UBOS offers a solution that allows you to create your own templates with ease and speed. In this article, we will consider the process of creating your own template on UBOS, which will consist of a frontend and a backend part
Step 1. Publishing the project on GIT
Our template consists of UI and Node Red. These are two different services that need to be connected to GIT.
Templates developed by our team are stored on GitHub but you can also use GitLab
namespace: ubos-template-AI-task-manager-UI / ubos-template-AI-task-manager-NR
Step 2. Publication of the template on the UBOS platform
You need to open the Template Manager tab. Where you can fill in all the information about the template
This is the main template creation screen
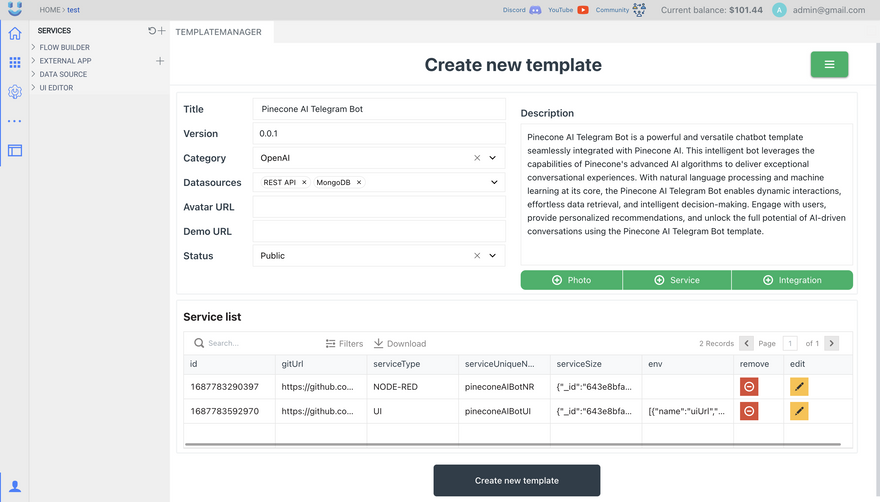
If you select Status private, another field will appear in which you need to write the mail of the user to whom this template will be available. The number of users is not limited.

The Photo button opens a modal window where you can upload screenshots of the template.
Various information will be displayed on the template details page. If the Demo URL field is filled in, an iframe with this link will be displayed, and if screenshots are loaded, the gallery will be displayed
The Service button opens a modal window where you need to fill in information about the service that will be in the template. Each service must be described and added separately
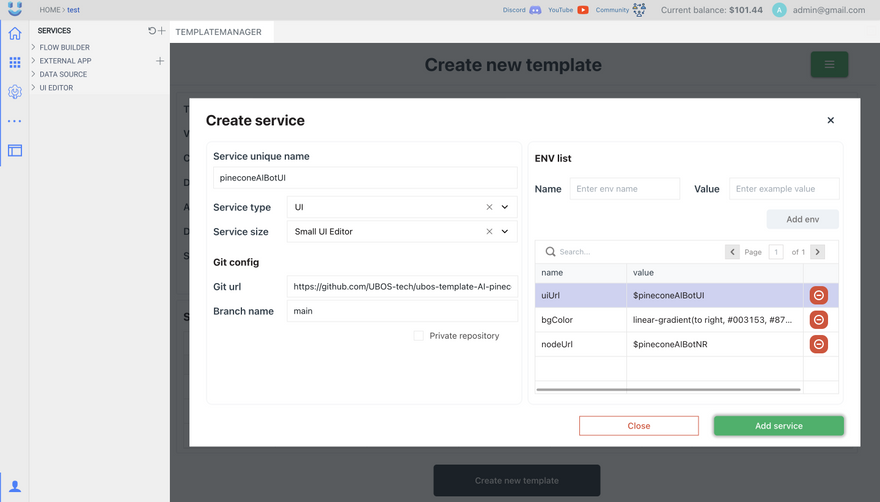
Here we indicate the link to the GIT service that we connected at the beginning of the article, the type and size of the service.
Each service can contain an ENV (optional). Here you can write api keys, constants and refer to another service that will be in this template.
For example, the template consists of two services UI (frontend) and NodeRED (backend). The UI service has an API that sends requests to NodeRED. In order not to manually add a link to the backend to each API, you can add a link that will be generated when the template is loaded to ENV. How to do it?
ENV consists of a key and a value. Service unique name should be specified in the value, which should start with $ $pineconeAIBotNR. Before downloading, a link to the service is created, and if a service with that name exists, a link to it is written there
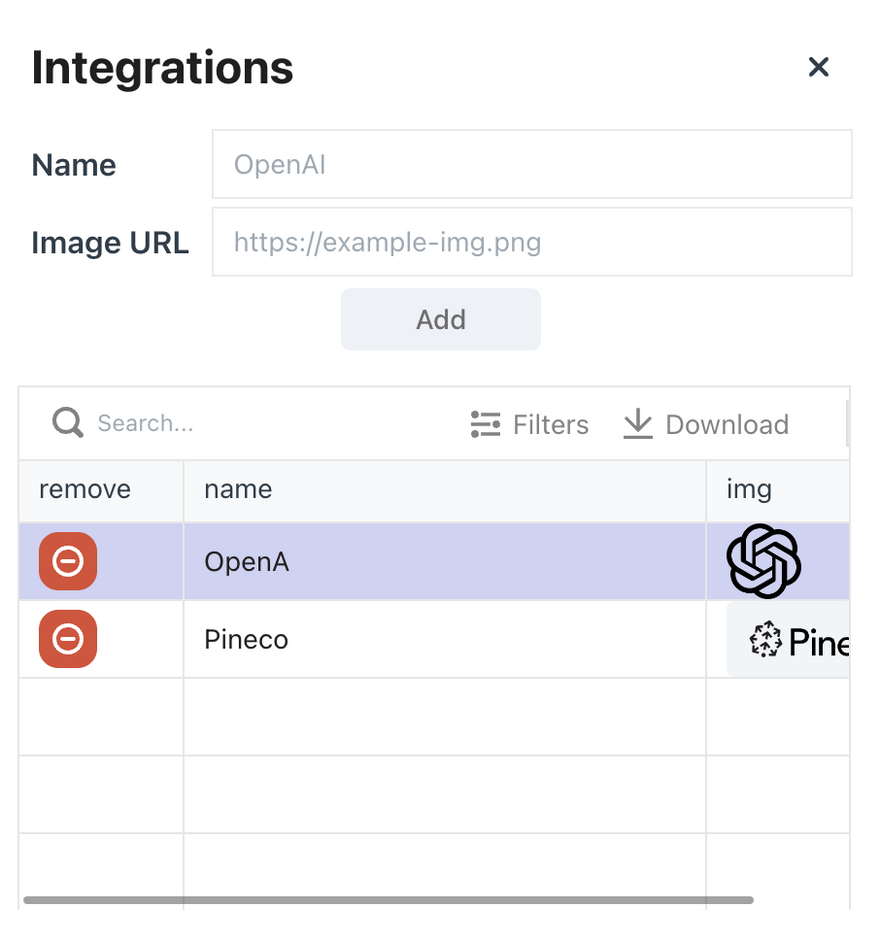
The Integration button opens a modal window where you need to add icons with which services the template interacts with
After filling in the information about the template, you need to press the Create new template button
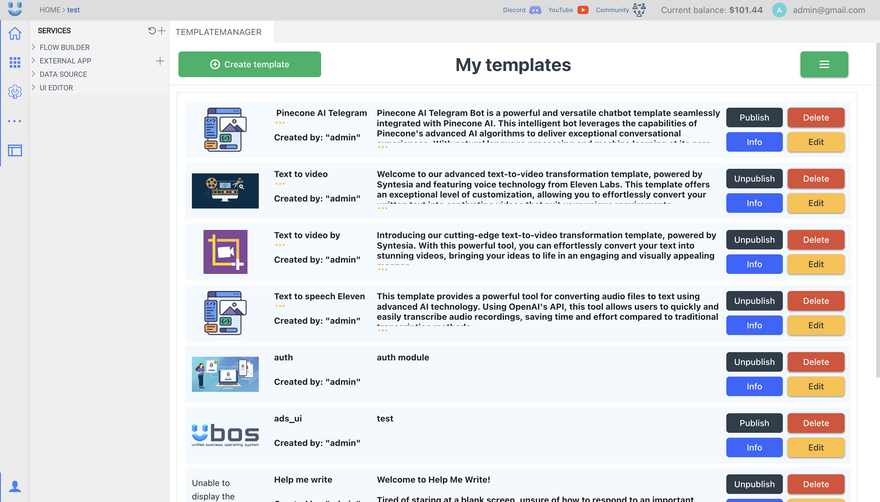
The template will appear on the My templates page. There you can view, edit, delete and publish it
Dear users,
We are not responsible for the templates you create on UBOS. Please keep in mind that we provide tools for creating templates, but we do not control their content and functionality.
You are solely responsible for the selection, development and use of templates on UBOS. We recommend that you review and test the templates you create before using them to ensure they are safe and fit your needs.
We do our best to ensure the security and reliability of the UBOS platform, but we cannot guarantee that the templates you create will be error-free or meet your needs. Use them at your own risk.
Sincerely,
The UBOS team

Top comments (0)