To ensure the safety of your data, protect against possible data loss, and have universal access to your code, you can connect your applications to Git. In this example, we will use the GitLab web repository.
Prerequisites:
- Have a GitLab profile.
- Create two repositories without a Readme file for Node-RED and UI.
GitLab
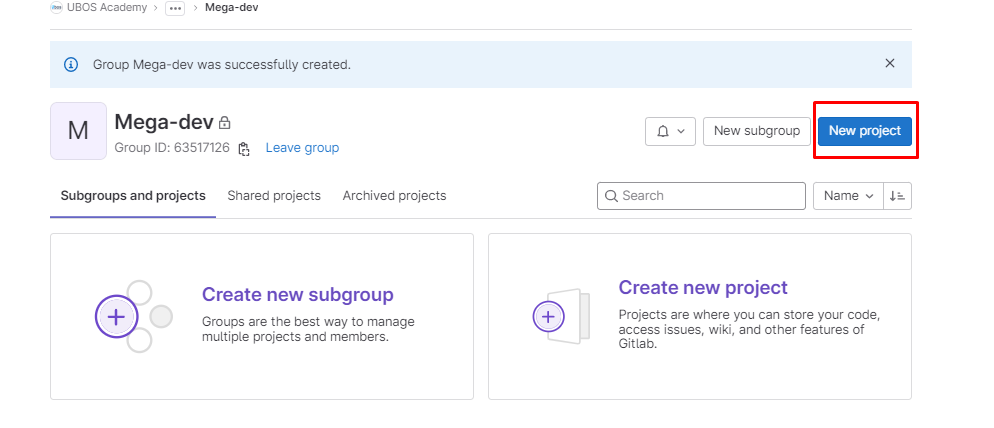
In GitLab, create two projects for UI and Node-RED.
When you are in a group, click on the "New project" button =>
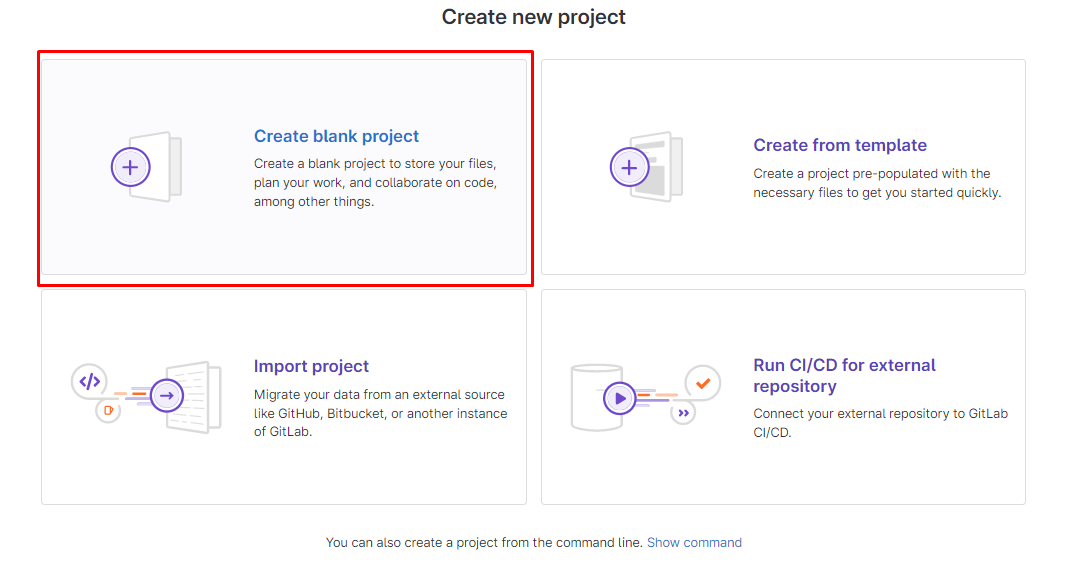
In the modal window, select "Create blank project" =>
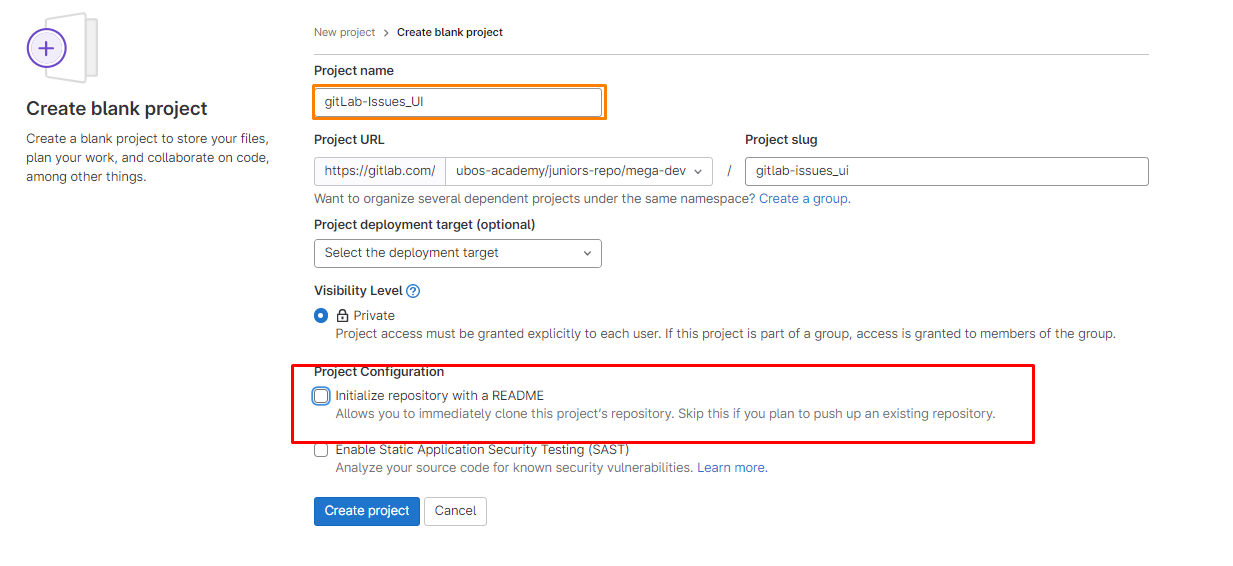
In the project settings, enter a name for the project and uncheck the option "Initialize repository with a README" to create it without that file =>
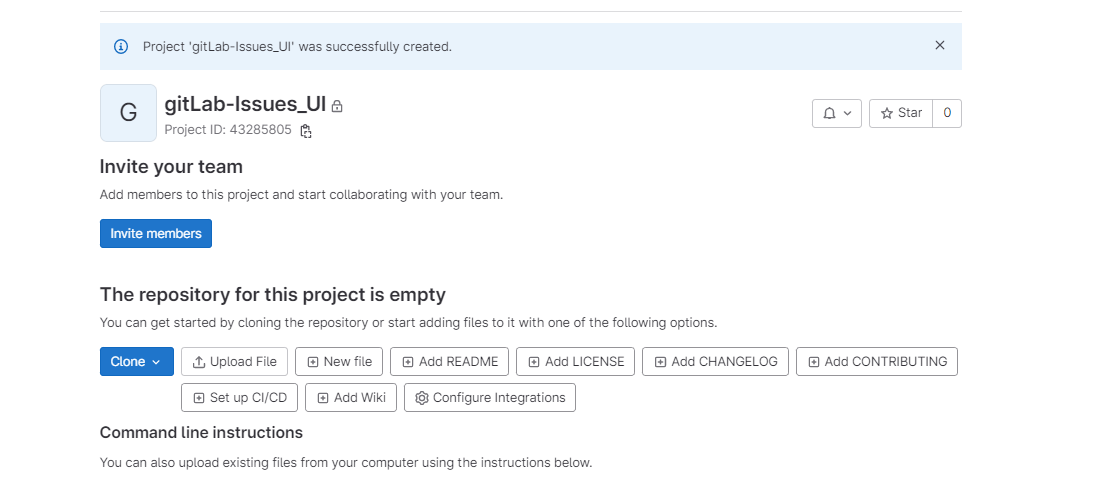
Click "Create project".
It is also important to name your project appropriately. The name should be clear and understandable. Avoid using overly brief names that require additional explanations in the Readme file to understand what the project is about. For example, naming a project "Front" or "UI" is not ideal because it doesn't convey what exactly is happening in the project.
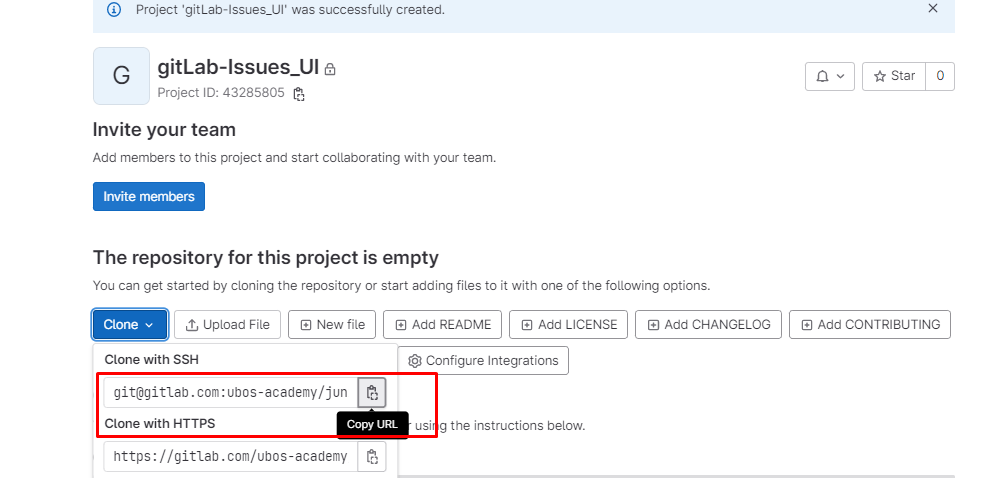
In GitLab, click on the "Clone" button and copy the SSH clone URL.
UI
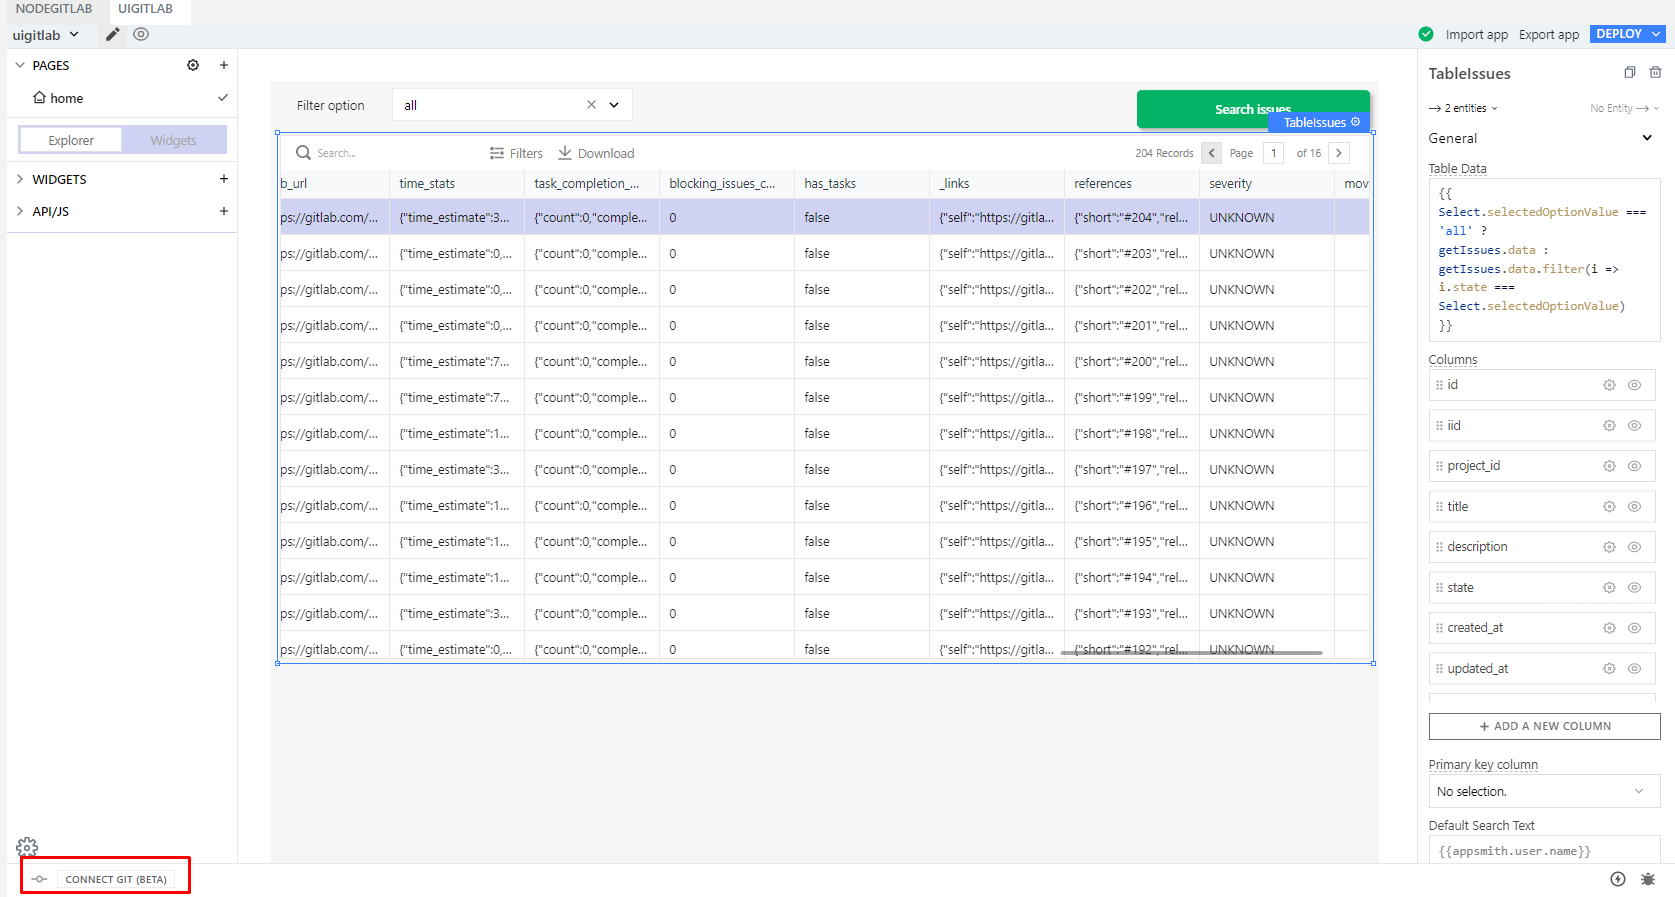
In the UI Editor, click on the "CONNECT GIT" button located in the bottom left corner.
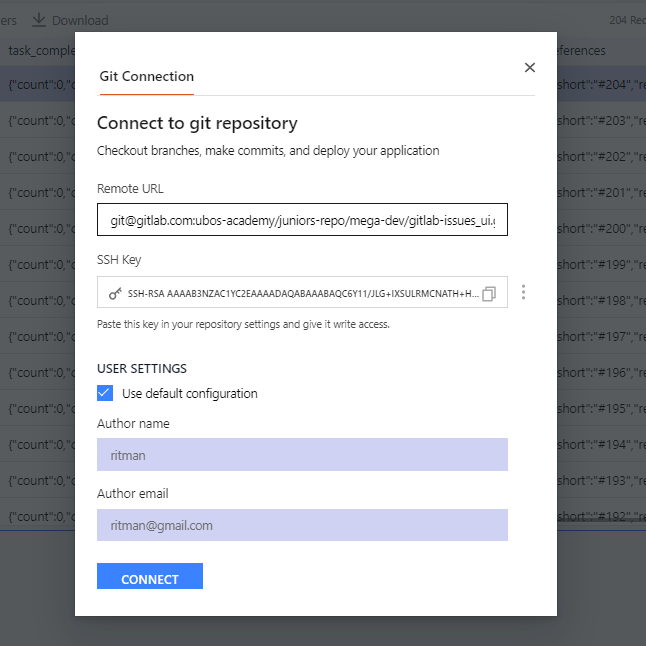
A modal window will open, where we paste our SSH key. Then click on the "Generate key" button.
The SSH key will appear, and we copy it.
Next, go to our GitLab account, click on the icon located in the top right corner, and select "Preferences".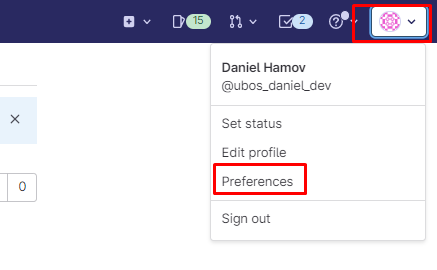
In the left menu, select the "SSH Keys" field. On the opened page, paste our generated SSH key into the "Key" field. Below, in the "Expiration date" field, click on the cross icon to remove the expiration date. Finally, click on the "Add key" button.

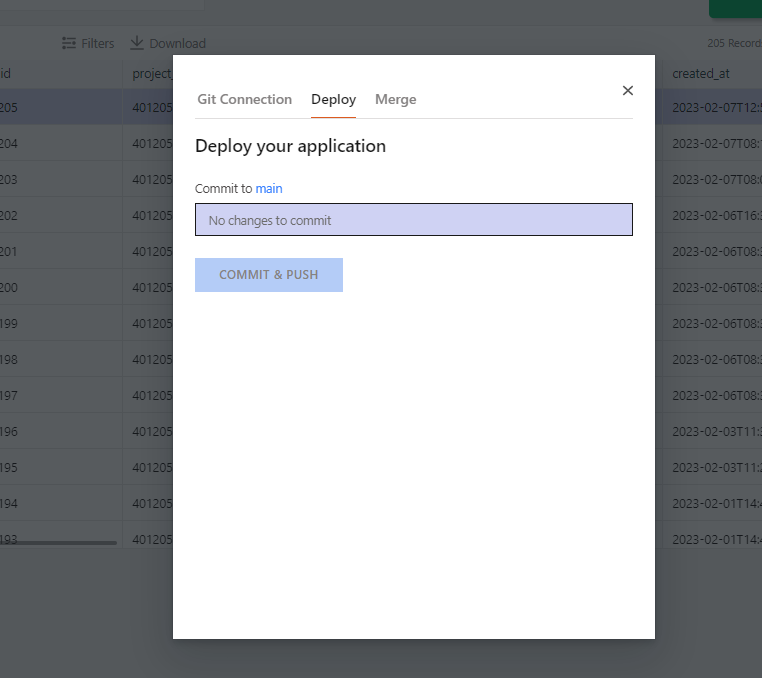
Now we return to our UI Editor and click on the "Connect" button. The connection to our GitLab is established automatically, and the first commit is made. At the end, a modal window titled "Deploy your application" is displayed, indicating that everything has been successful.
Our project is now connected to GitLab. Instead of "CONNECT GIT" a plus button is shown at the bottom. After making any changes, click on it. A modal window titled "Deploy your application" will open, where you can enter a name for your commit in the field and click the "COMMIT & PUSH" button.
NodeRed
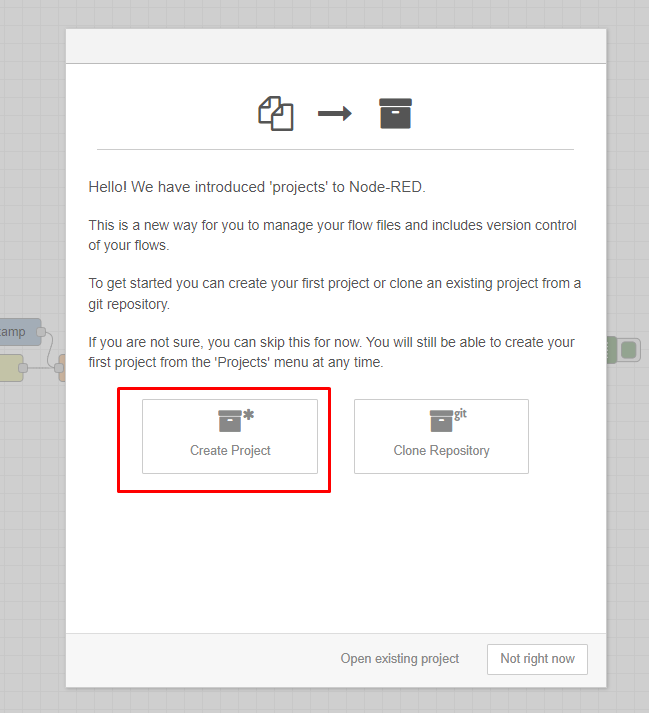
Let's go to our NodeRed interface and click on the three lines icon located at the top right corner. This will open a menu. Click on "Projects" and select "New." Alternatively, you can use the keyboard shortcut Ctrl + Alt + N to open the modal window.

Choose "Create Project."
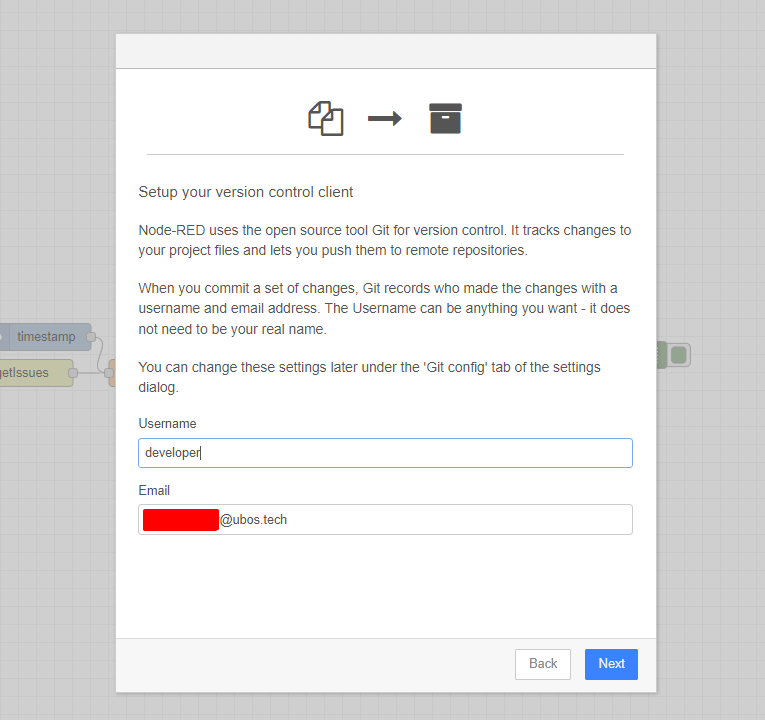
Enter your username, email, and click on the "Next" button.
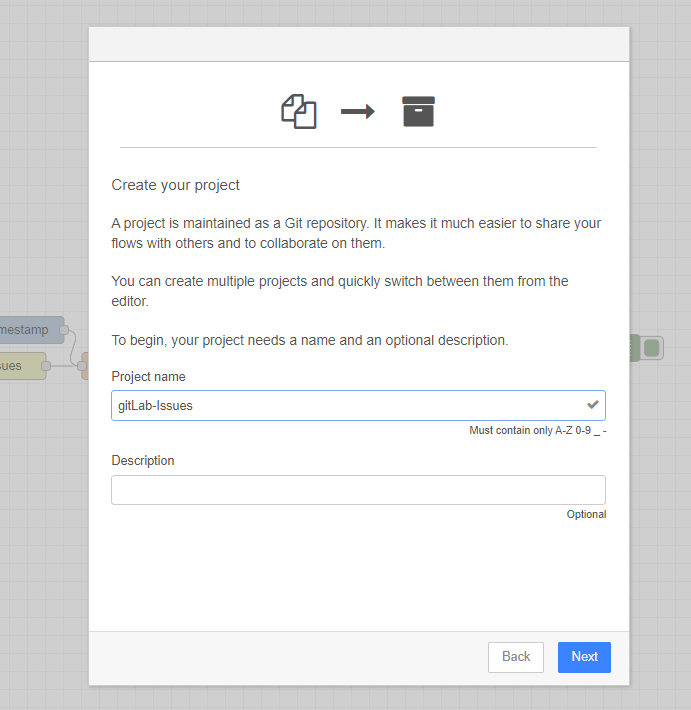
Give a name to your project and click "Next."
Next, you will be prompted to name your flow file. Leave it as is and click "Next".
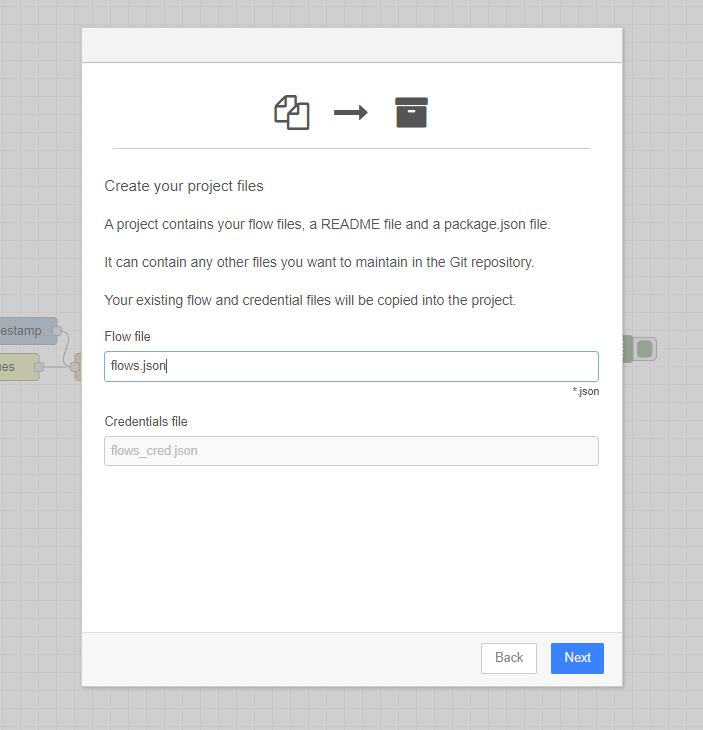
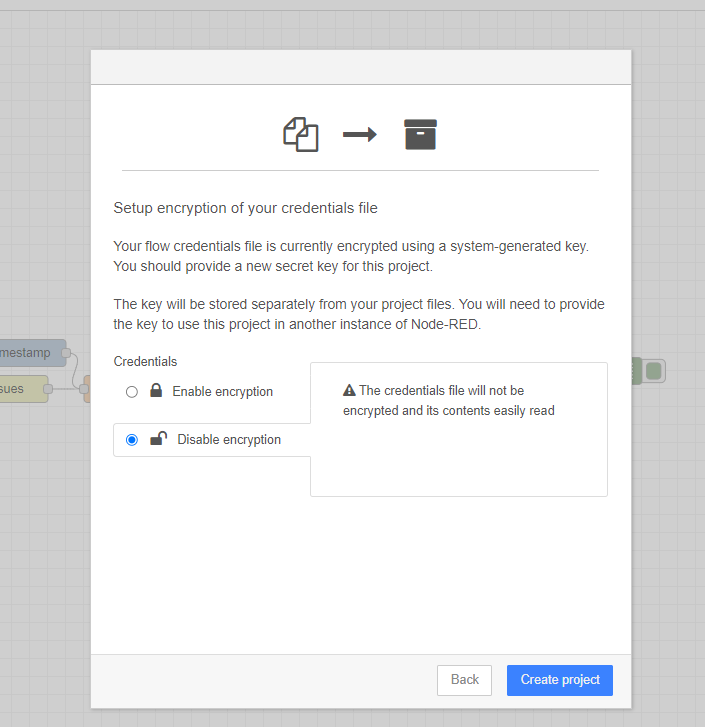
Next, a modal window will open with encryption settings. Choose "Disable encryption" and click on "Create project." If you want to create a project with encryption, there is a link to a video tutorial in the additional information at the bottom.
Next, we need to create a project in GitLab (refer to the example above). However, this time instead of copying the SSH link, we will use HTTPS (how to add SSH is explained in the video in the additional information).
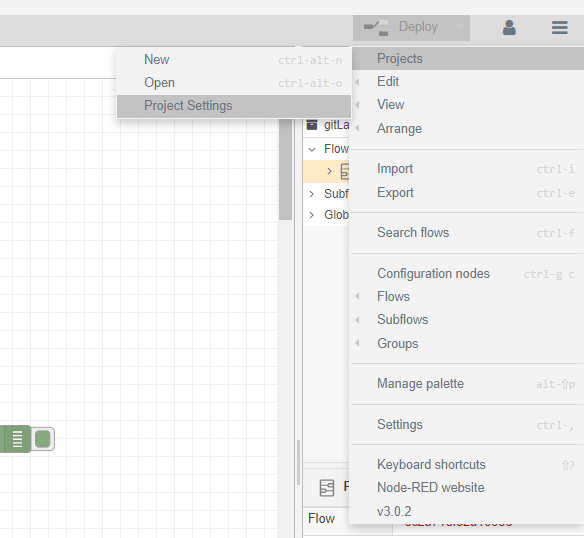
Then, in Node-RED, click on the three lines icon located at the top right corner to open the menu. Click on "Projects" and select "Project Settings".
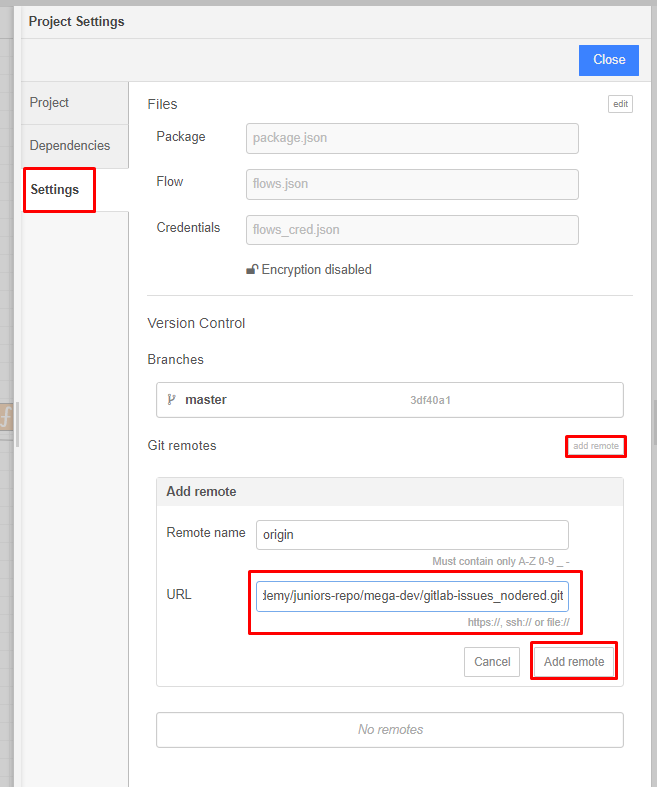
Then, in the menu, select "Settings." Click on the "Add remote" button, and in the URL field, paste the HTTPS link of our project on GitLab that you copied. Click on the "Add remote" button. Now, our NodeRed is connected to GitLab.
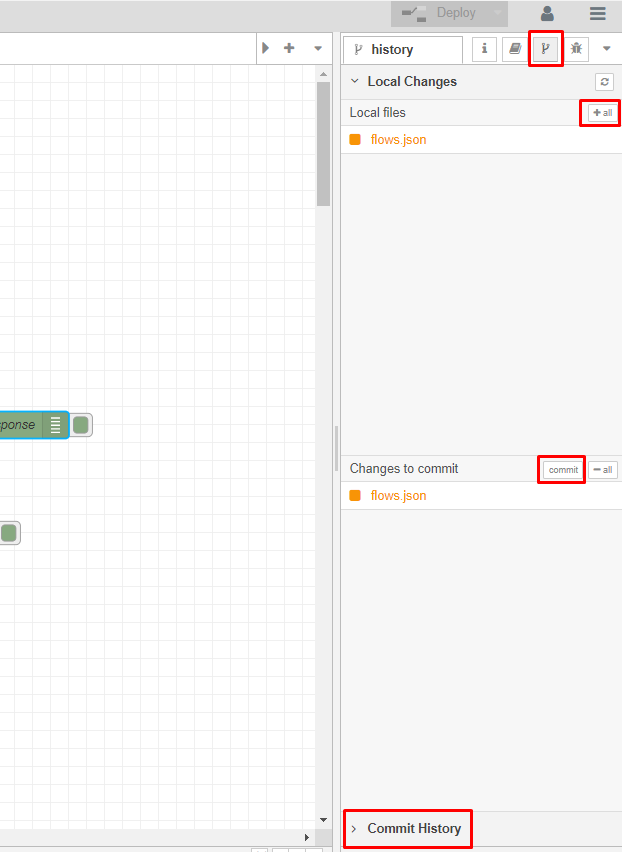
To add changes to GitLab, click on the tree button located at the top right between the book and the bug. This is the Git management menu.
To save changes in the remote environment, click on the "+add" button and then click on "Commit". If you don't understand the significance of these states and why we are performing these steps, refer to the official git documentation
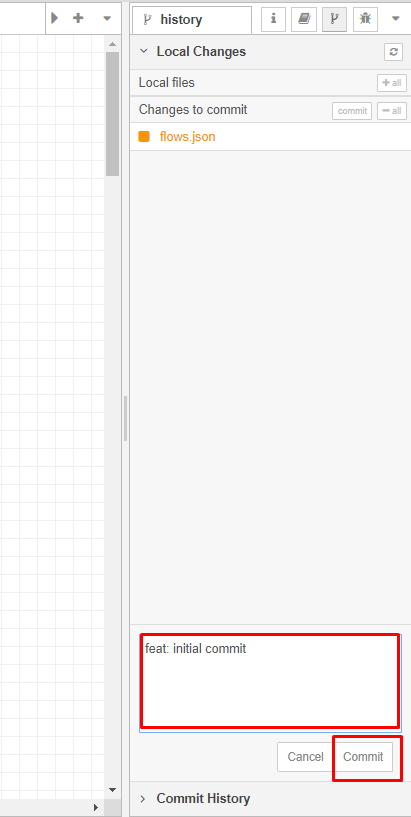
Write the title of your commit and click on "Commit".
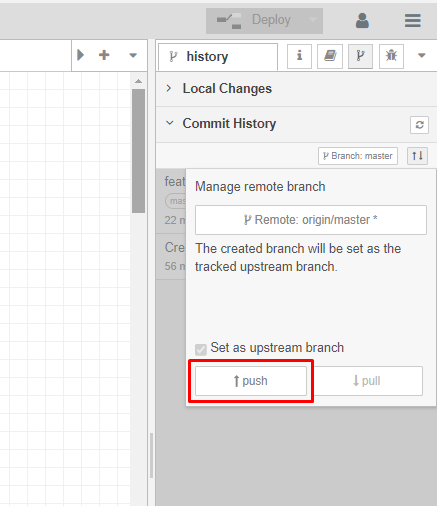
Next, click on "Commit History" and then on the button with arrows, selecting "Remote: None".
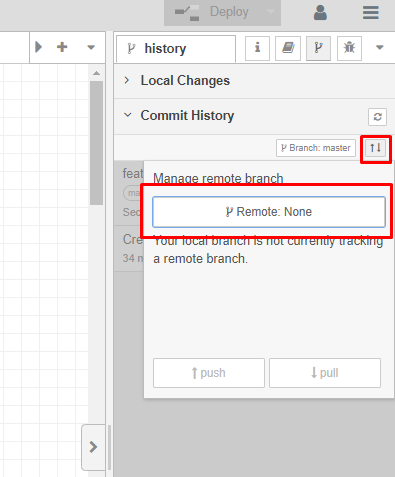
A pop-up window should appear, where you need to enter your GitLab username or email with the corresponding password. Click the "Retry" button.

Then, once again, click on the tree button located at the top right between the book and the bug. Select "Remote: None". If there are no branches, enter any name for the branch and click a bit lower to create it.
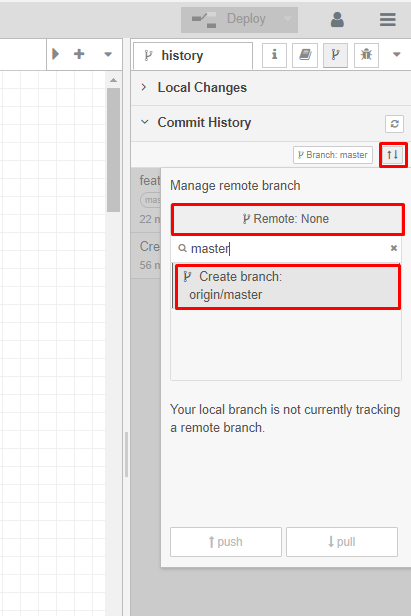
A menu will open, and you should click on the "Push" button. Your data will be added to the GitLab repository.
Additional information:

Top comments (0)