- UI Editor Layout
- Widgets Pane
- Adding UI Widgets
- Widget Settings
- Deploying UI
- Working with API
- API Panel
UI Editor Layout
Let's start with learning about the first tool in the UBOS ecosystem that will help us create dashboards, admin panels, CRUD applications, and other types of web applications quickly and almost without programming.
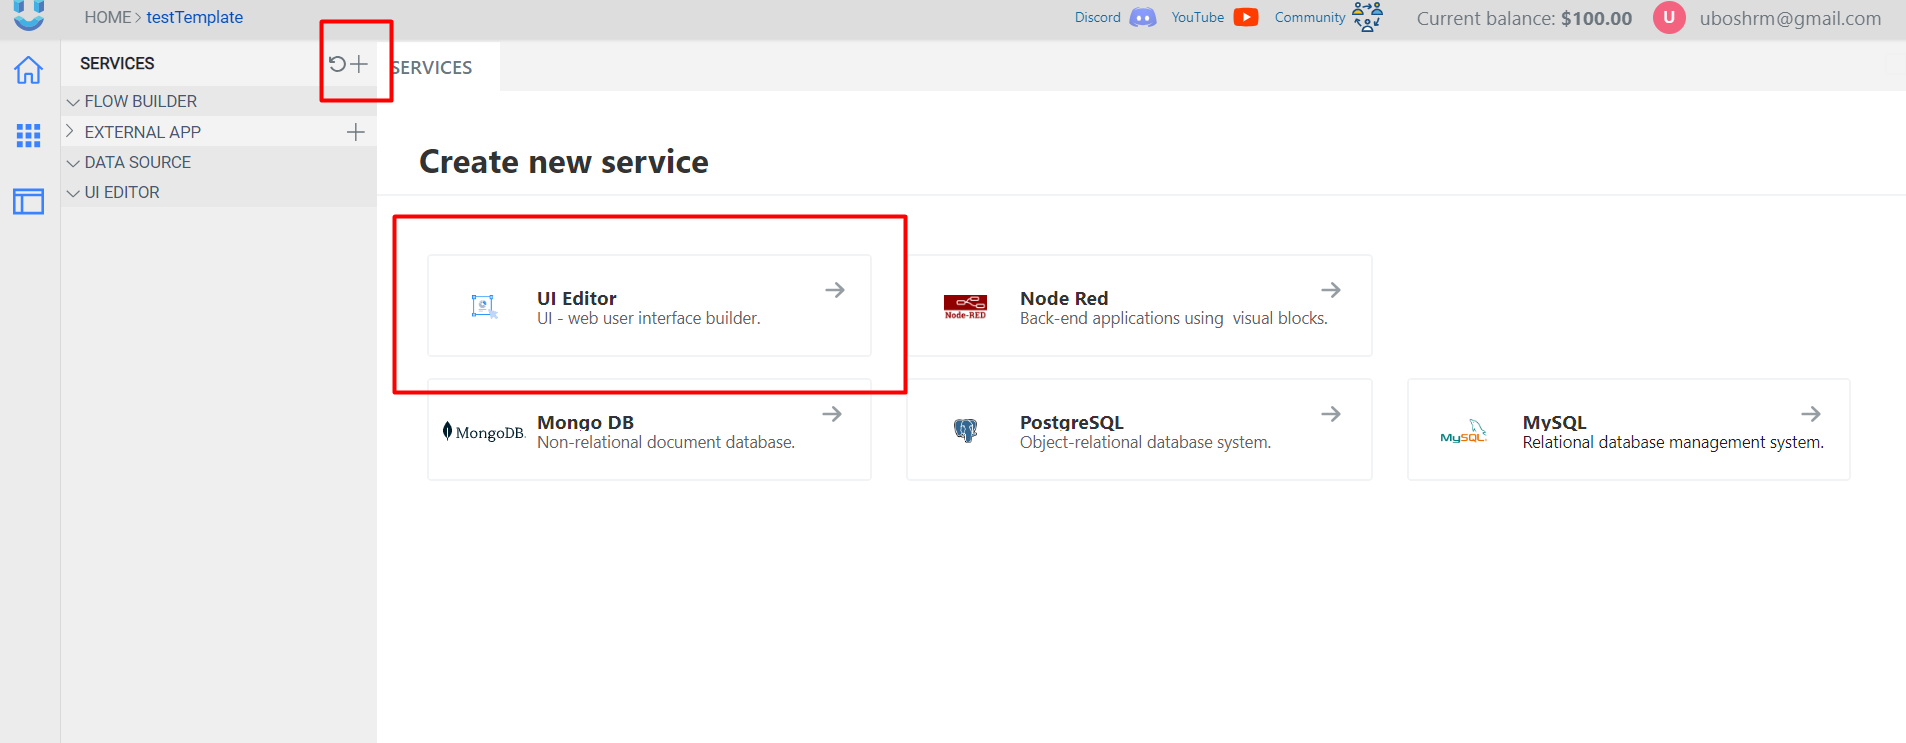
To open the visual editor, you need to click "+", open the page Services.
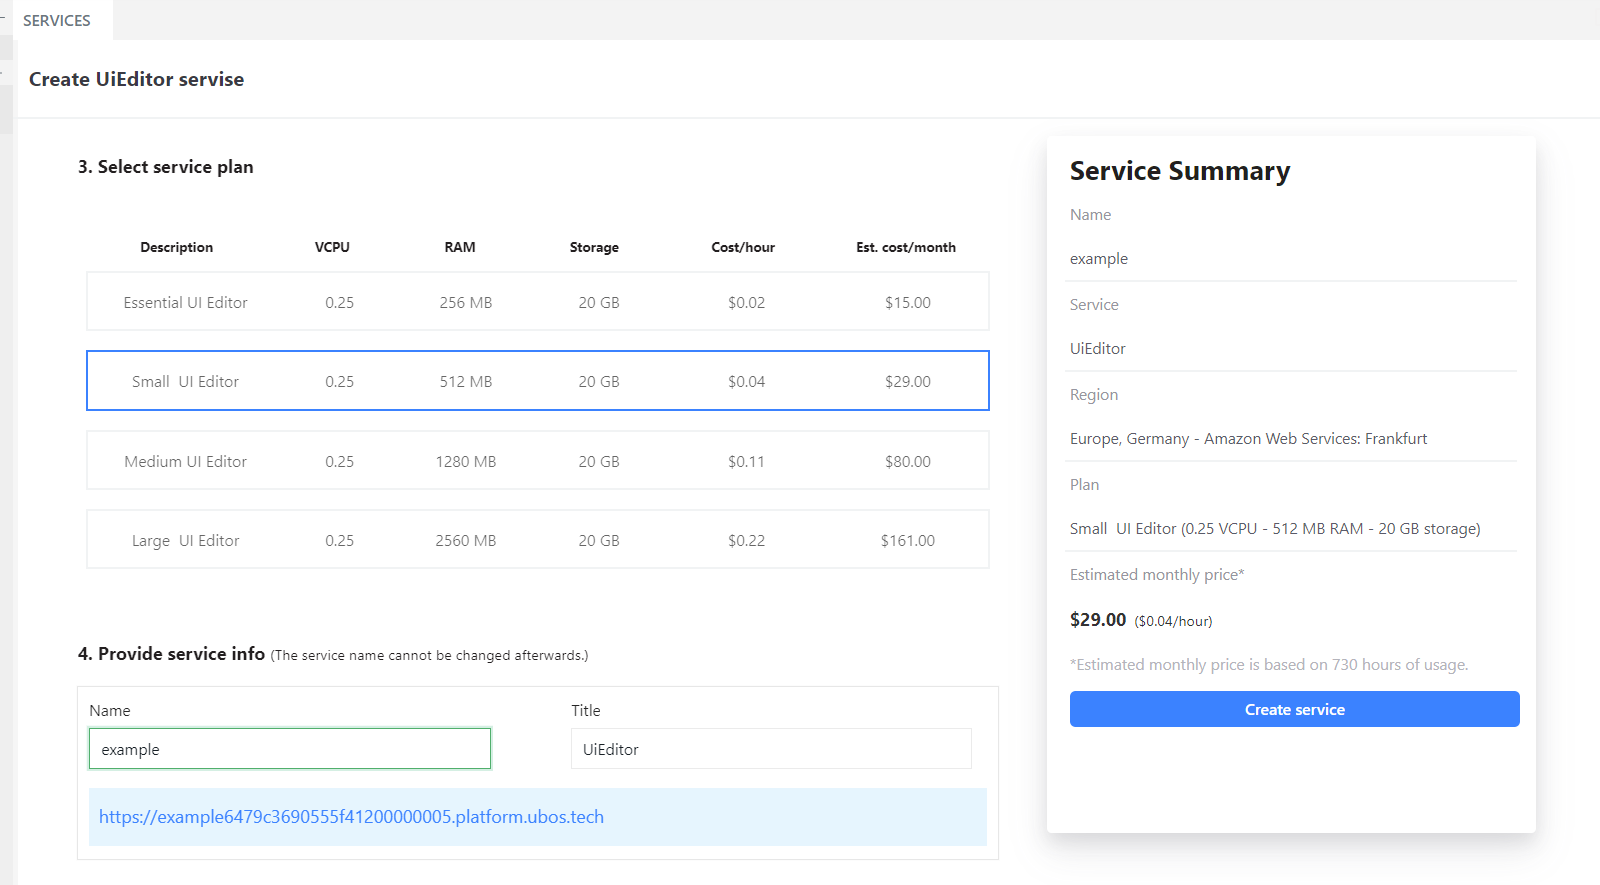
On the creation page of UI EDditor select the desired package and change the name of your service.
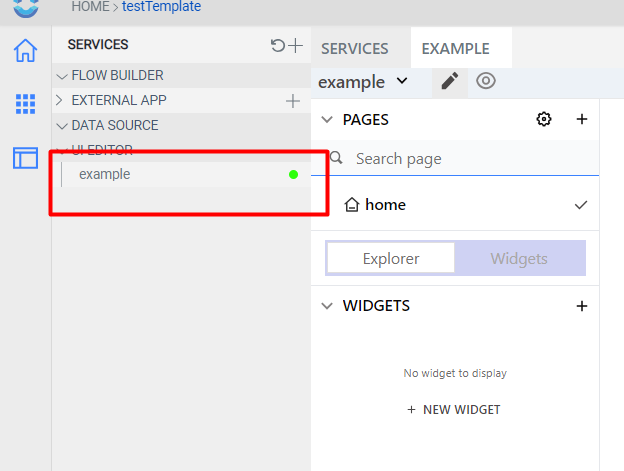
Next you have to wait when opposite the name of your service in the side panel will appear a green sign and open it.
After clicking on UI Editor, it will open in the main workspace.
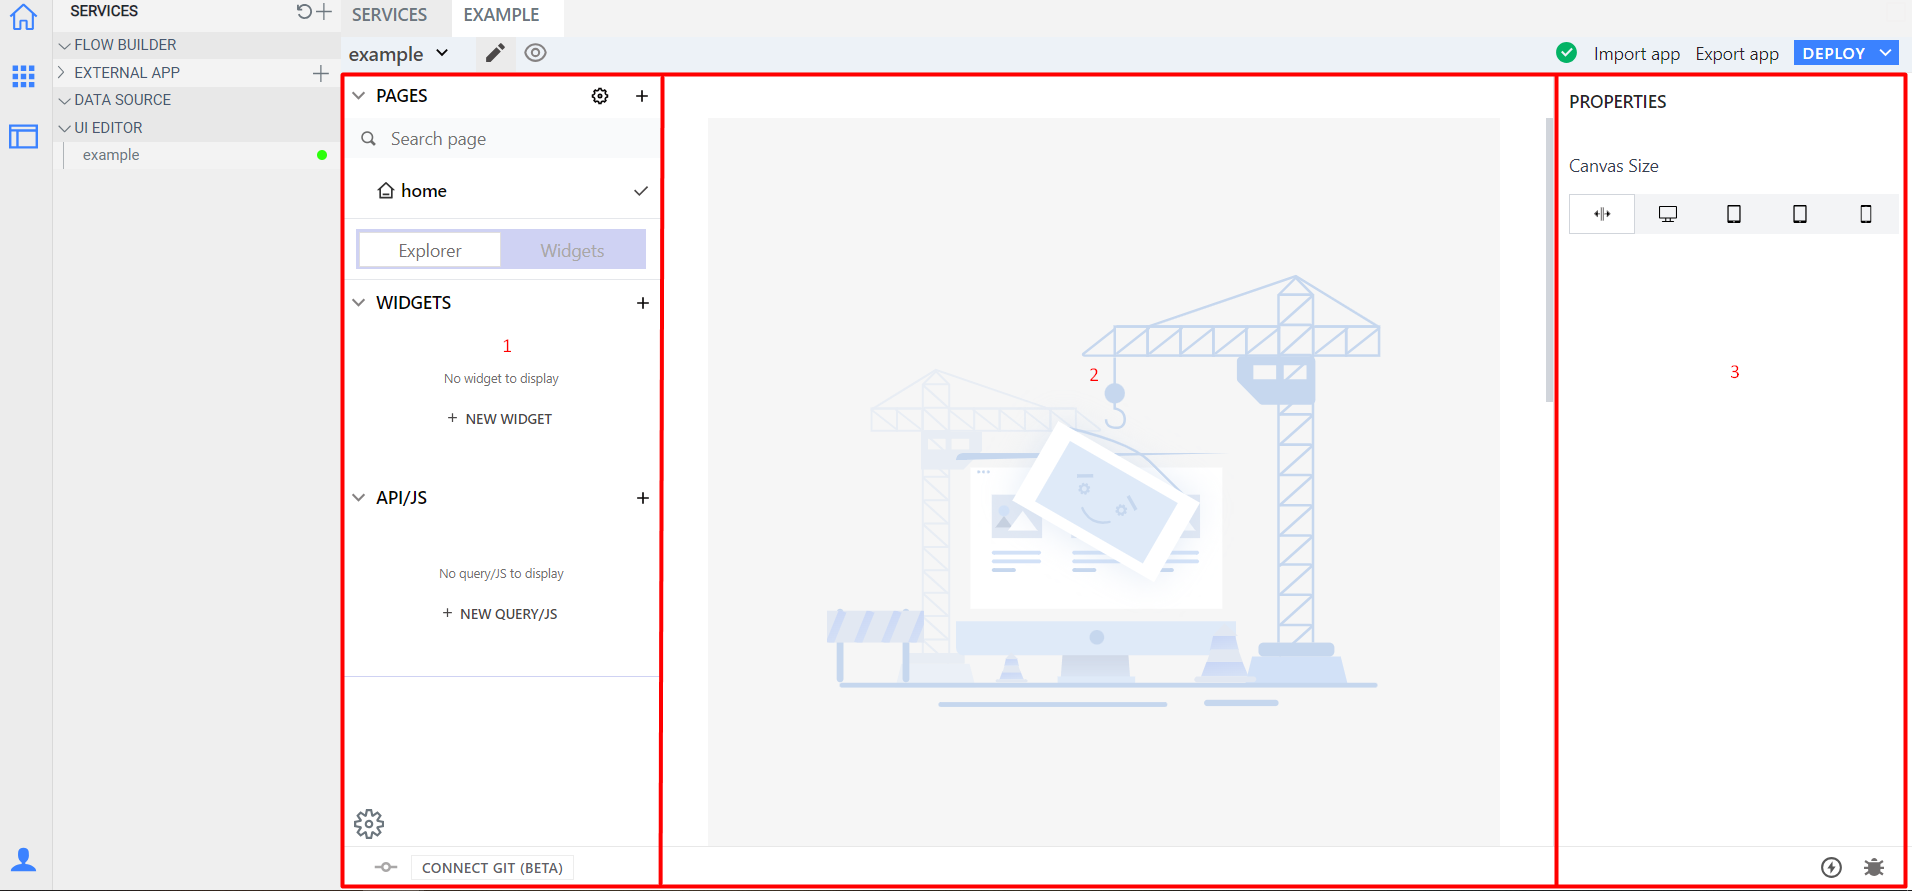
The UI editor has its own layout, which consists of 3 main windows:
Sidebar - Helps create and organize pages, user interface widgets, and APIs for working with data.
Page Editor - This is the canvas where you can drag and drop user interface widgets from the widget panel and design how your page will look. Each page has its own canvas.
Widget Settings - Displays the properties of the selected user interface widget on the canvas.
Widgets Pane
The widget panel can be opened by clicking the "+" button on the current page. After opening the panel, you will see all the available widgets that can be dragged onto the page canvas to create the design of your page.
Adding UI Widgets
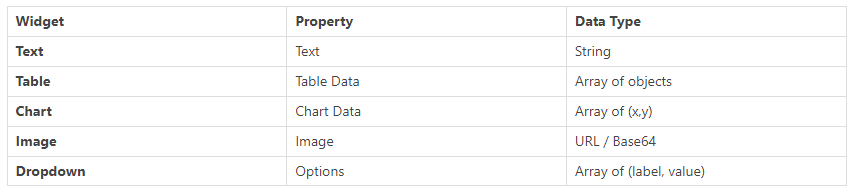
Each widget from the widget panel can be dragged onto the page canvas to create the user interface. After placing a widget on the page canvas, you can customize it to align with the design of your page and the data you want to display.
Widget Settings
Each widget has a list of properties that can be customized in the WIDGET SETTINGS window located on the right side of the UI editor. To open the widget settings window, simply click on the icon at the top of the widget. The widget properties can be used to modify the style, data, or behavior of the widget.
Deploying UI
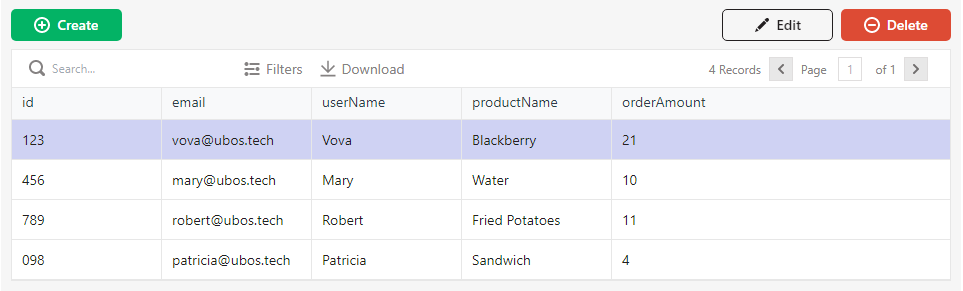
Let's create a sample page consisting of 3 button widgets and 1 table widget. Try configuring the widgets on the page according to the example below:
Once the page is ready, it needs to be deployed to view it from an end-user perspective. To do this, click the DEPLOY button on the top panel. In the modal window that appears, click View Application, and a new tab will open in your browser with the URL for previewing your application.
Working with API
To make your program dynamic, you will need specific data, which you can obtain by creating an API. You can visualize any data retrieved from the API call using the available widgets.
You can create a new API by clicking the "+" button in the side menu on the current page. After clicking, you should see the API panel where you can edit the API properties.
API Panel
Here you can modify your API using the REST interface. The API supports all REST HTTP methods: GET, POST, PUT, DELETE, PATCH. You can configure header values, body fields, and parameters.
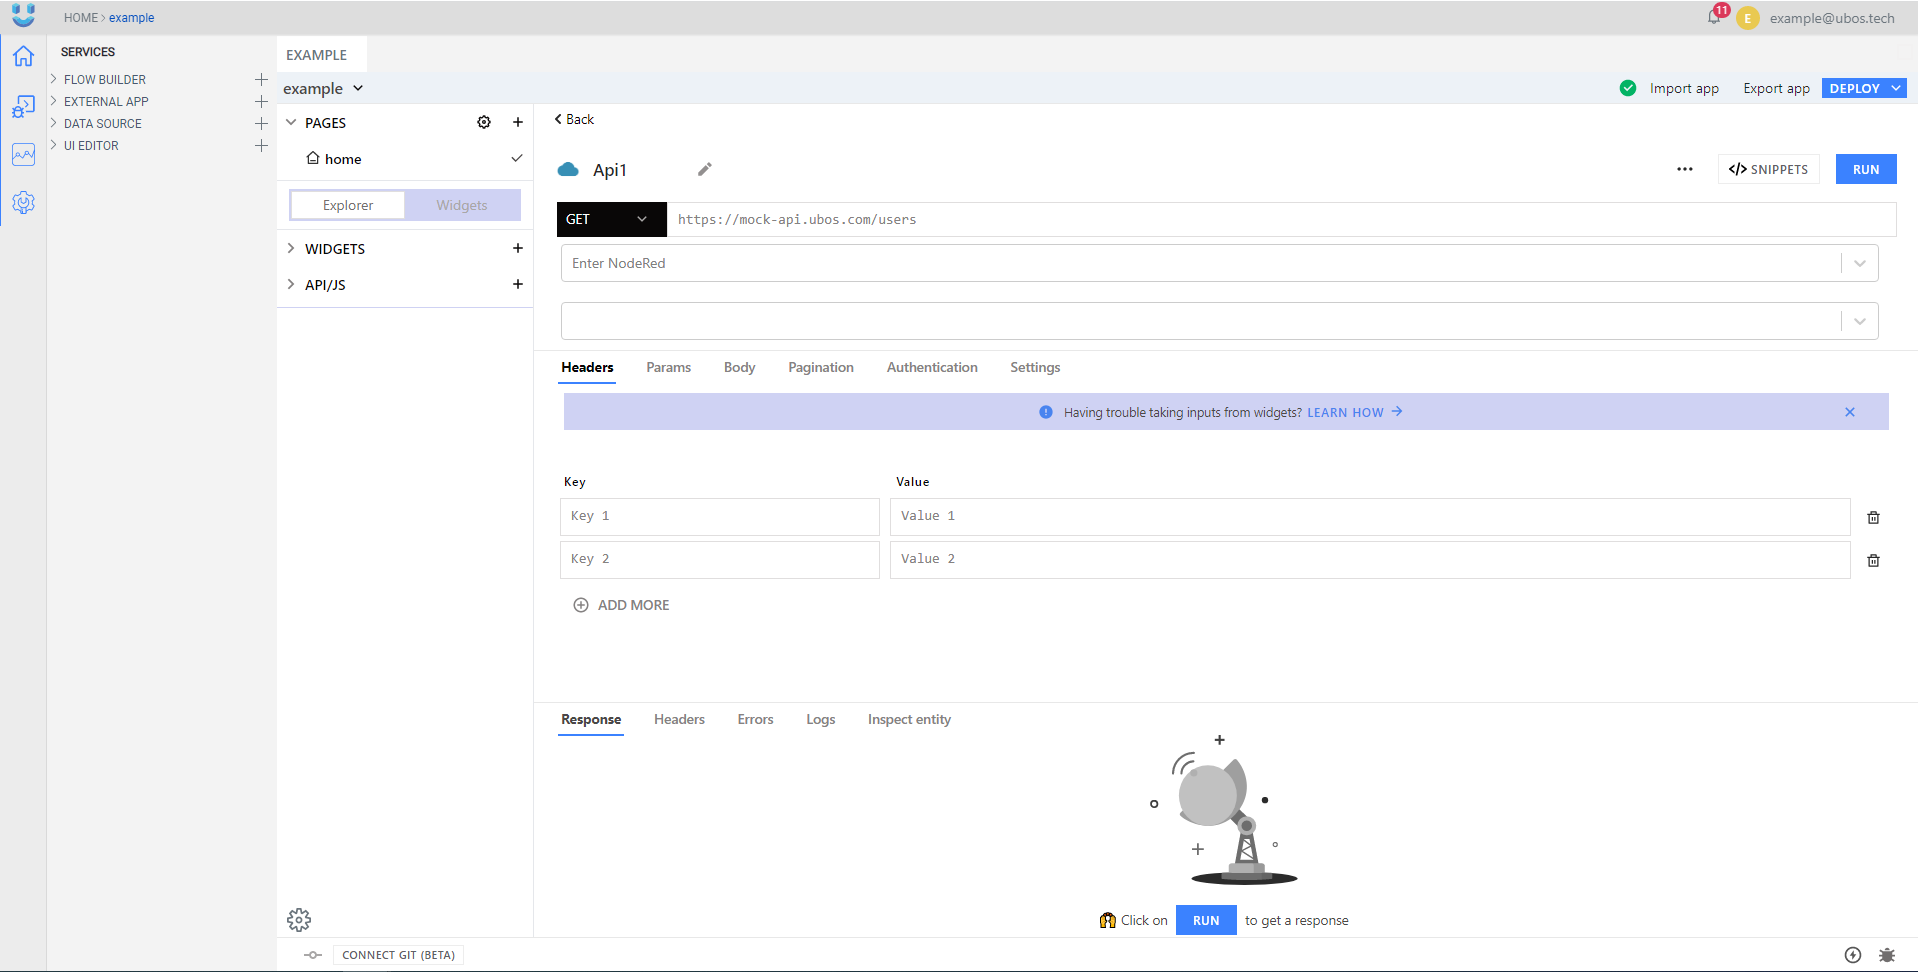
You can obtain values for the REST API from widgets by entering {{ widgetName.propertyName }} in the field.

Top comments (0)