CRUD operations are the foundation of most web applications, and they allow you to create, read, update, and delete records in a database. In this series of articles, we'll take a look at how to perform the first operation Create on UBOS, the popular low-code platform for building web applications.
Creating records the UI on UI editor and backend on Node-RED.
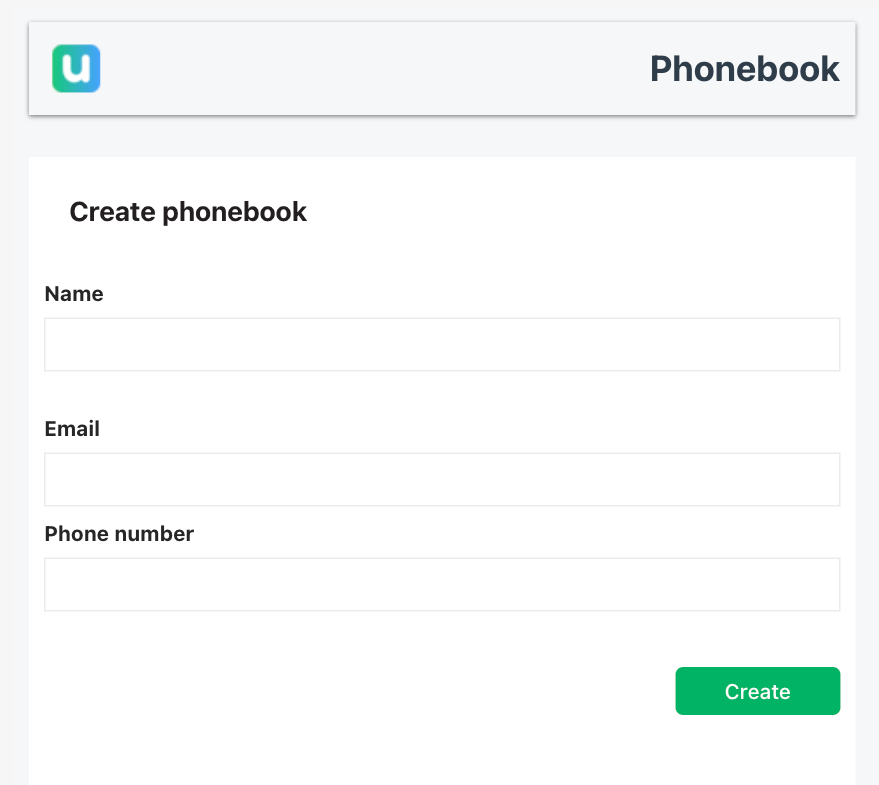
Let’s look at each method separately and create the phonebook.
Create- operation is one of the four basic CRUD (Create, Read, Update, Delete) operations used in database management. The "Create" operation is used to add new records to a database.
Advise you to read before starting work :
Step 1:
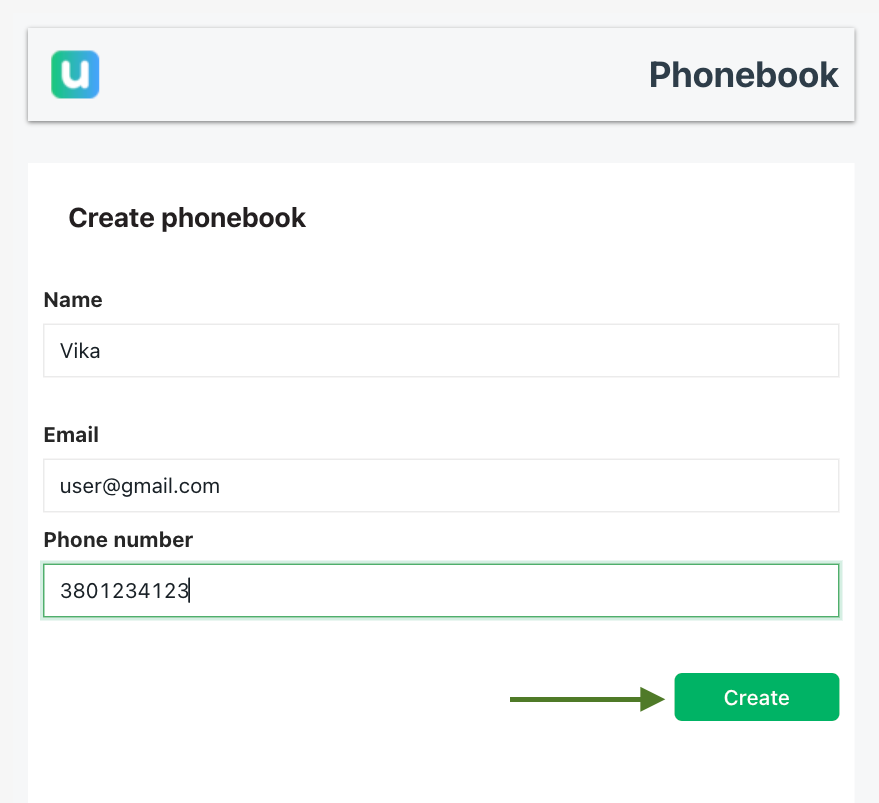
The first step is to gather the data that you want to add to the database.
Widgets we need:
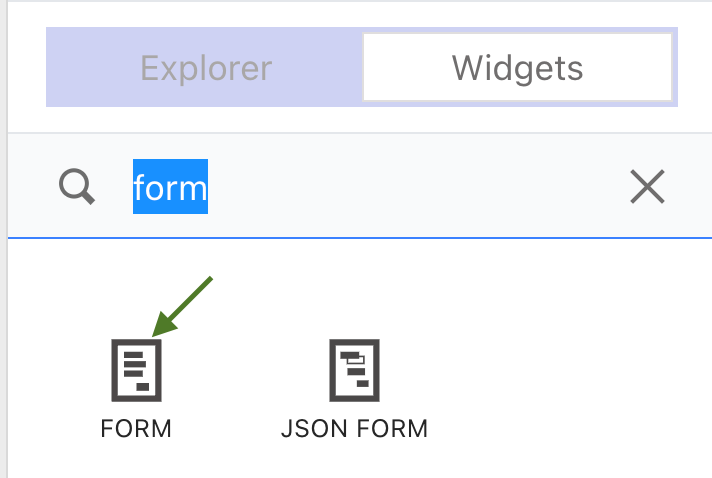 |An FORM widget would be used to gather the data: name,email,phone number. Widget FORM already has widgets TEXT (use for title) and BUTTON(use for submit).
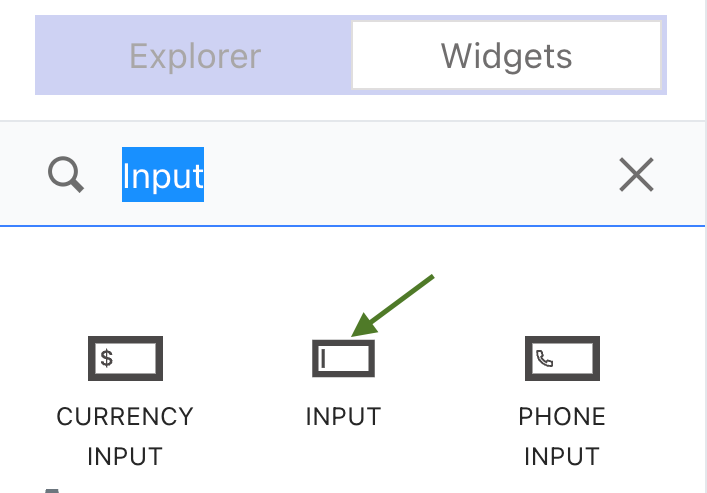
INPUT is used to input information and can have different types of data such as text,email,number. Depends on the needs.
Step 2:
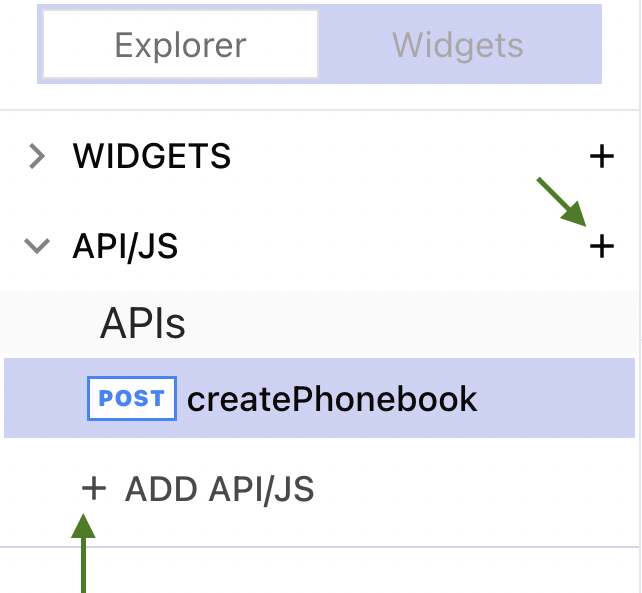
Create API
In UBOS UI, you can create an API (Application Programming Interface) to allow your application to interact with a database and perform CRUD operations. Here's a simple explanation of how to create an API in UBOS:
To create the API you'll use the visual interface to build the API using a series of actions and triggers.
- Add new API
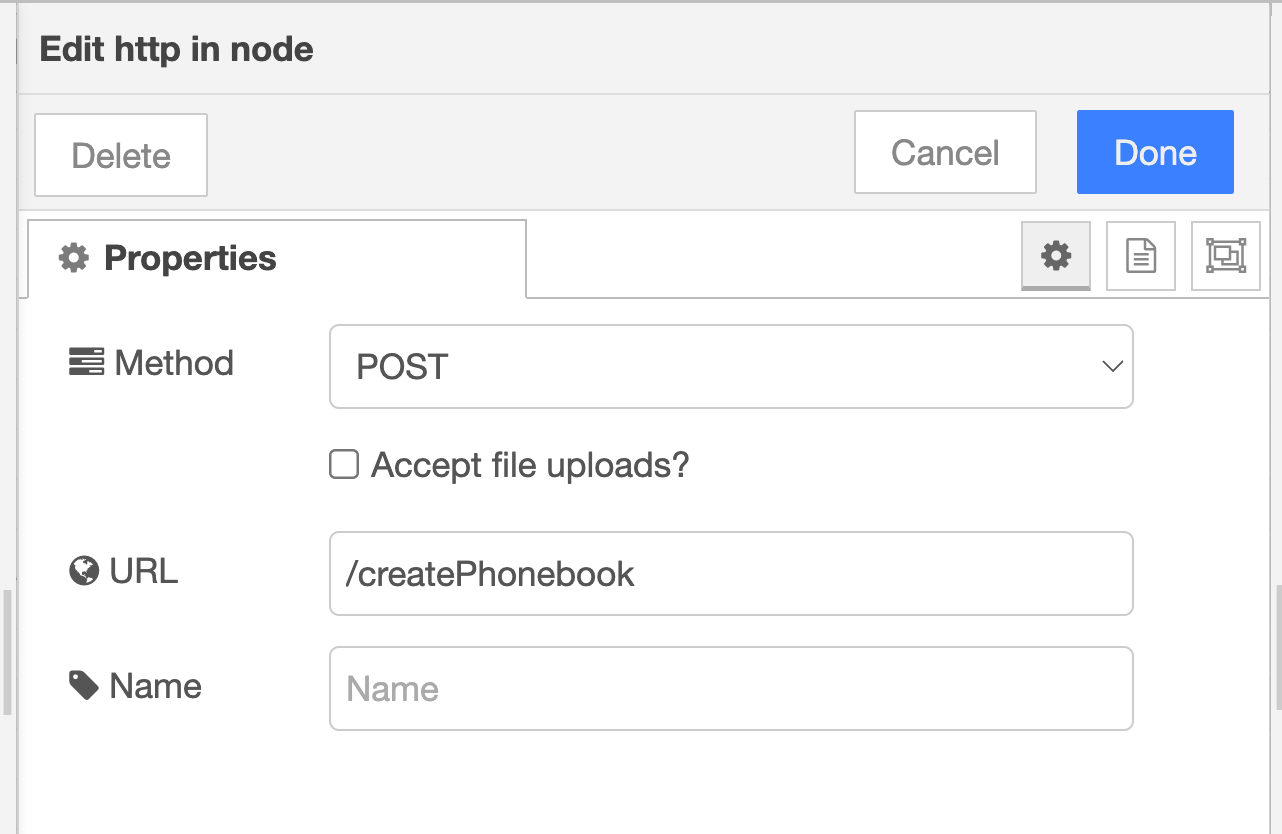
It is important to call it as the endpoint on the backend is named.
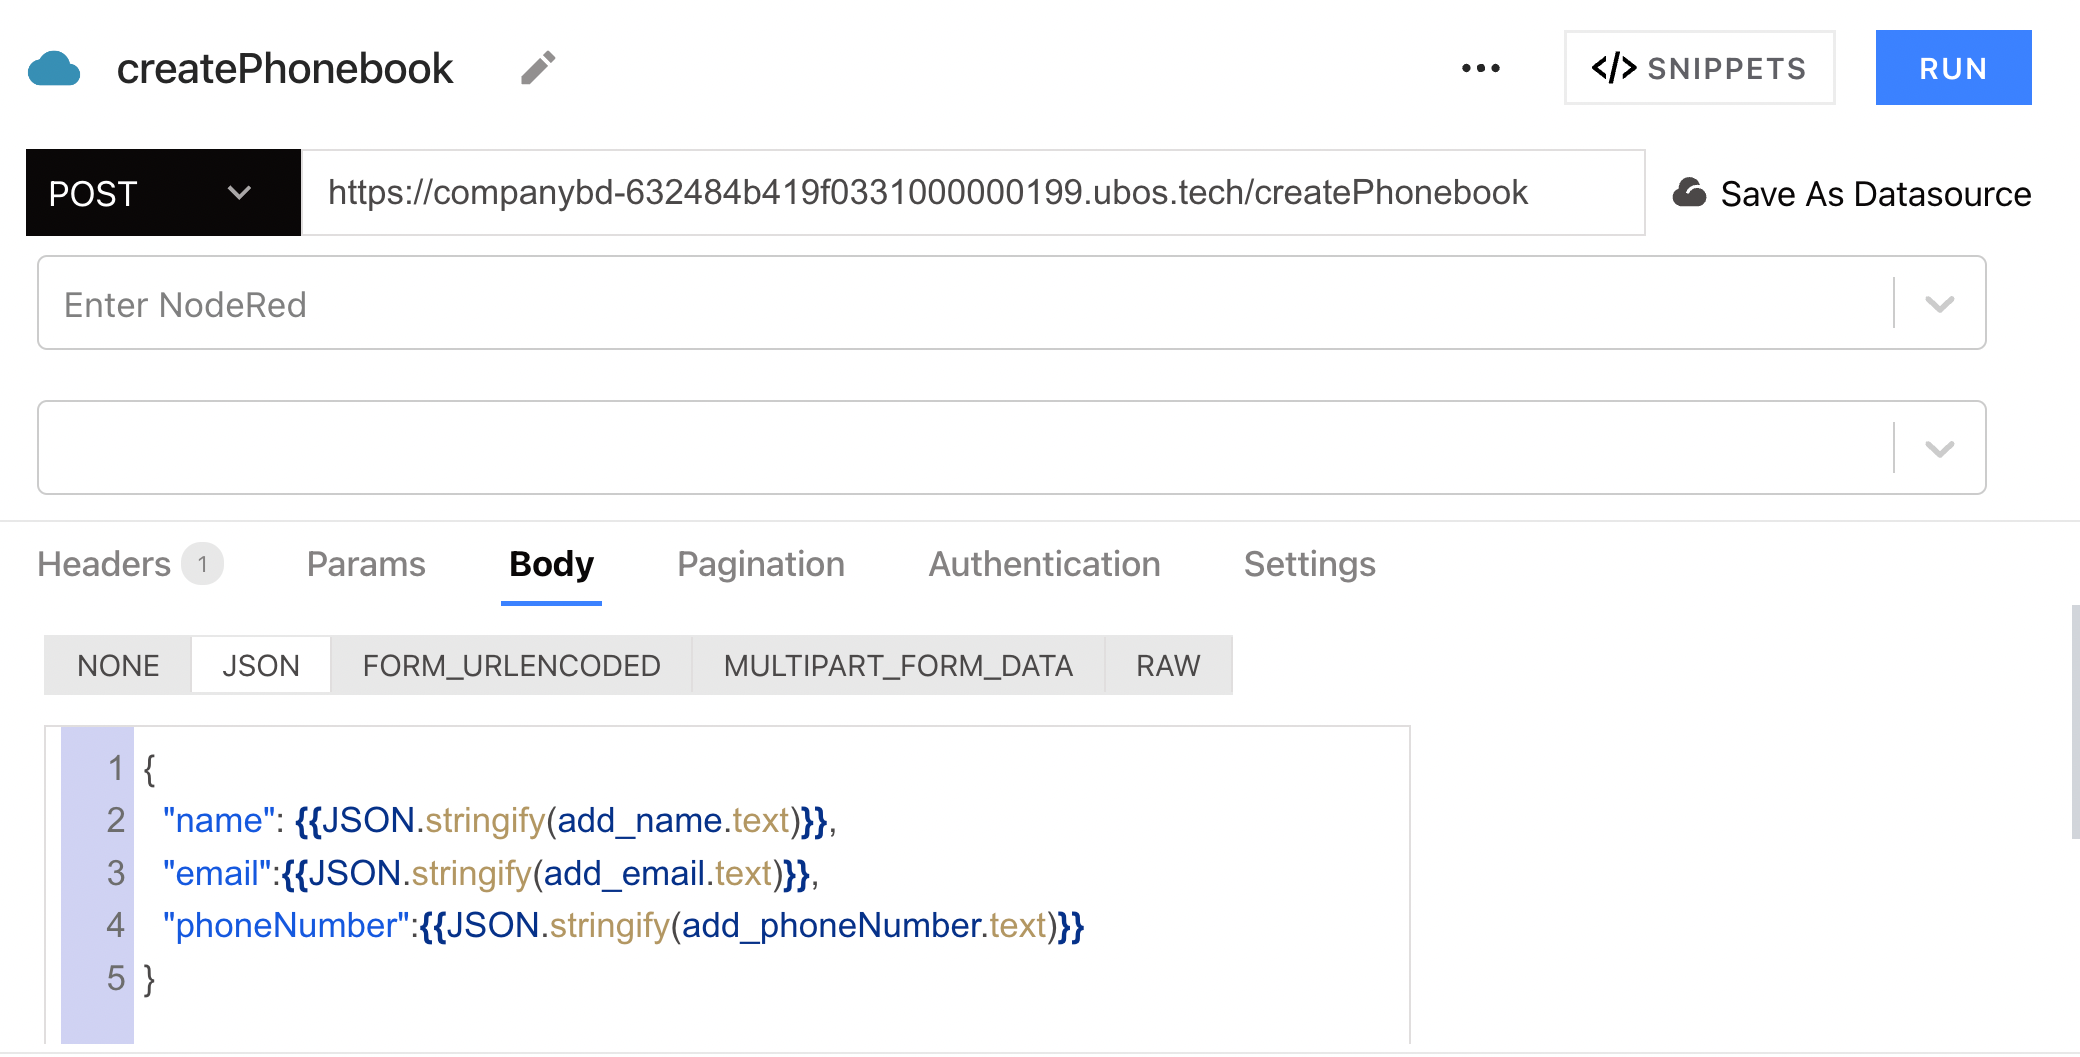
The selected method must also match the method on the backend, in this case it is POST. In the body we pass the information collected from the form. Note that the content type - is json so it's good practice to use the JSON.stringify() method in the body.
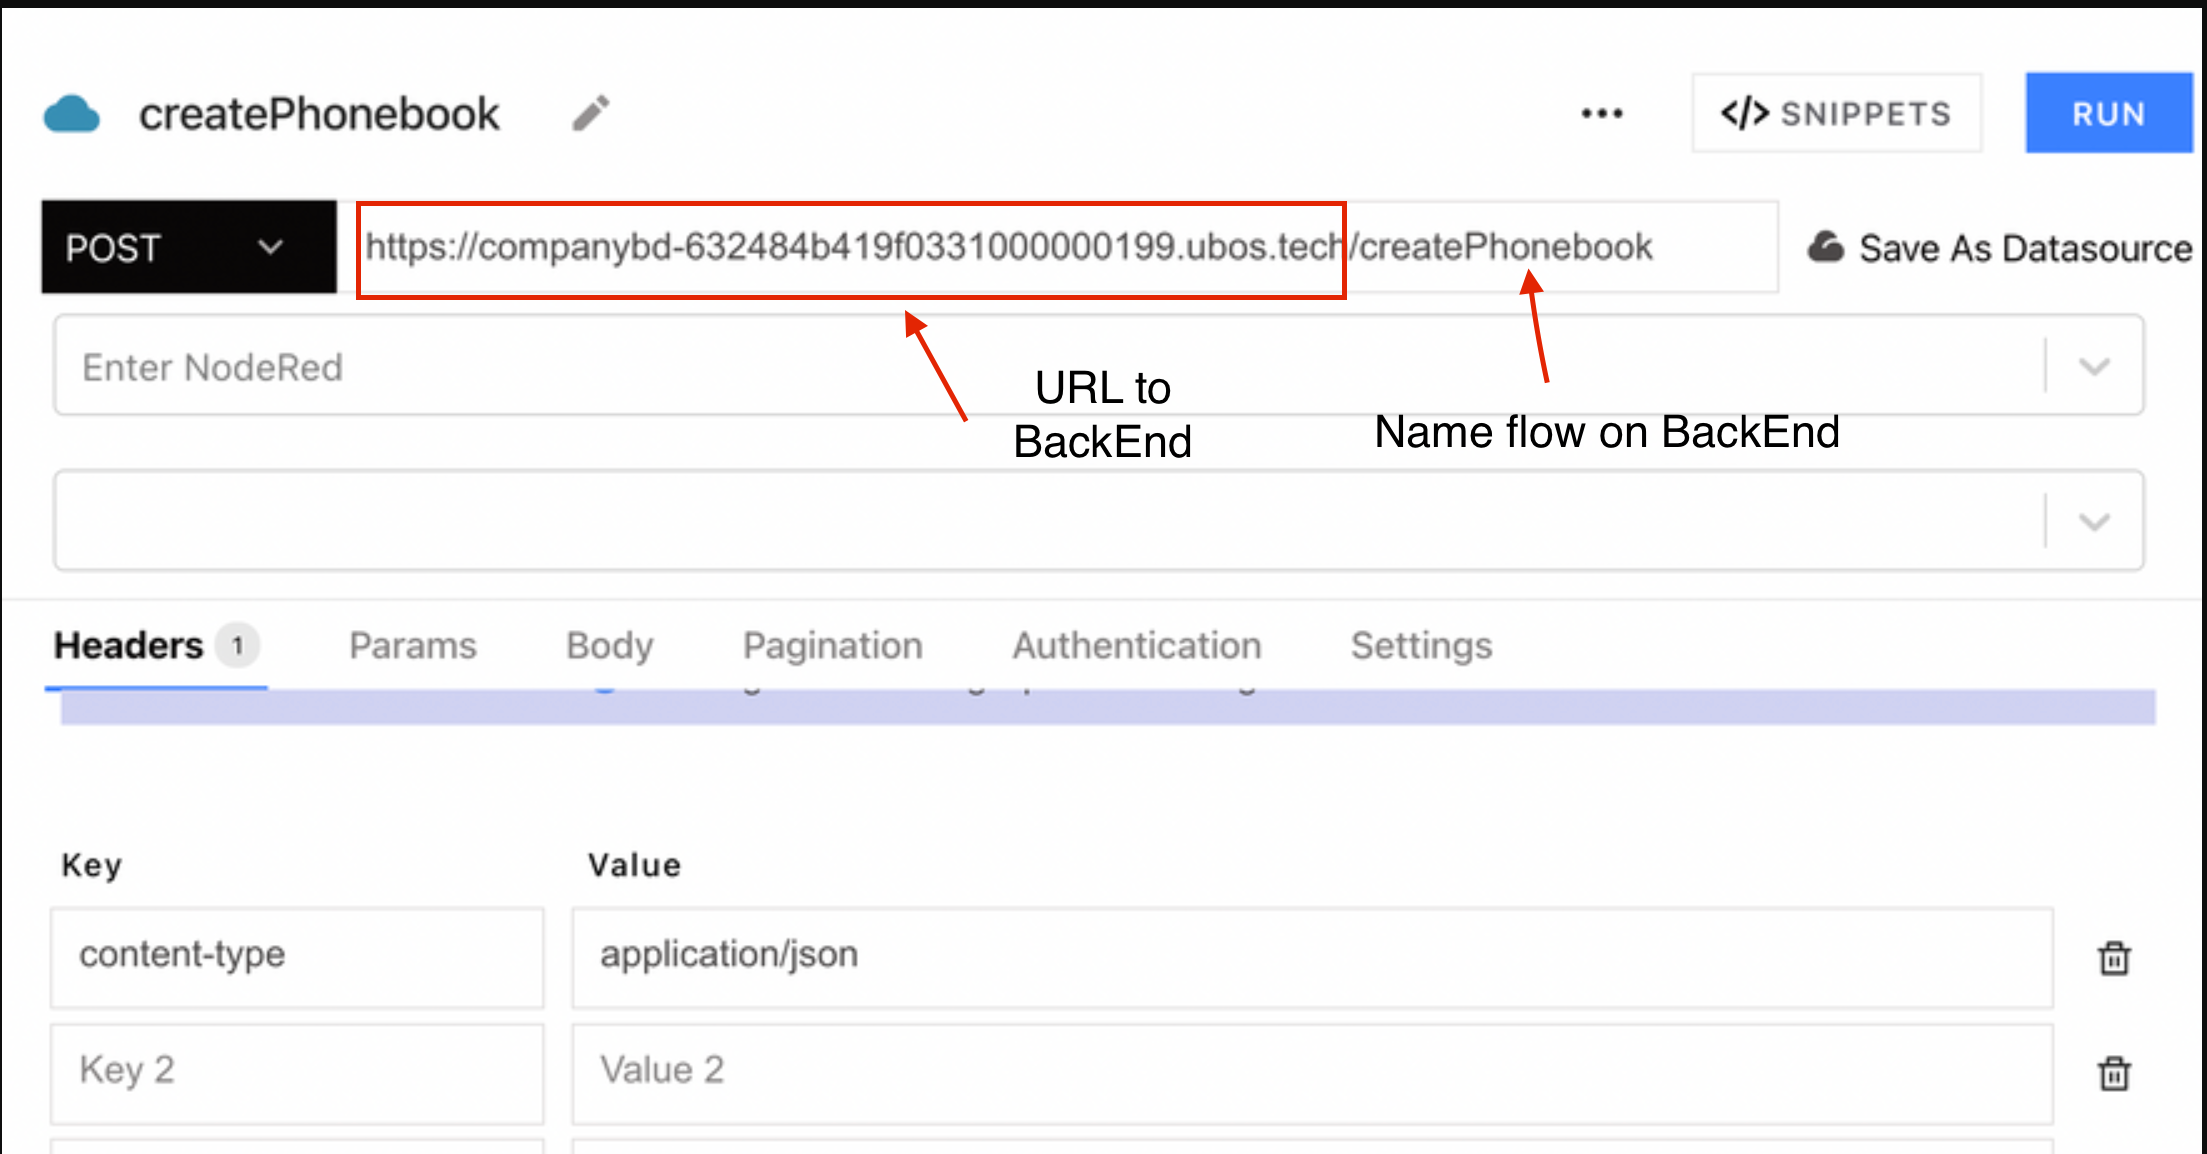
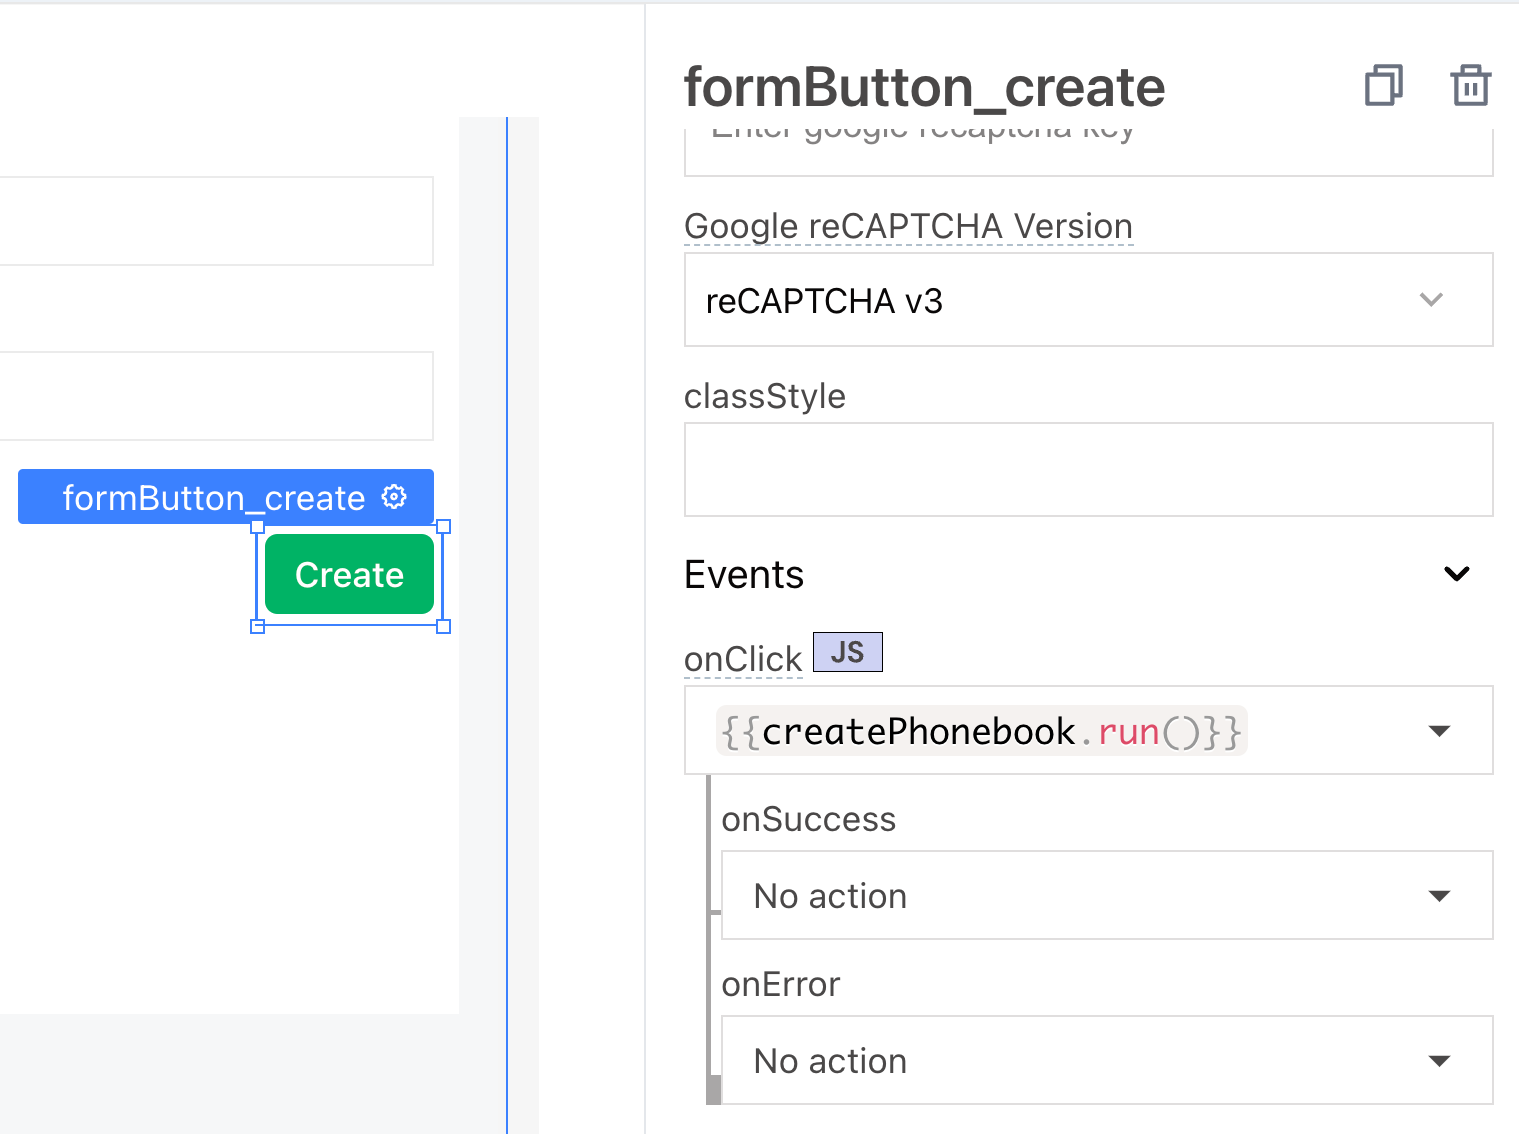
- We call this API on the onclick event of the button in the FORM.
Step 3:
Flow Builder UBOS is a visual tool for creating and managing APIs and integrations. You can use Flow Builder UBOS to create a backend for your application that can perform CRUD operations on a database. Here's a simple explanation of how to create a backend using Flow Builder UBOS.

*Now a little more about each node *

- "http in" is a built-in node in Node-RED that allows you to receive incoming HTTP requests. The "http in" node acts as a server that listens for incoming requests and passes them to other nodes in the flow for processing. The "http in" node is commonly used in Node-RED to create APIs and webhooks that can be consumed by other applications.
- Here are some of the key features of the "http in" node in Node-RED:
- HTTP methods: The "http in" node supports all of the standard HTTP methods, including GET, POST, PUT, DELETE, and others. You can use this node to handle different types of requests, such as retrieving data from the server, submitting data to the server, or deleting data from the server.
- URL patterns: The "http in" node allows you to define URL patterns that determine which incoming requests are handled by the node. For example, you can use the node to handle all requests to a specific endpoint, or to handle requests that match a particular pattern.
- Request and response handling: The "http in" node provides access to the incoming request and the outgoing response, allowing you to process the request and generate a response. You can use other nodes in the flow to perform operations such as data validation, database queries, and data manipulation.
- Middleware: The "http in" node allows you to add middleware functions that can be used to perform operations such as authentication, data validation, or data transformation. You can use middleware to implement custom logic that is executed before the request is passed on to other nodes in the flow.
In our case we use the method POST for creating new collection.
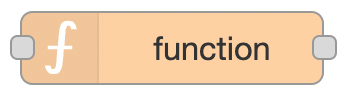
The "function" node in Node-RED is a core node that allows you to perform custom processing on incoming data in your flows. The "function" node provides a simple way to add custom logic to your flows, and it's a very flexible node that can be used for a wide range of tasks.
Here are some of the key features of the "function" node in Node-RED:
- JavaScript code: The "function" node allows you to write JavaScript code that can be executed when a message arrives at the node. The code can be used to perform operations such as data manipulation, data validation, or database queries.
- Input and output: The "function" node can receive input in the form of a message, and it can send output in the form of a message. The input and output messages can contain data in a wide range of formats, including JSON, XML, and plain text.
- Context: The "function" node provides access to a context object that can be used to store data that is specific to the current flow. You can use the context object to store data such as configuration settings, user-defined variables, or intermediate results from processing.
- Debugging: The "function" node provides built-in debugging support that allows you to view the input and output messages and to step through the code line by line to understand how it works.For example
node.warn(msg.payload) - Reusable logic: The "function" node allows you to create reusable logic that can be used across multiple flows in your Node-RED application. This makes it easy to implement common functionality, such as data validation, data transformation, or database queries, that can be used by multiple flows.
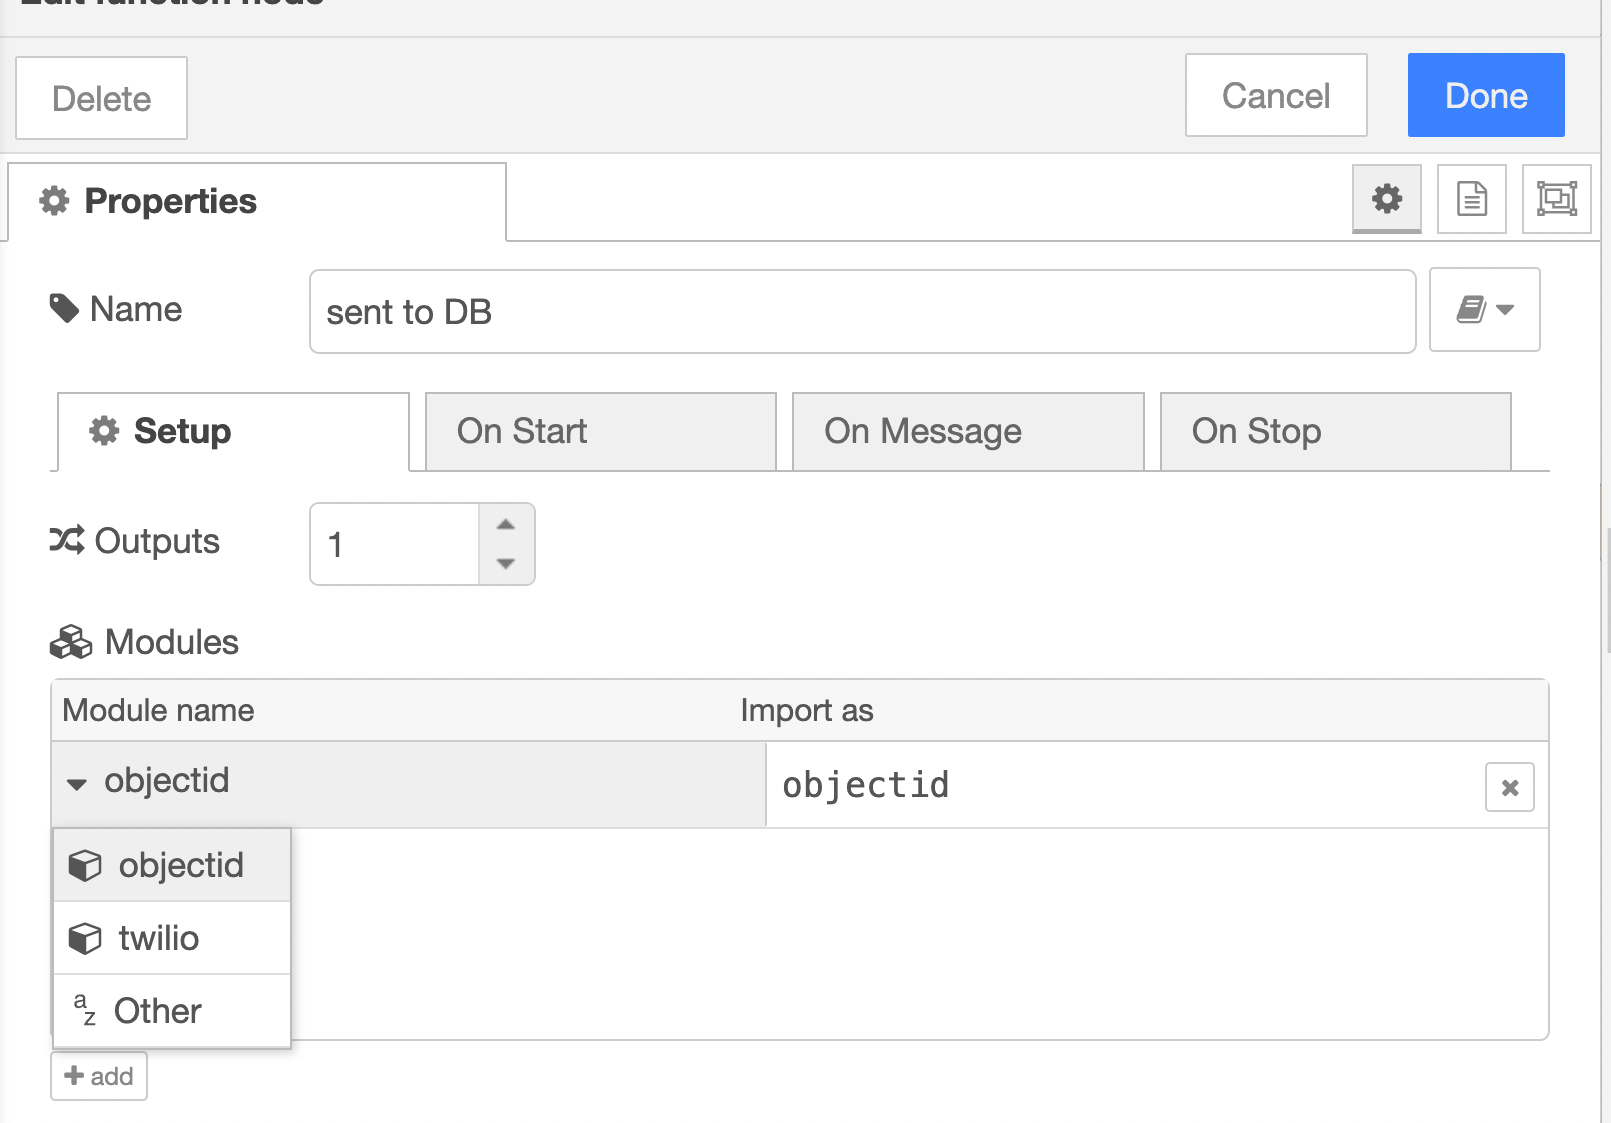
We can also use npm modules such as objectid() in more detail in the next article.
In our case we use it for creating new collection "phonebook"and build a data storage structure.
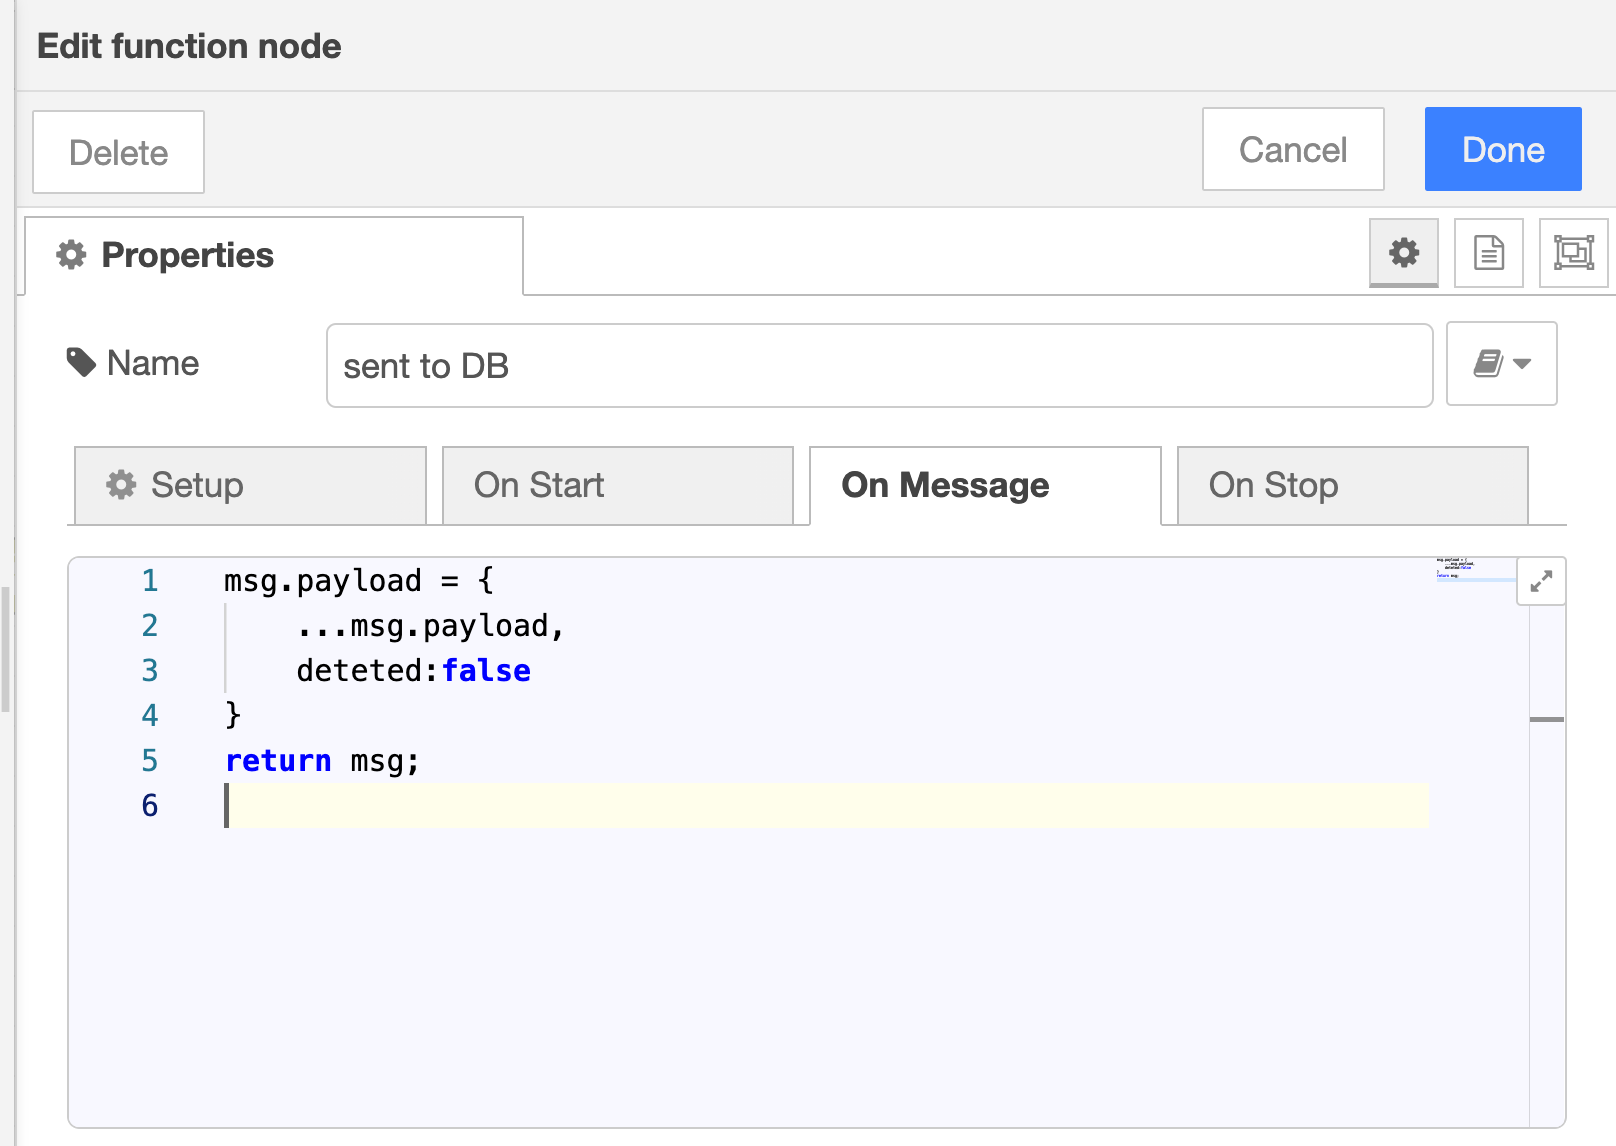
In the message we receive data from the UI, but pay attention to two things:
- We don’t need to generate
_idthis automatically makesmongodb. - We add
deleted:falsefor items. We will use it for a "soft delete" in the "DELETE" part.
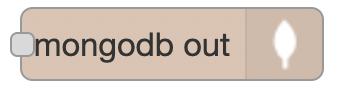
The "node-red-node-mongodb" node is a MongoDB node for Node-RED, which allows you to interact with a MongoDB database from within your Node-RED flows. The "node-red-node-mongodb" node provides a simple and easy-to-use interface for performing common database operations, such as inserting, updating, retrieving, and deleting data.
Here are some of the key features of the "node-red-node-mongodb" node:
- Connection configuration: The "node-red-node-mongodb" node allows you to define a connection to a MongoDB database, which can be used to perform database operations. The connection configuration includes details such as the hostname, port, database name, and credentials.
- CRUD operations: The "node-red-node-mongodb" node provides built-in support for common database operations, including inserting, updating, retrieving, and deleting data. You can use the node to perform these operations with just a few clicks, and the node automatically handles the details of connecting to the database and executing the appropriate commands.
- Query support: The "node-red-node-mongodb" node provides support for querying data from the database, allowing you to retrieve data based on specific criteria. The node provides a simple interface for defining queries, and it supports a wide range of query options, including sorting, limiting, and skipping.
- Data manipulation: The "node-red-node-mongodb" node allows you to manipulate the data in the database, including updating and transforming data as it is retrieved from the database. You can use the node to perform operations such as data validation, data transformation, or data enrichment.
- Error handling: The "node-red-node-mongodb" node provides built-in error handling that allows you to respond to errors that occur during the processing of database operations. For example, you can use the node to return an error response if the database is unavailable, or if the query fails to return any data.
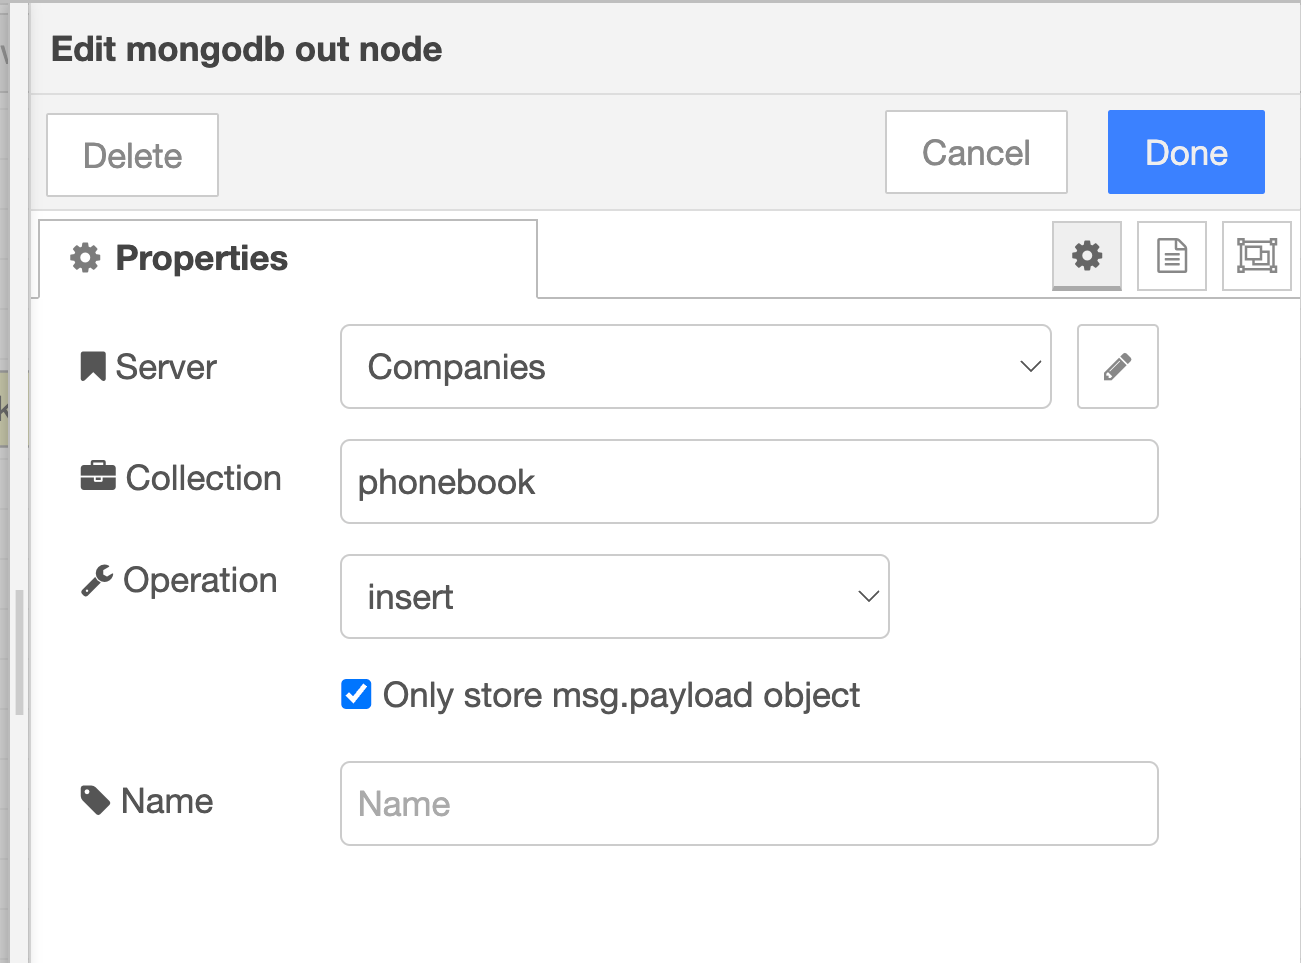
In our case we use :
 Server -  Companies (name depends on how you named your server when you built the server)
Collection - phonebook (name of the collection you create)
 Operation - insert
  select Only store msg.payload object

The "debug" node in Node-RED is a built-in node that allows you to see the messages that are passing through your flows in real-time. The "debug" node provides a simple and convenient way to debug your flows and to view the data that is being processed by your nodes.
Here are some of the key features of the "debug" node in Node-RED:
- Message inspection: The "debug" node allows you to inspect the messages that are passing through your flows, including the payload and the topic of each message. This makes it easy to see what data is being processed by your nodes, and to understand how your flows are working.
- Real-time updates: The "debug" node updates in real-time, so you can see the messages as they are processed by your nodes. This makes it easy to catch any issues or errors in your flows as they occur, and to make any necessary adjustments.
- Output format: The "debug" node provides several options for the output format, including plain text, JSON, and HTML. This makes it easy to format the debug output to suit your needs and to make it easy to read.
- Debugging options: The "debug" node provides several options for debugging your flows, including the ability to show the complete message object, to limit the number of messages displayed, and to choose the output format.
- Node-RED dashboard: The "debug" node can also be used in conjunction with the Node-RED dashboard to display debug messages on a dashboard. This makes it easy to monitor your flows and to see the status of your nodes in real-time.
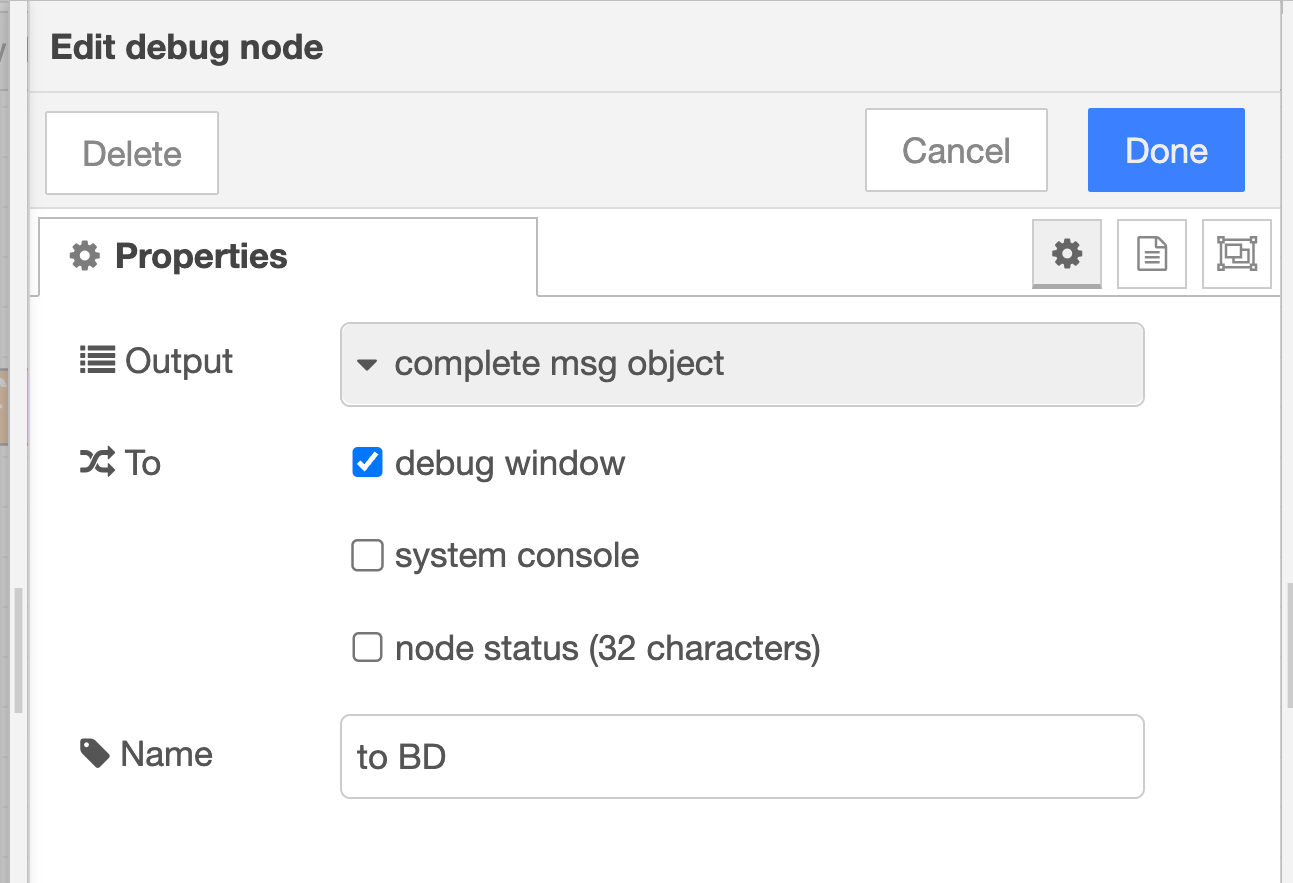
Useful tips: to view the whole object of the message, select: complete msg object and and let’s name ,so it will be easier to navigate the console
Summary
When we create an element on the UI and send it to the backend
we write this item into the collection, in order to see this item you need to create the GET request it will be the second part of our article.

Top comments (0)