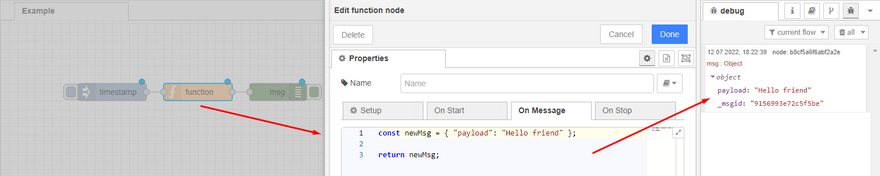
The function node allows you to execute JavaScript code for messages that are passed through it. The message is passed as an object named msg, and by default, it will have a msg.payload property that contains the body of the message.
Other nodes can add their own properties to the message. They should be documented in their respective documentation.
Writing Functions
The code entered in the function node represents the body of the function. The simplest function returns the message as it is.
return msg;
If a function returns null, the message is not passed, and the flow terminates.
The function must always return an msg object. Returning a number or a string will result in an error.
The returned message object does not necessarily have to be the same object that was passed. The function can construct a new object before returning it. For example:
Note: Creating a new message object will result in the loss of any properties from the received message. This can break certain flows, such as the HTTP In/Response flow, which requires the mandatory preservation of the
msg.reqandmsg.resproperties. In general, function nodes should return the message object they received after making any desired changes to its properties.
Example of how it should be done
Let's create a flow that returns the value of the request body. We'll use the http in and http response nodes (more details about them here).

The http in node sends a message to the function node with properties like payload, req, and res. In the body of the function, we only need to update the specific value we want in msg.payload without replacing the entire msg object. Then the http response node will understand that it needs to return the response to our request.
Let's make a request using Postman.

We received the text that was passed in the request body as the response.
Example of how it should not be done
Let's modify the body of the function in the above-described flow to:
In the console, we will receive the message "No response object". This happens because we created a new message object, and the http response node doesn't know that it needs to return the response.

Therefore, if you need to create new properties, you should assign them to msg without creating a new object.
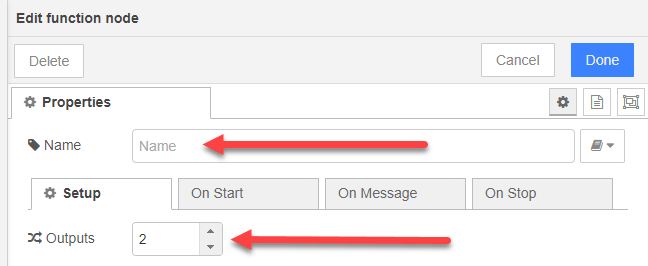
Multiple Outputs
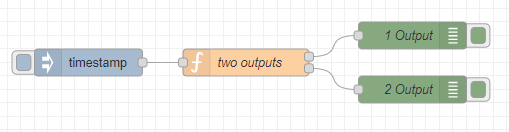
In the function node's editor, there is an option to change the number of outputs and the name of the function.
Let's add two outputs and change the name of the function.
Now the function node has two outputs. The question arises: how do we control them? We need to use an if statement and return an array of messages in its body. The number of messages in the array depends on the number of outputs, which are numbered from top to bottom.
if (msg.payload.length > 0) {
    msg.payload = `array length: ${msg.payload.length}`;

    return [ null, msg ]
}

msg.payload = "Empty"
return msg;
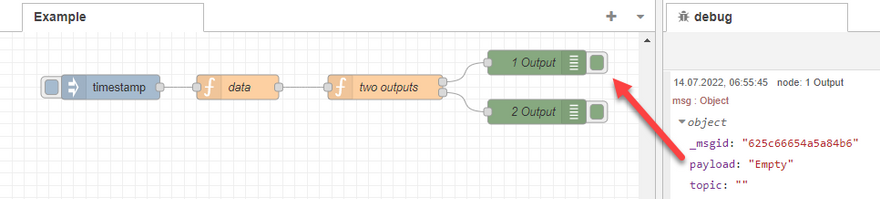
For example, let's consider that we have two outputs: return [null, msg]. In the first output, we return null, indicating that the function doesn't return anything on that output in this case. In the second output, we pass msg. Therefore, if an array with multiple elements is passed to the function, the second output will return a string representing the length of the array. Otherwise, we return return msg on the first output.

Let's add another function node called "data" that returns an array of objects.
msg.payload = [
    { name: "banana" },
    { name: "potato" }
];

return msg;
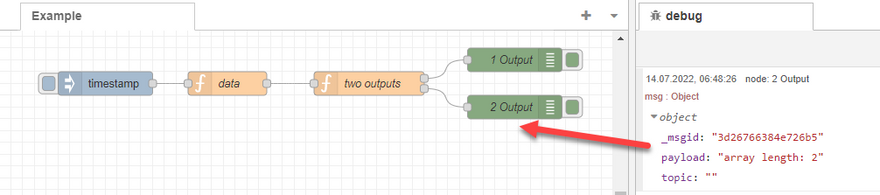
We received true, so the message was sent to the second output. If we pass an empty array to the "data" function, the condition will not be met, and the message will be sent to the first output.
msg.payload = [];
return msg;
Event Logging
To effectively debug your code, it is important to understand what data is coming in and how it changes. For this purpose, you can use the following functions to log messages to the console (similar to console.log() in JavaScript).
node.warn("Something happened");
node.error("Something bad happened");
Let's modify the example we discussed earlier. We'll add a loop that iterates over an array and prints its elements to the console.
if (msg.payload.length > 0) {
    node.warn("start if");

    for (const element of msg.payload) {
        node.warn(element);
    }

    return [ null, msg ]
}

msg.payload = "Empty"
return msg;

You can see 3 node.warn events in the console.
Error Handling
If a function encounters an error and needs to terminate the execution flow, it should not return anything. To trigger a catch at a specific node, the function should call node.error("error", msg), passing the error message as the first argument and msg as the second argument.
Let's modify the previous example by adding an error to the _data_ function.
msg.payload = [
    { name: "banana" },
    { name: "potato" }
];

node.error("Еrror", msg);
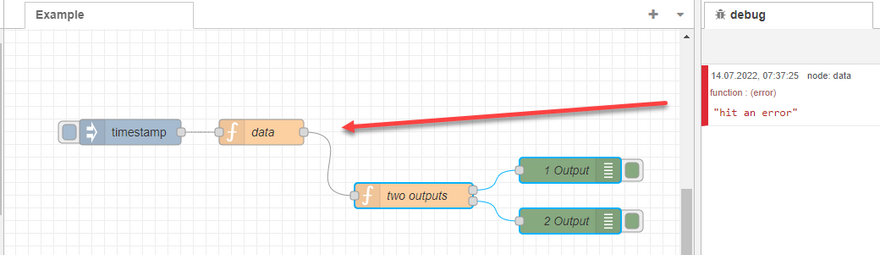
The _data_ function returned an error, so the node stopped working.
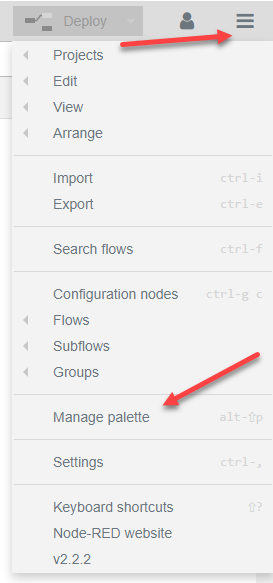
Manage Palette
To add additional Node-RED nodes to your project, you need to open the menu on the right and select the "Manage Palette" tab.
Before installing a library, it is advisable to familiarize yourself with its documentation.
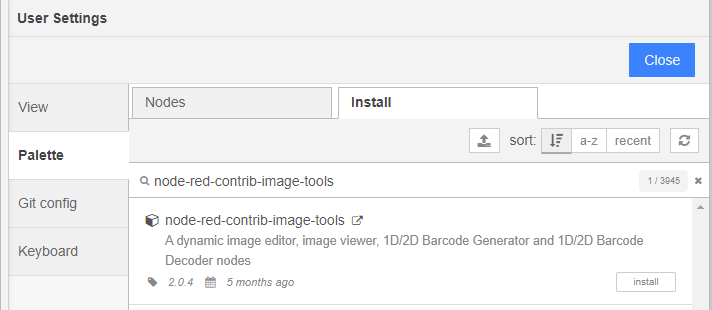
After installation, the newly installed nodes will appear in the list of all nodes.
NPM package
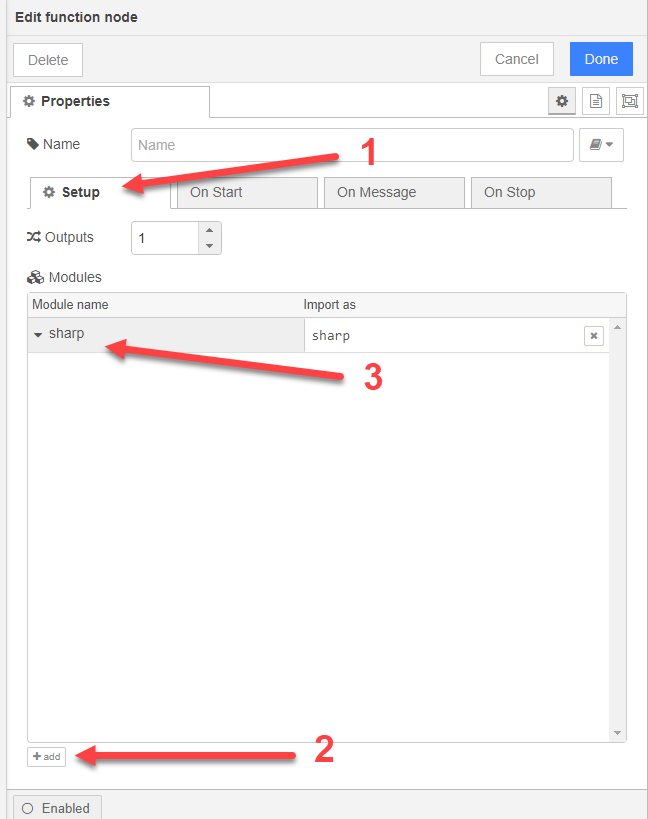
Node-RED allows you to fetch additional modules from the Node Package Manager (NPM). To do this, select the "function" node where you want to use the additional module and go to the "Setup" tab. In this tab, click the "add" button and enter the module you want to use. If such a module exists on the NPM platform, we can use it.
Let's create a flow that takes an image, optimizes it, and flips it.
[Image] -> [Optimization Module] -> [Flip Module]
In this flow, the "Image" node represents the input image, the "Optimization Module" performs image optimization, and the "Flip Module" flips the optimized image.
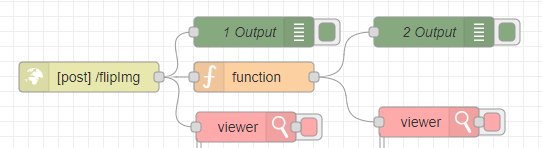
Let's use the new "viewer" node that we previously installed.
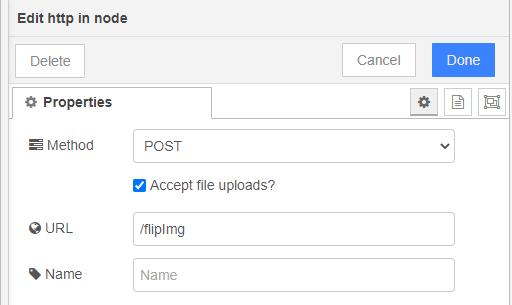
Note: To work with images, it is recommended to use the POST method and enable image uploads.
Let's add the sharp module for working with images.
const optimized = await sharp(msg.req.files[0].buffer)
    .toFormat("jpeg", { quality: 60 })
    .flip()
    .toBuffer();

msg.payload = optimized;

return msg;
We will send the image using Postman. The request body will be of type form-data. For the image, select the file type.

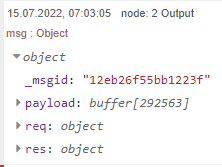
The result of the execution
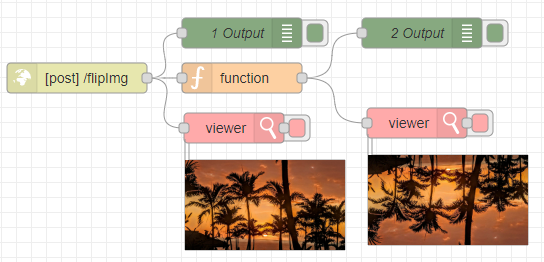
The request sends an image buffer stored at the following path: msg.req.files[0].buffer. The weight of the sent image is size: 414164 (404 KB).


Top comments (0)