A Unified Authorization Template employing Closed-Type Authorization by Attributes is designed to simplify and standardize access control processes within systems or applications. Utilizing a closed-type authorization model, this framework ensures that access permissions are explicitly defined and constrained based on specific attributes, enhancing security and efficiency.
How to Use Our Template
Follow these steps to implement the Unified Authorization Template effectively:
1. Register a Super Administrator
Initially, designate a super administrator who will possess the authority to create users and assign roles.
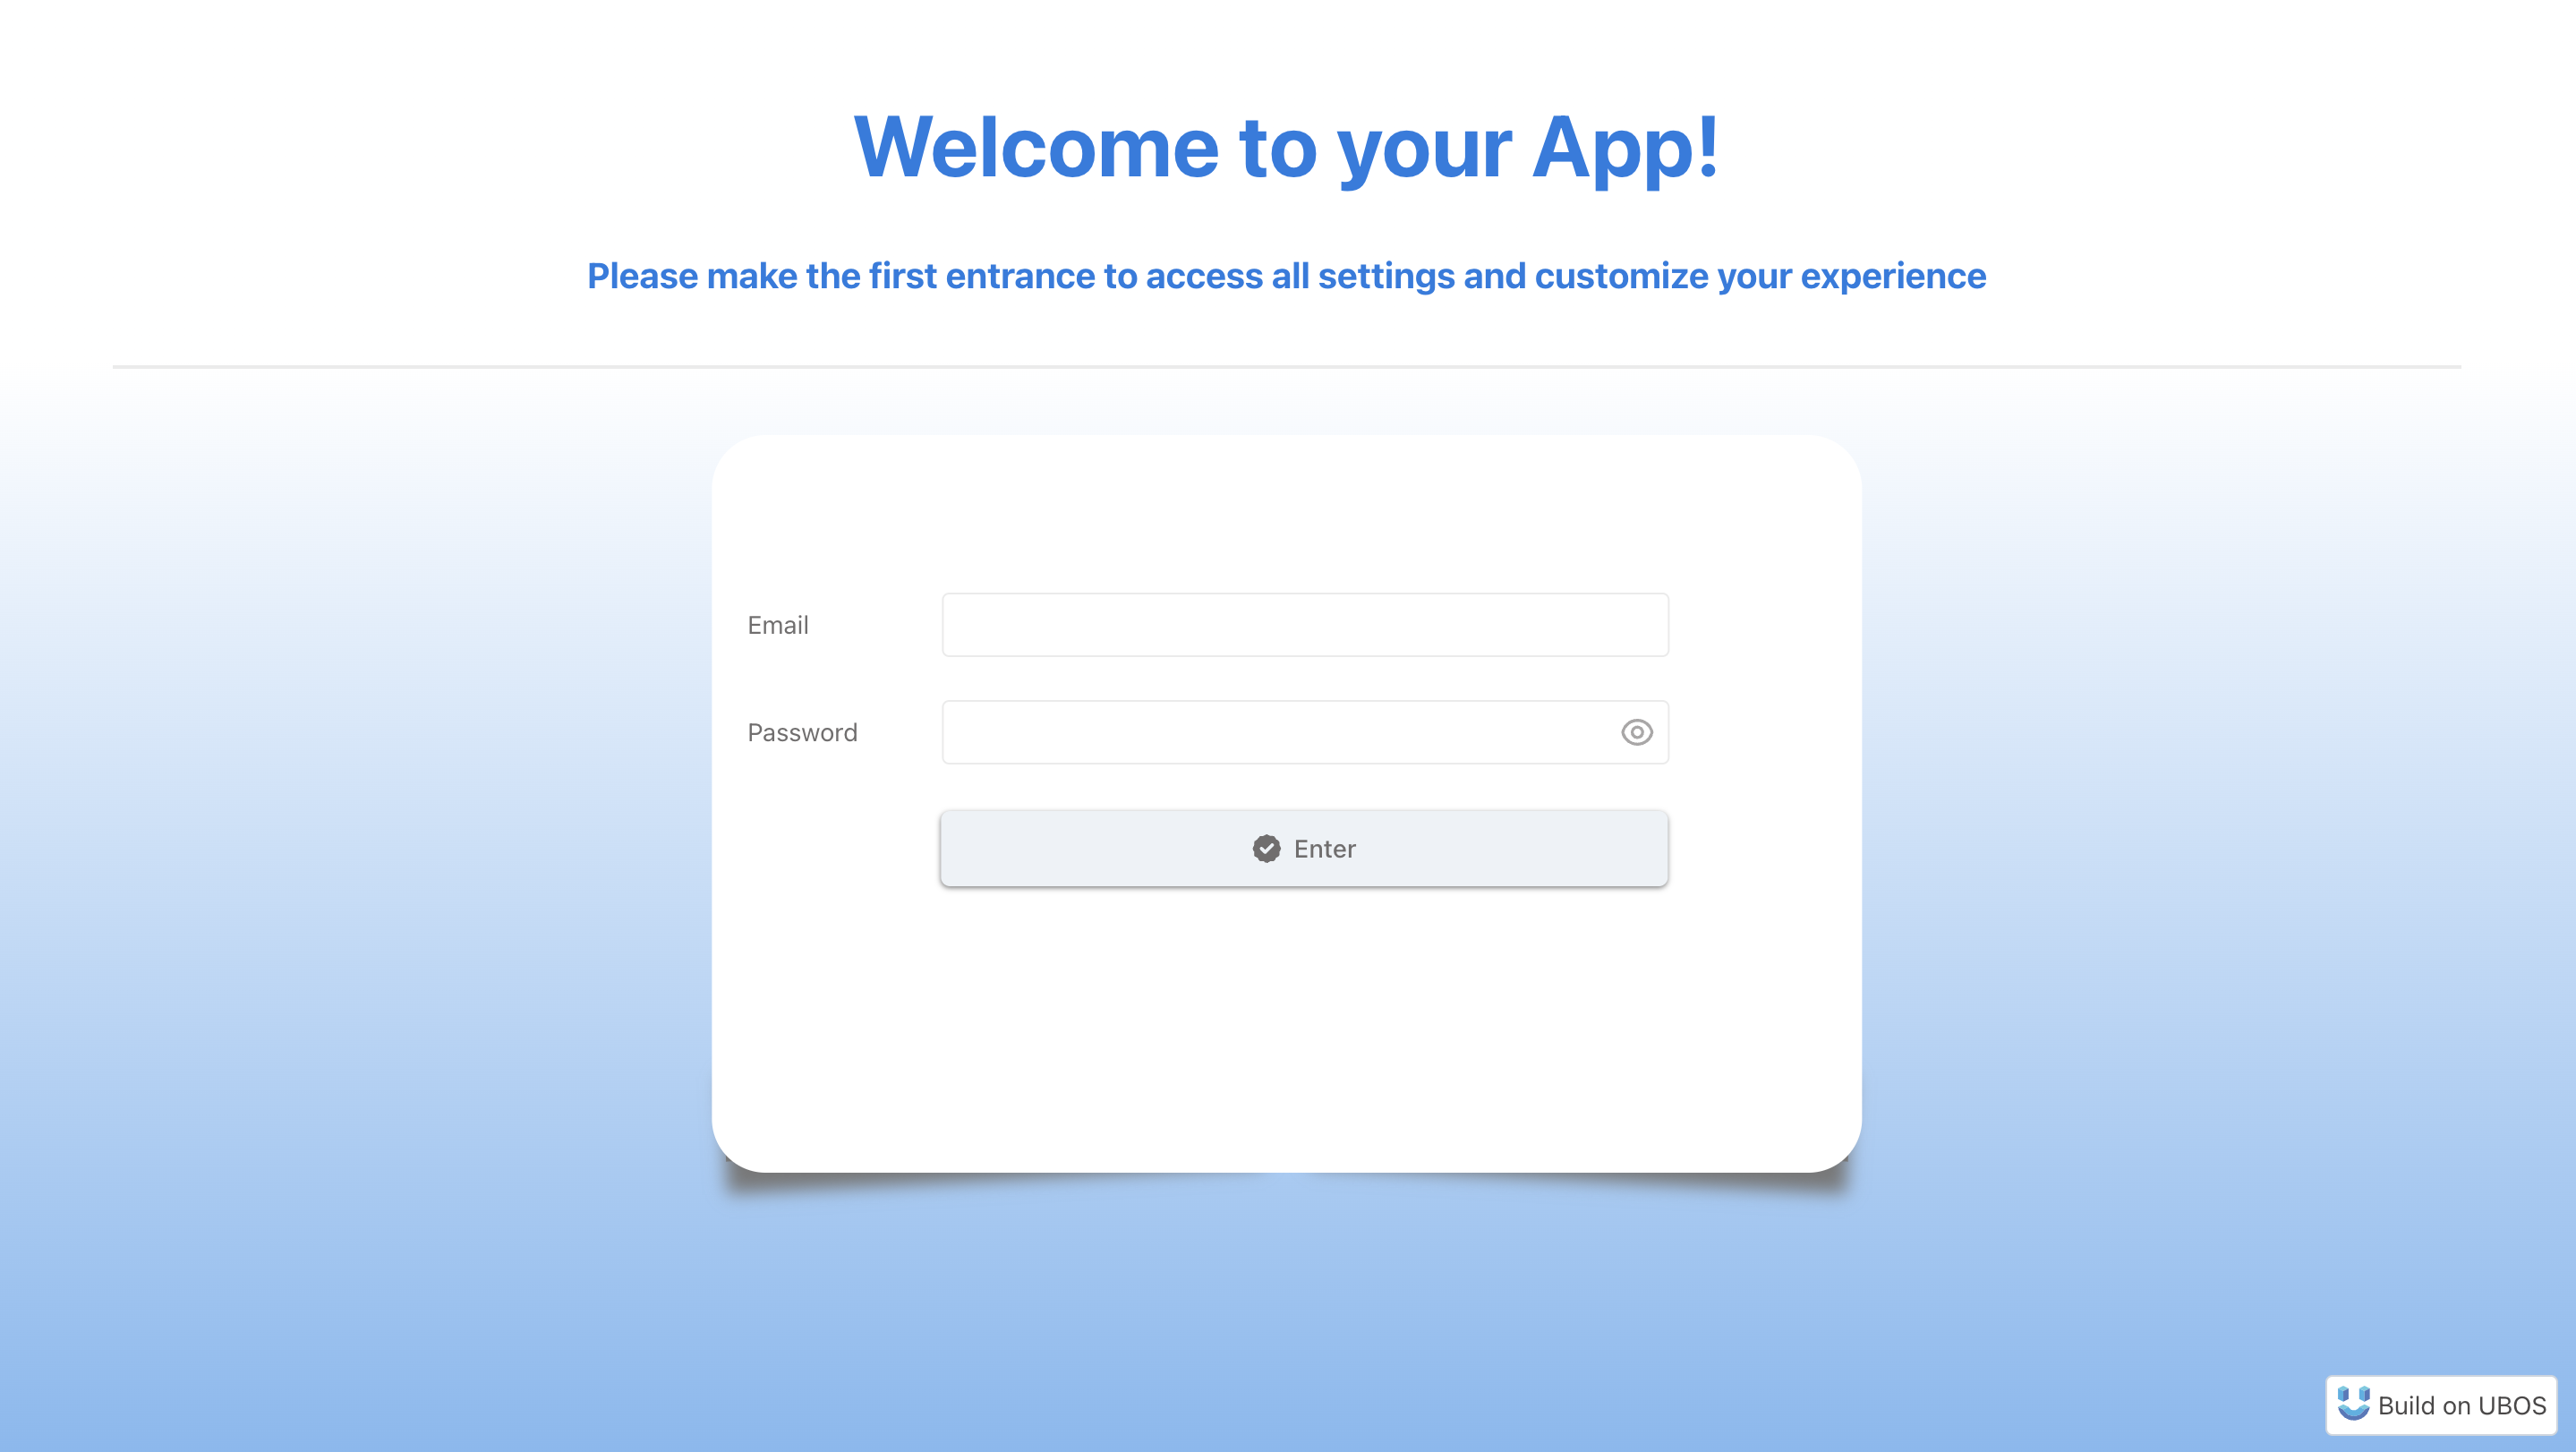
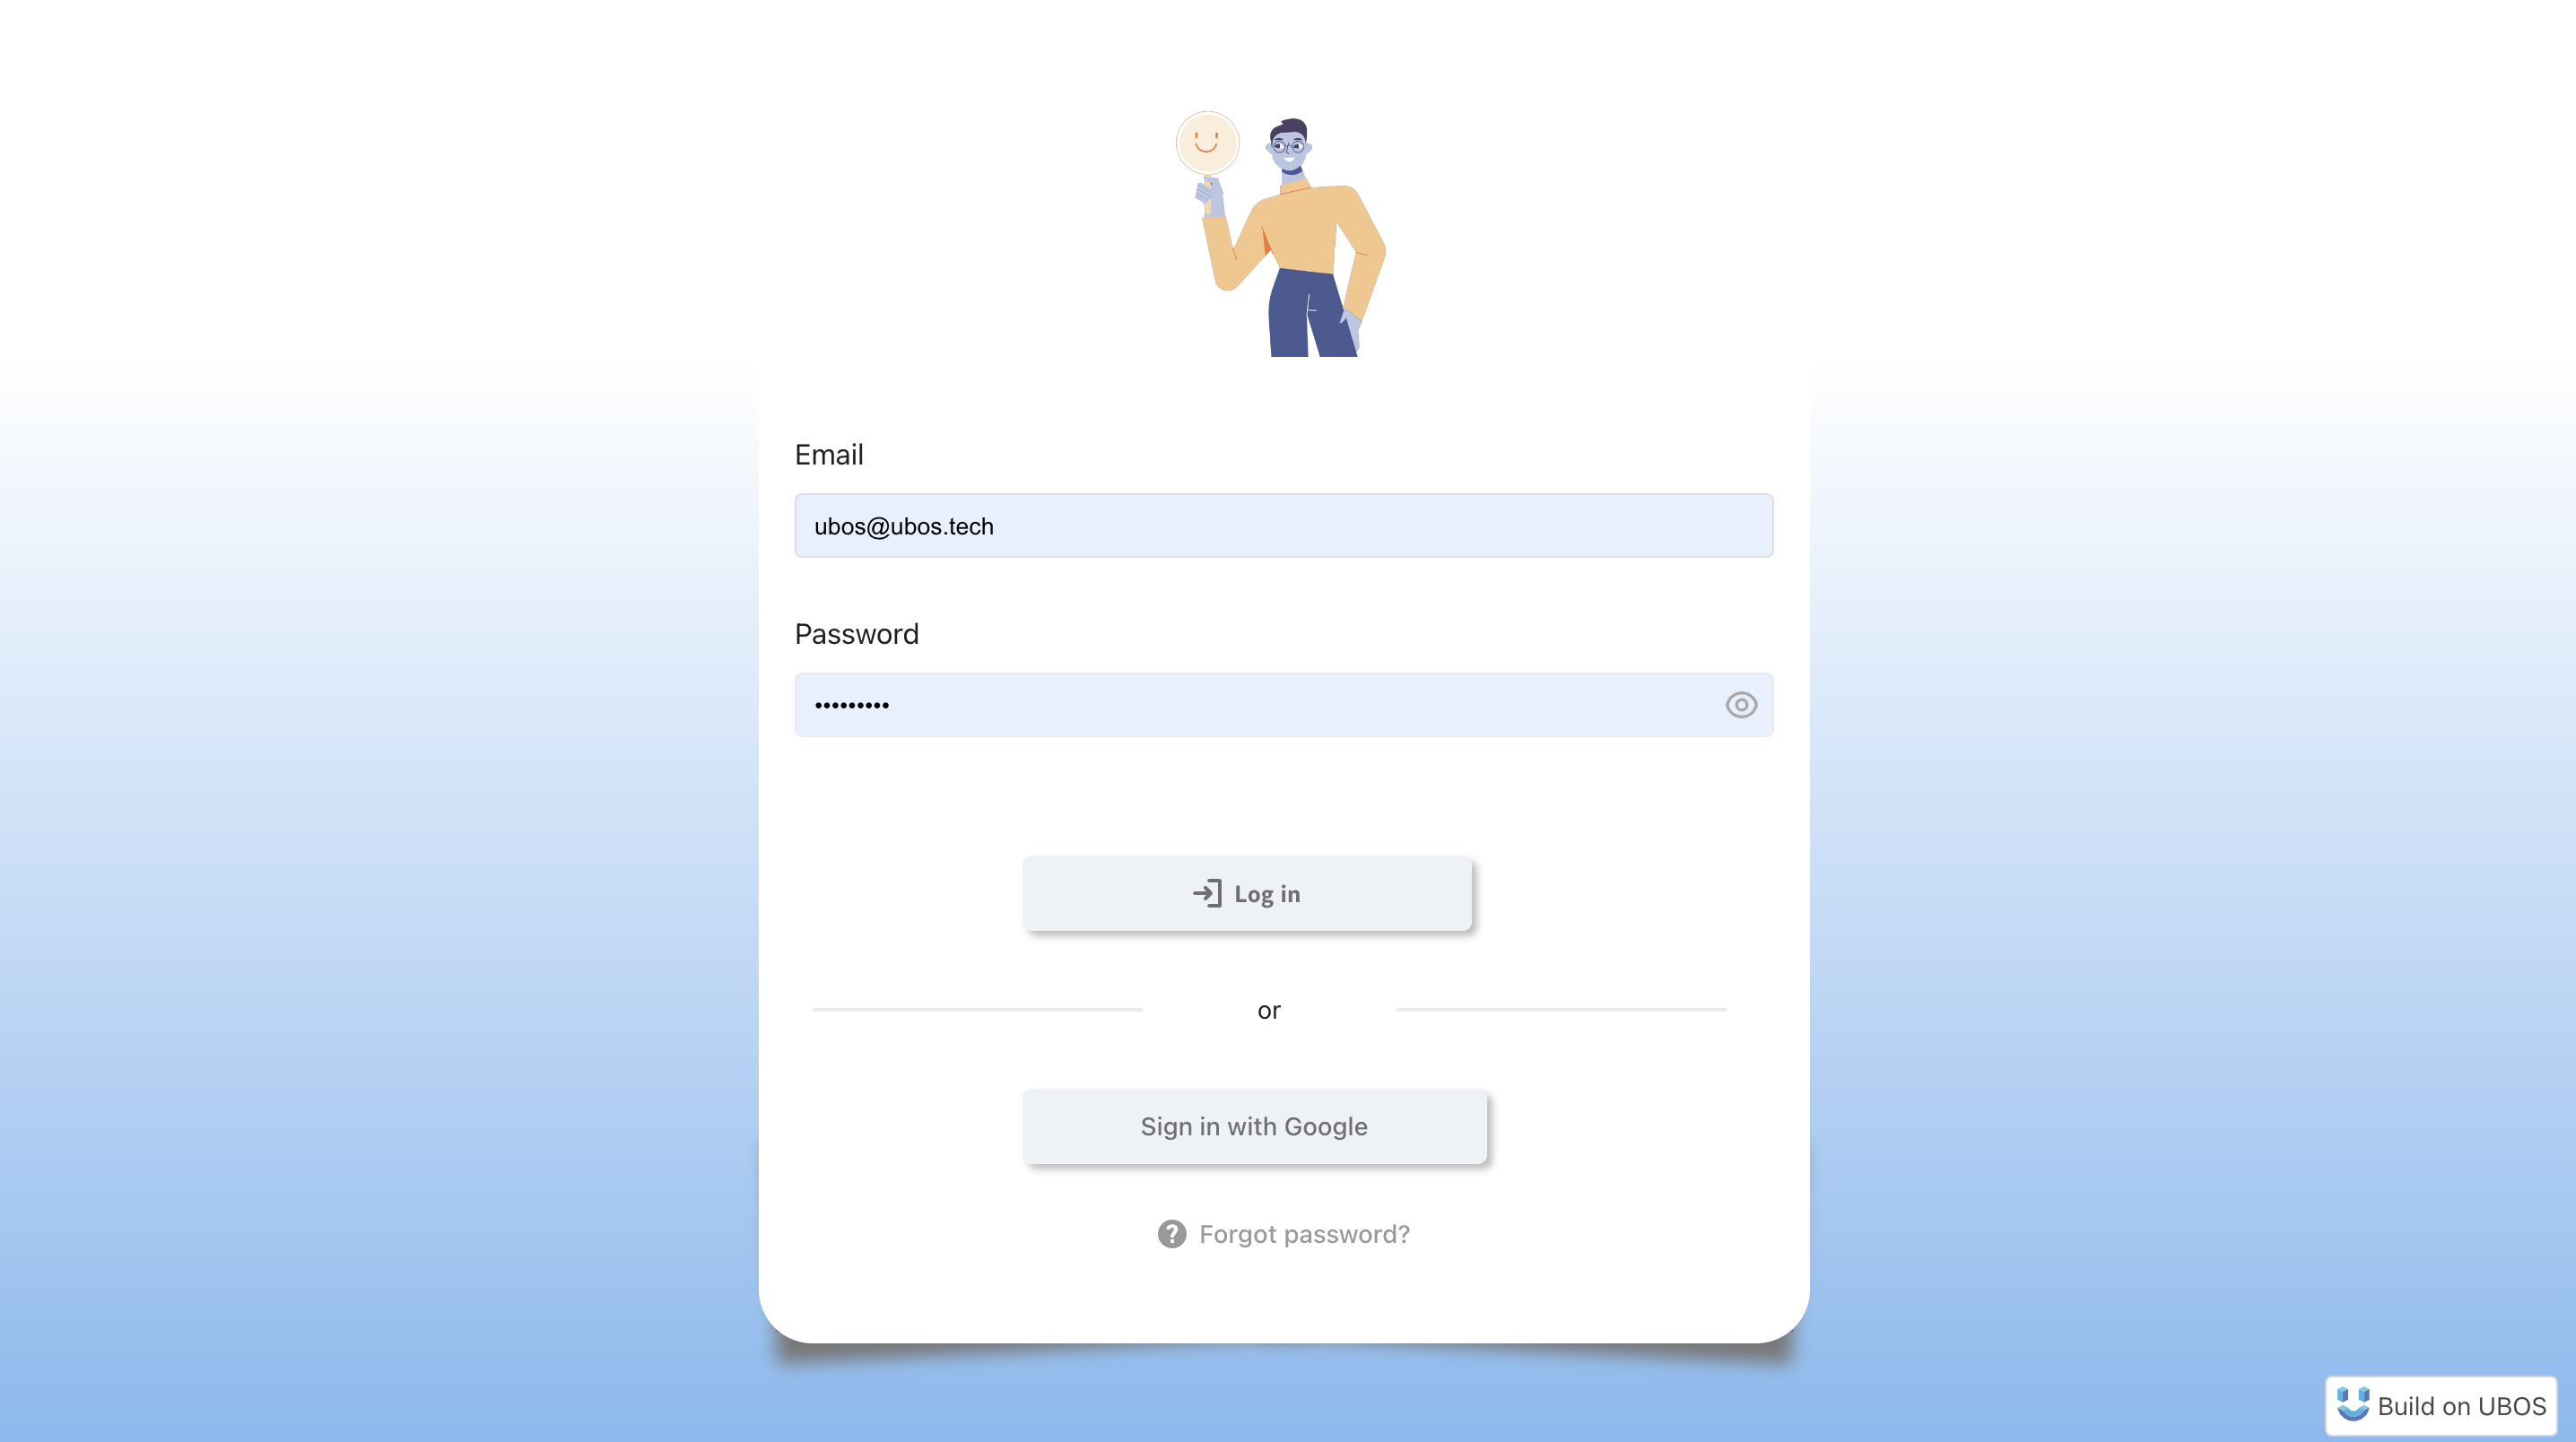
2. First-time Login
Use the super administrator credentials to log in for the first time.
3. Configure the Application Settings
Navigate to the AppSettings page to configure your email client, set up Google authentication, and change logo.
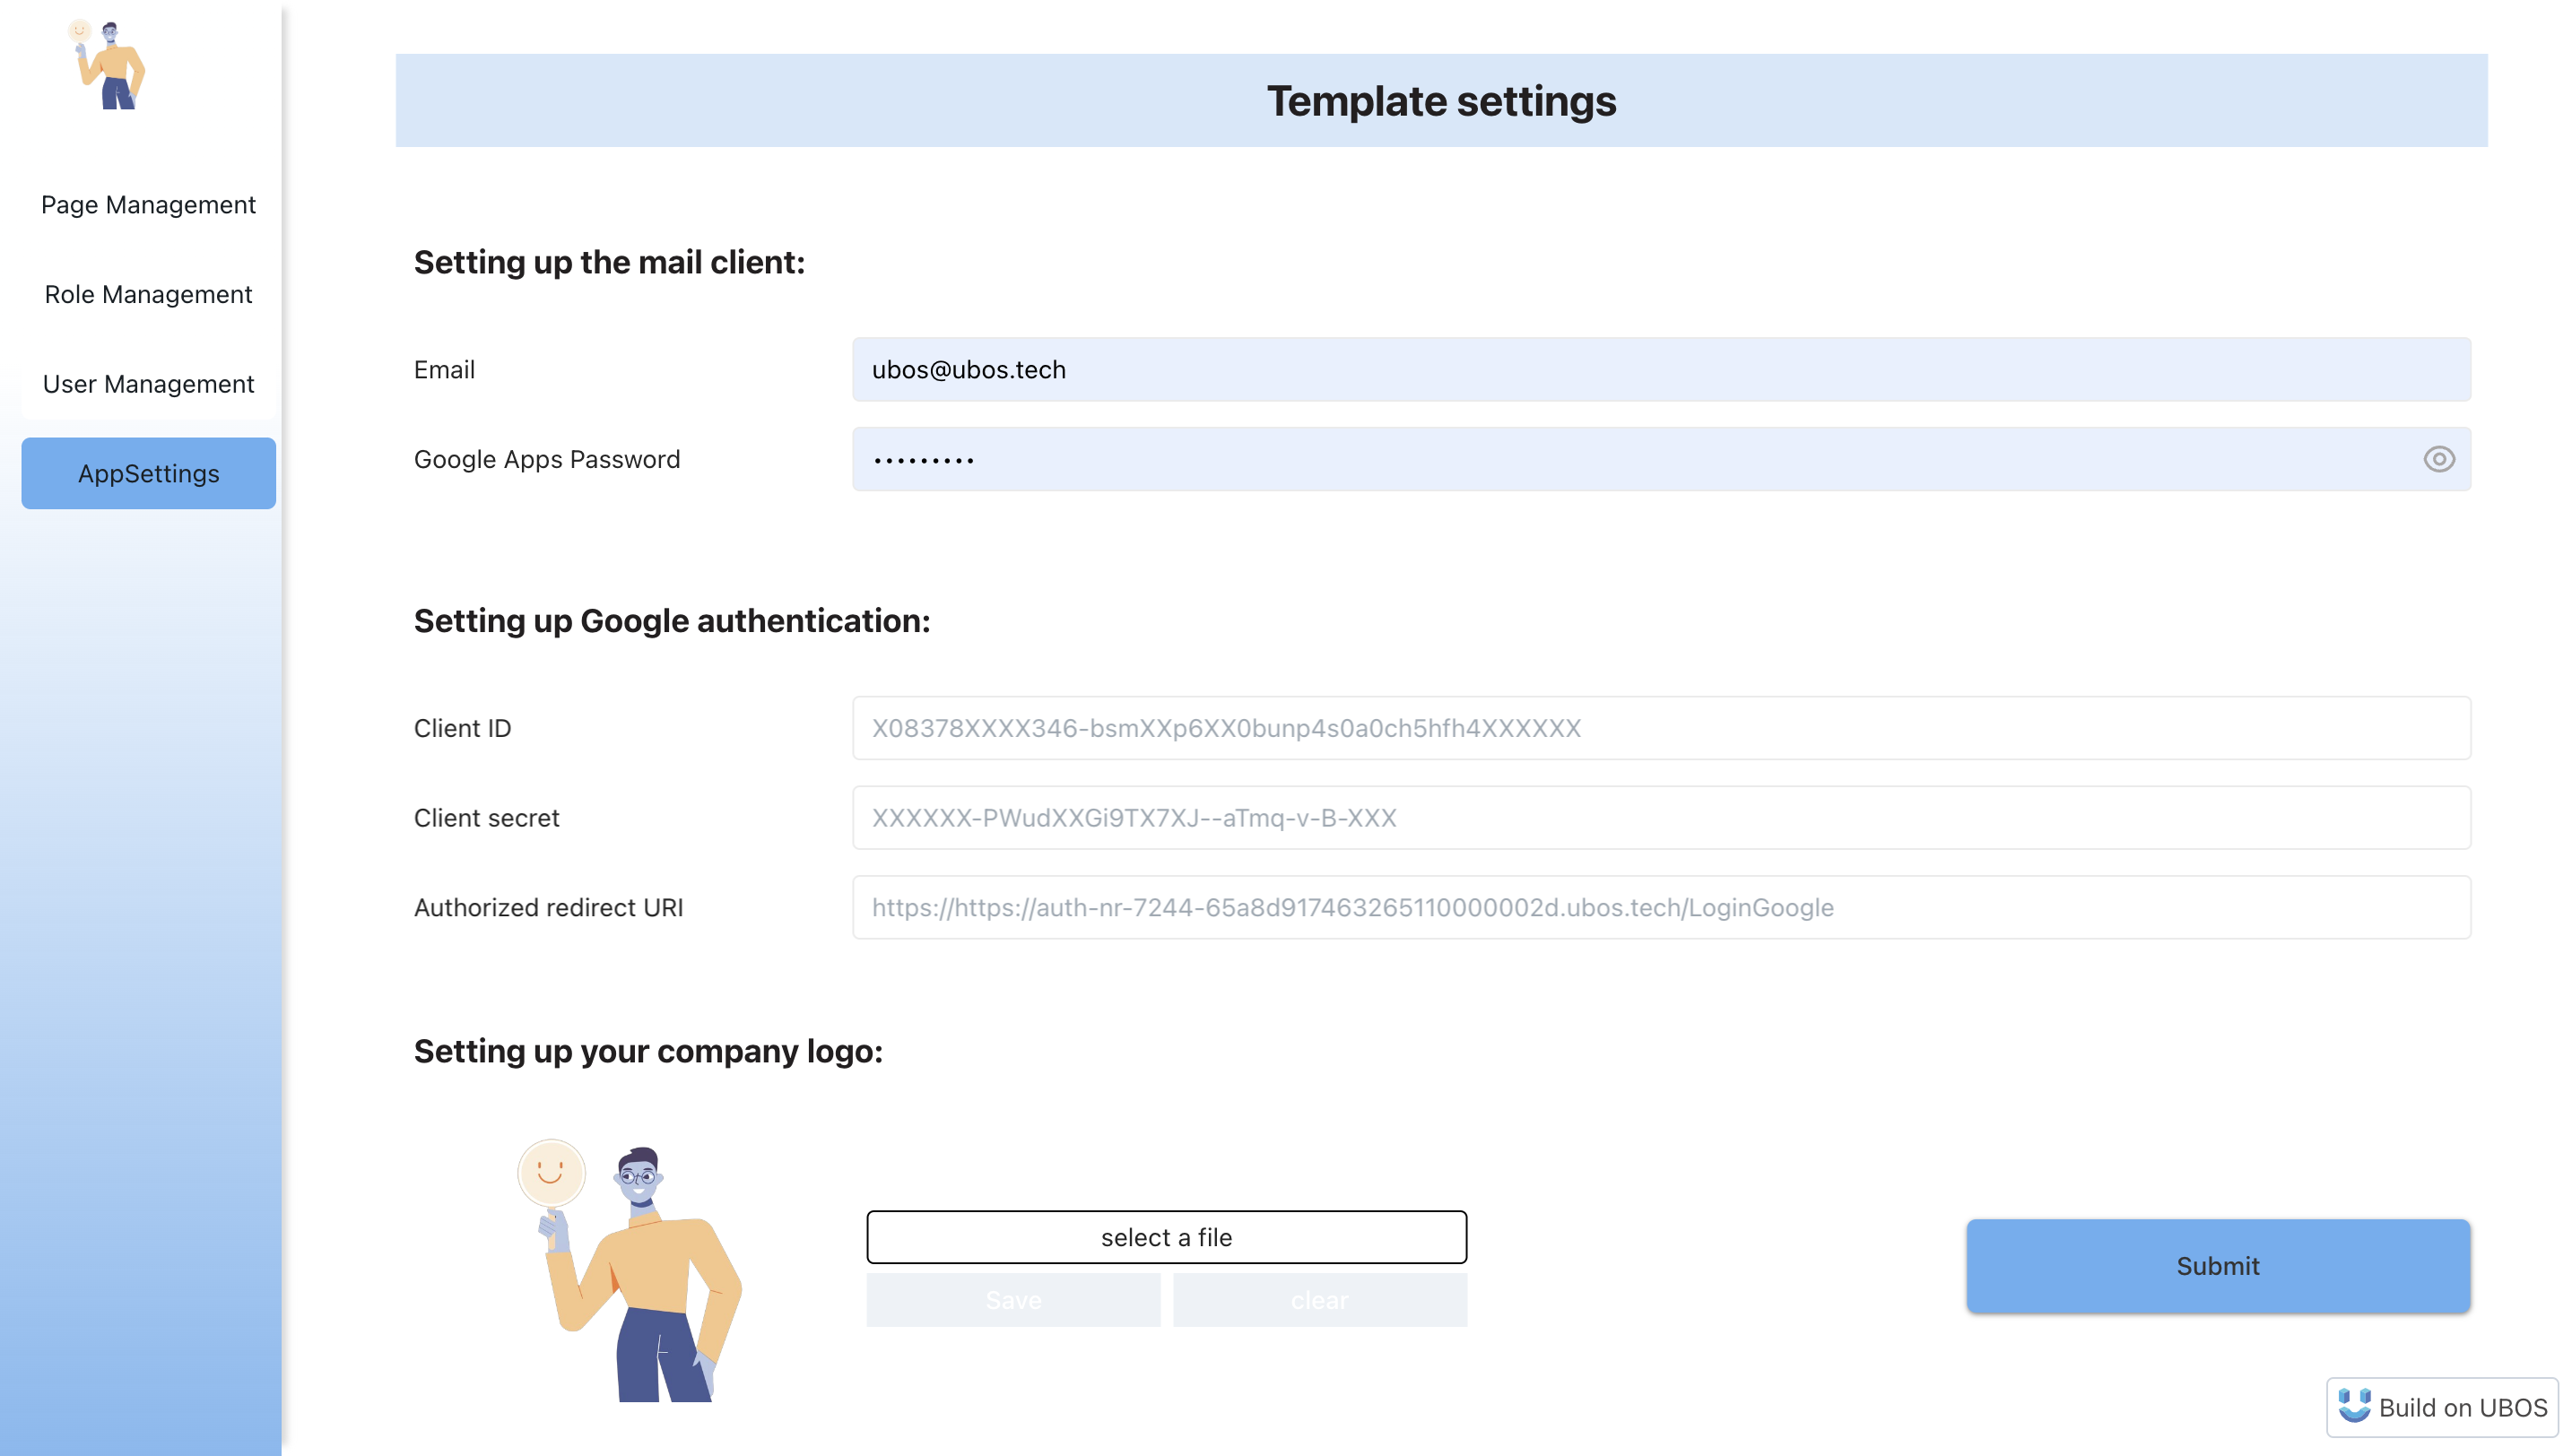
Google Authentication Setup
To enable Google authentication, follow these steps:
1. Configure Email Settings:
- Email: Enter the Google email address that will be used to send notifications to users about their account creation.
- Google Apps Password: Use the app-specific password from this email. For instructions on obtaining this, visit Google Support.
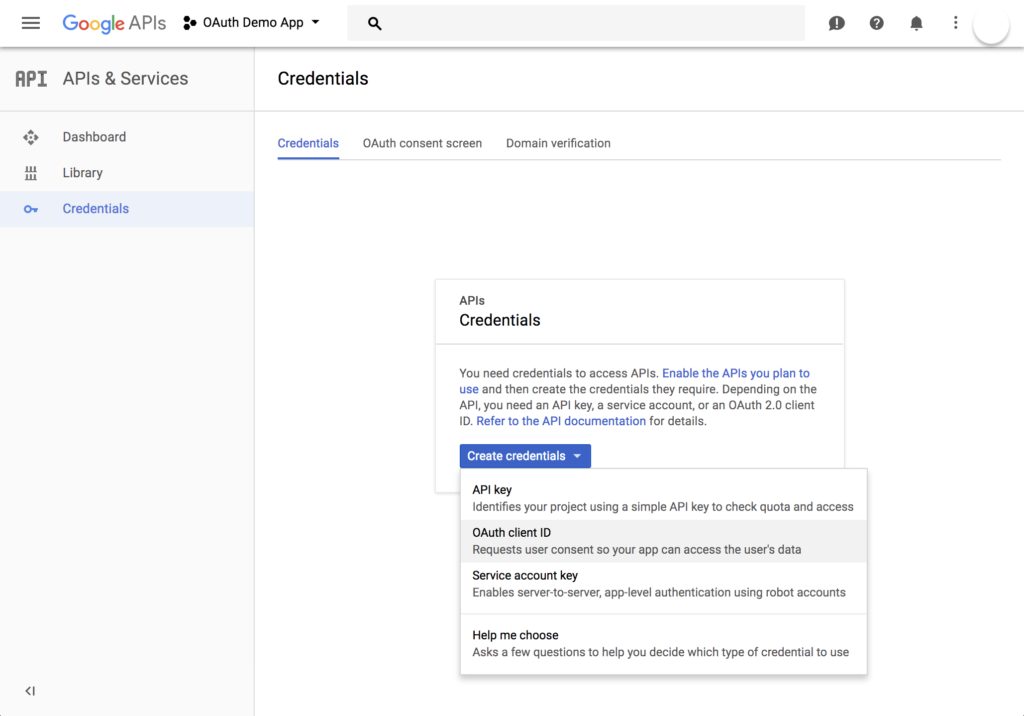
2. Create a Google API Console Project:
Before setting up Google authentication in the application, you must create a project in the Google API Console to obtain a client ID and client secret, as well as register a redirect URL.
- Visit the Google Console website and create a new project.
- Navigate to the Credentials tab from the sidebar, click Create credentials, and select OAuth client ID.
- Provide the required information about your application, such as product name, homepage, and logo.
- On the next page, choose Web application type, and specify the redirect URL where your authentication script will reside.
3. Enter OAuth Credentials:
After creating an application in the Google API Console, input the following details in their respective fields:
- Client ID: Automatically generated from the Client ID field in the Google Console.
- Client Secret: Automatically generated from the Client Secret field in the Google Console.
-
Authorized Redirect URI: Formulate this URI by combining your template URL with the
/LoginGoogleendpoint. For your convenience, we filled this field automatically.
Press the Submit button to save your credentials.
4. Set Your Logo
To personalize your application further, you can change the logo that appears in the top left corner of the menu. To do this, upload your desired picture through the appropriate section in the AppSettings page.
4. Create a List of Pages Within Your Application
Navigate to the Page Management page to add all pages for which you plan to configure access. It's important to remember that these pages must also be created on the UI part of your application.
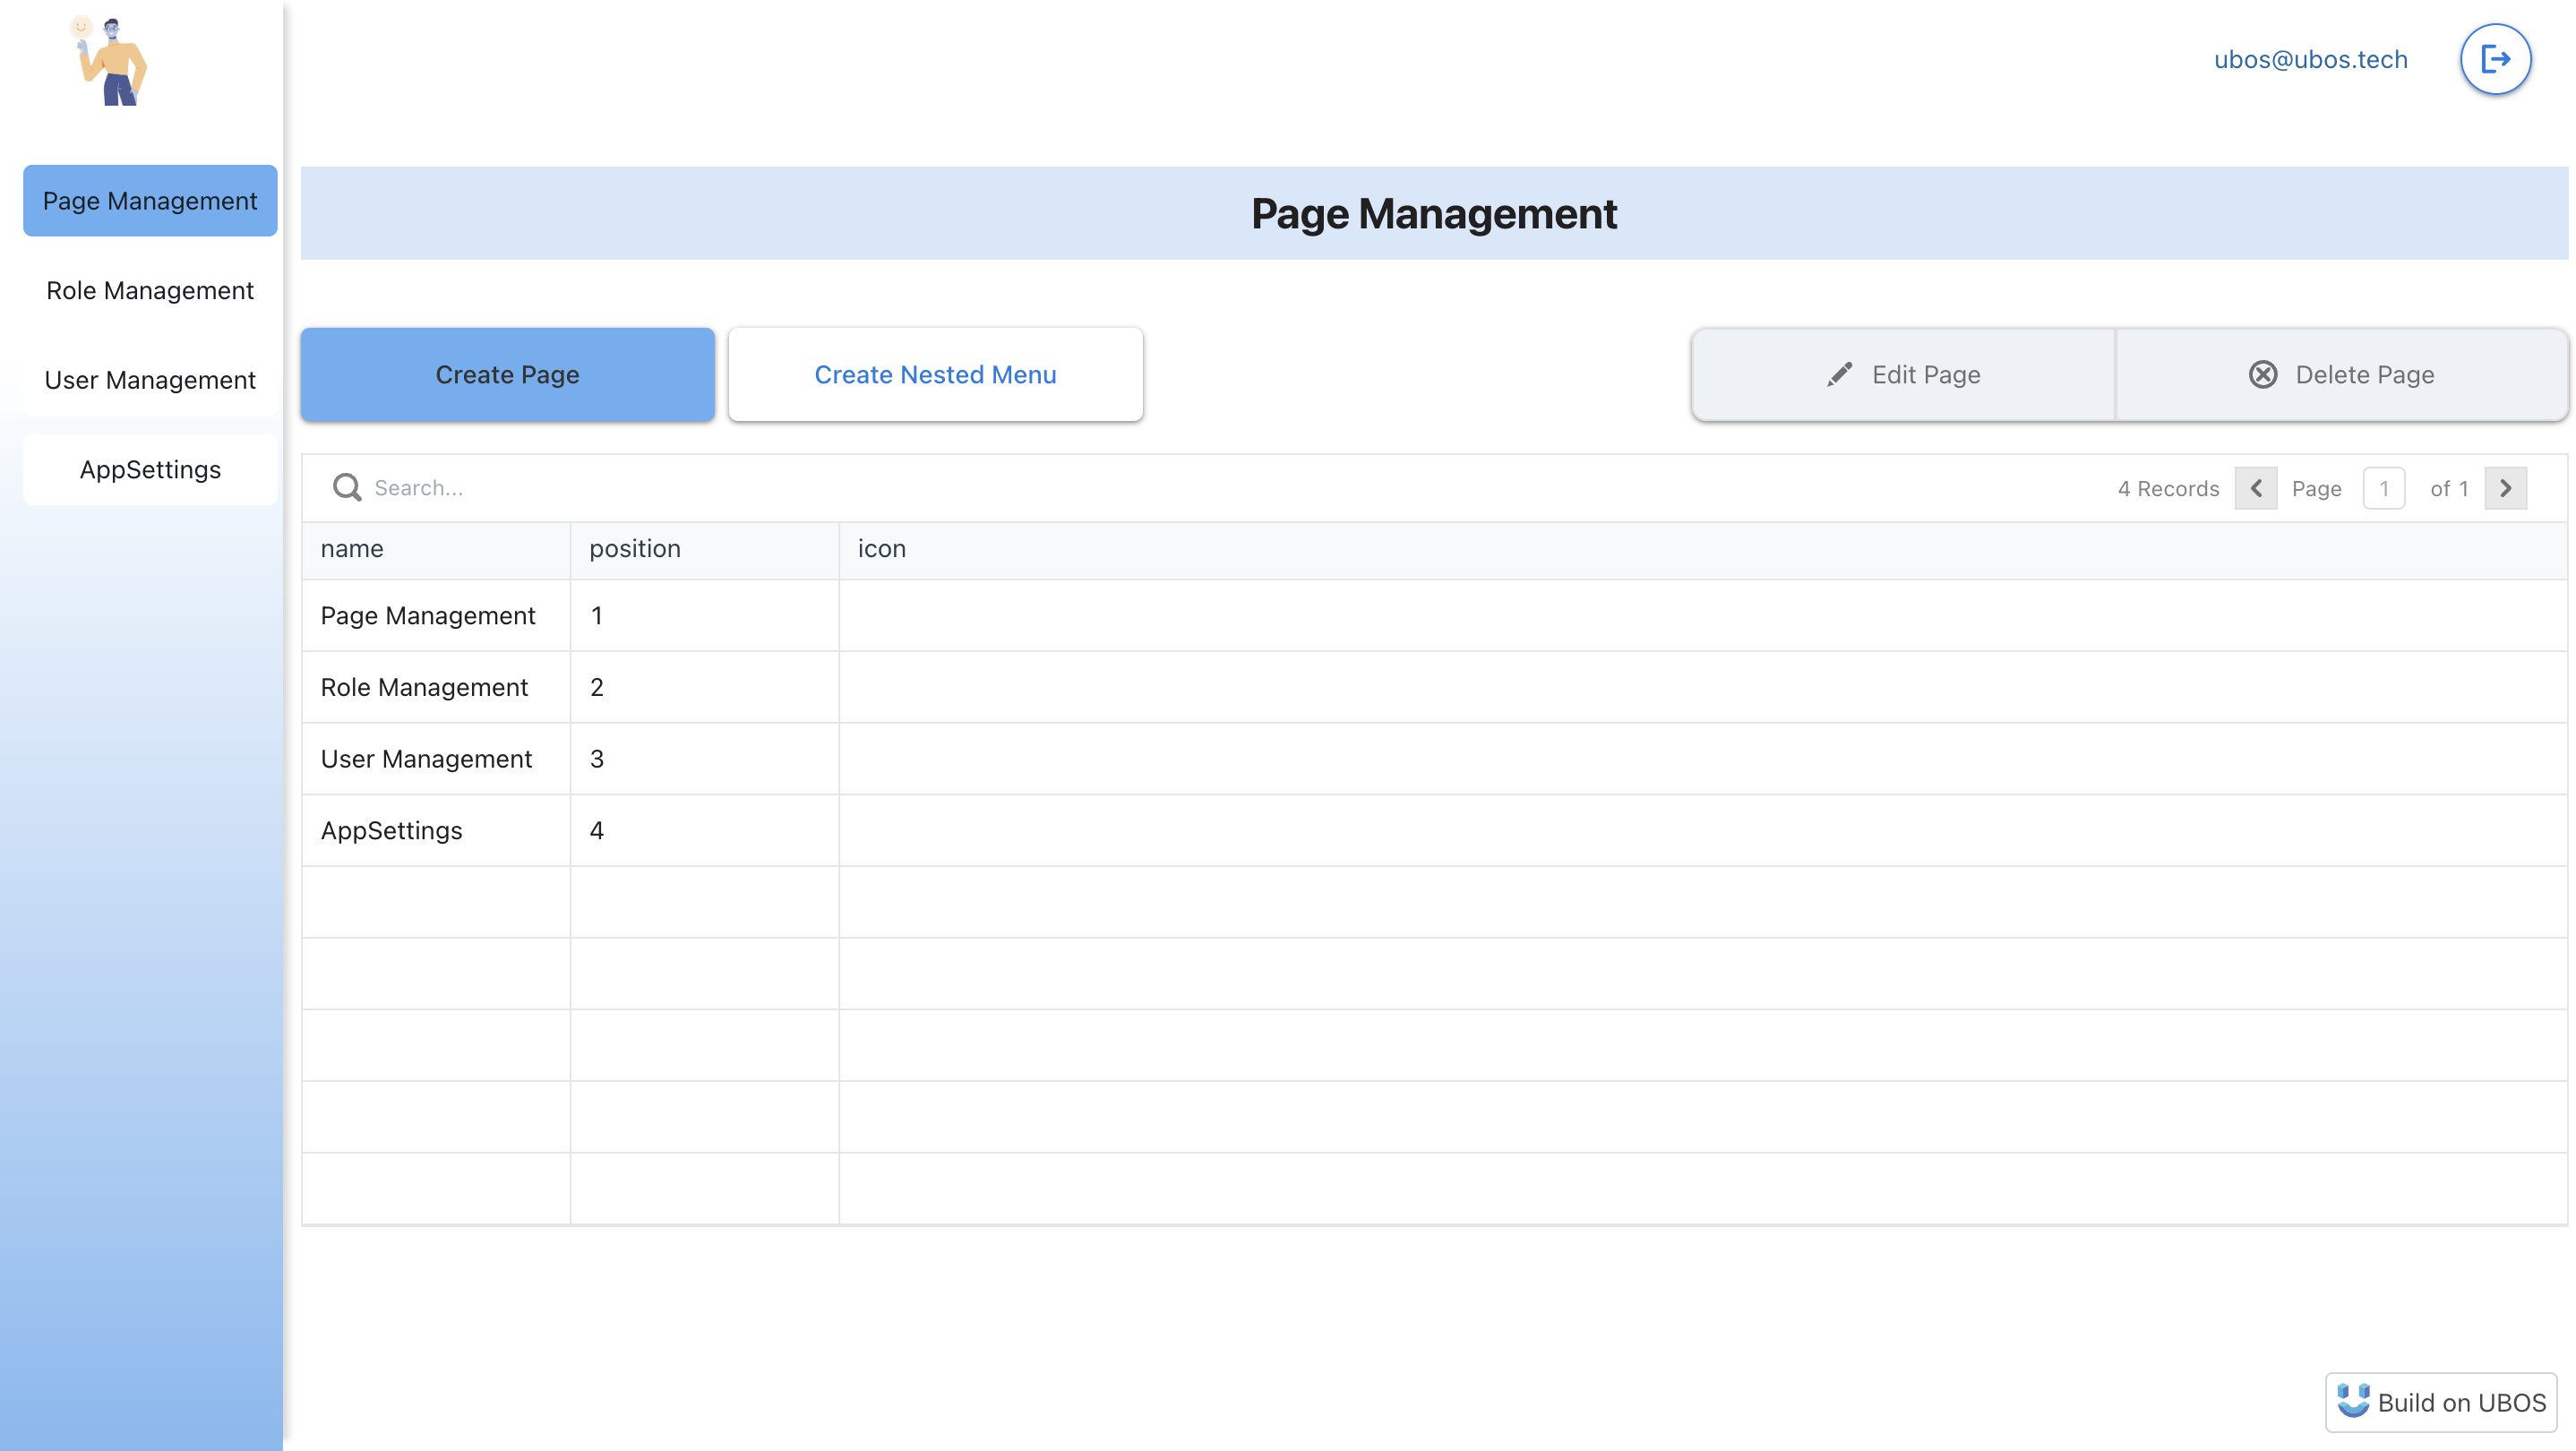
Once added, pages will be displayed as a menu on the left side of your application interface. To organize your pages into a nested menu, select the nested menu button and complete the necessary fields.
5. Creating Roles and Attributes
The Role Management page is where you can define user roles and their associated attributes, crucial for setting up your application's authorization system.
Role Management

Here, you can create a role and assign it permissions to view certain pages by clicking the "Add Page Access to the Role" button.
Permissions Management
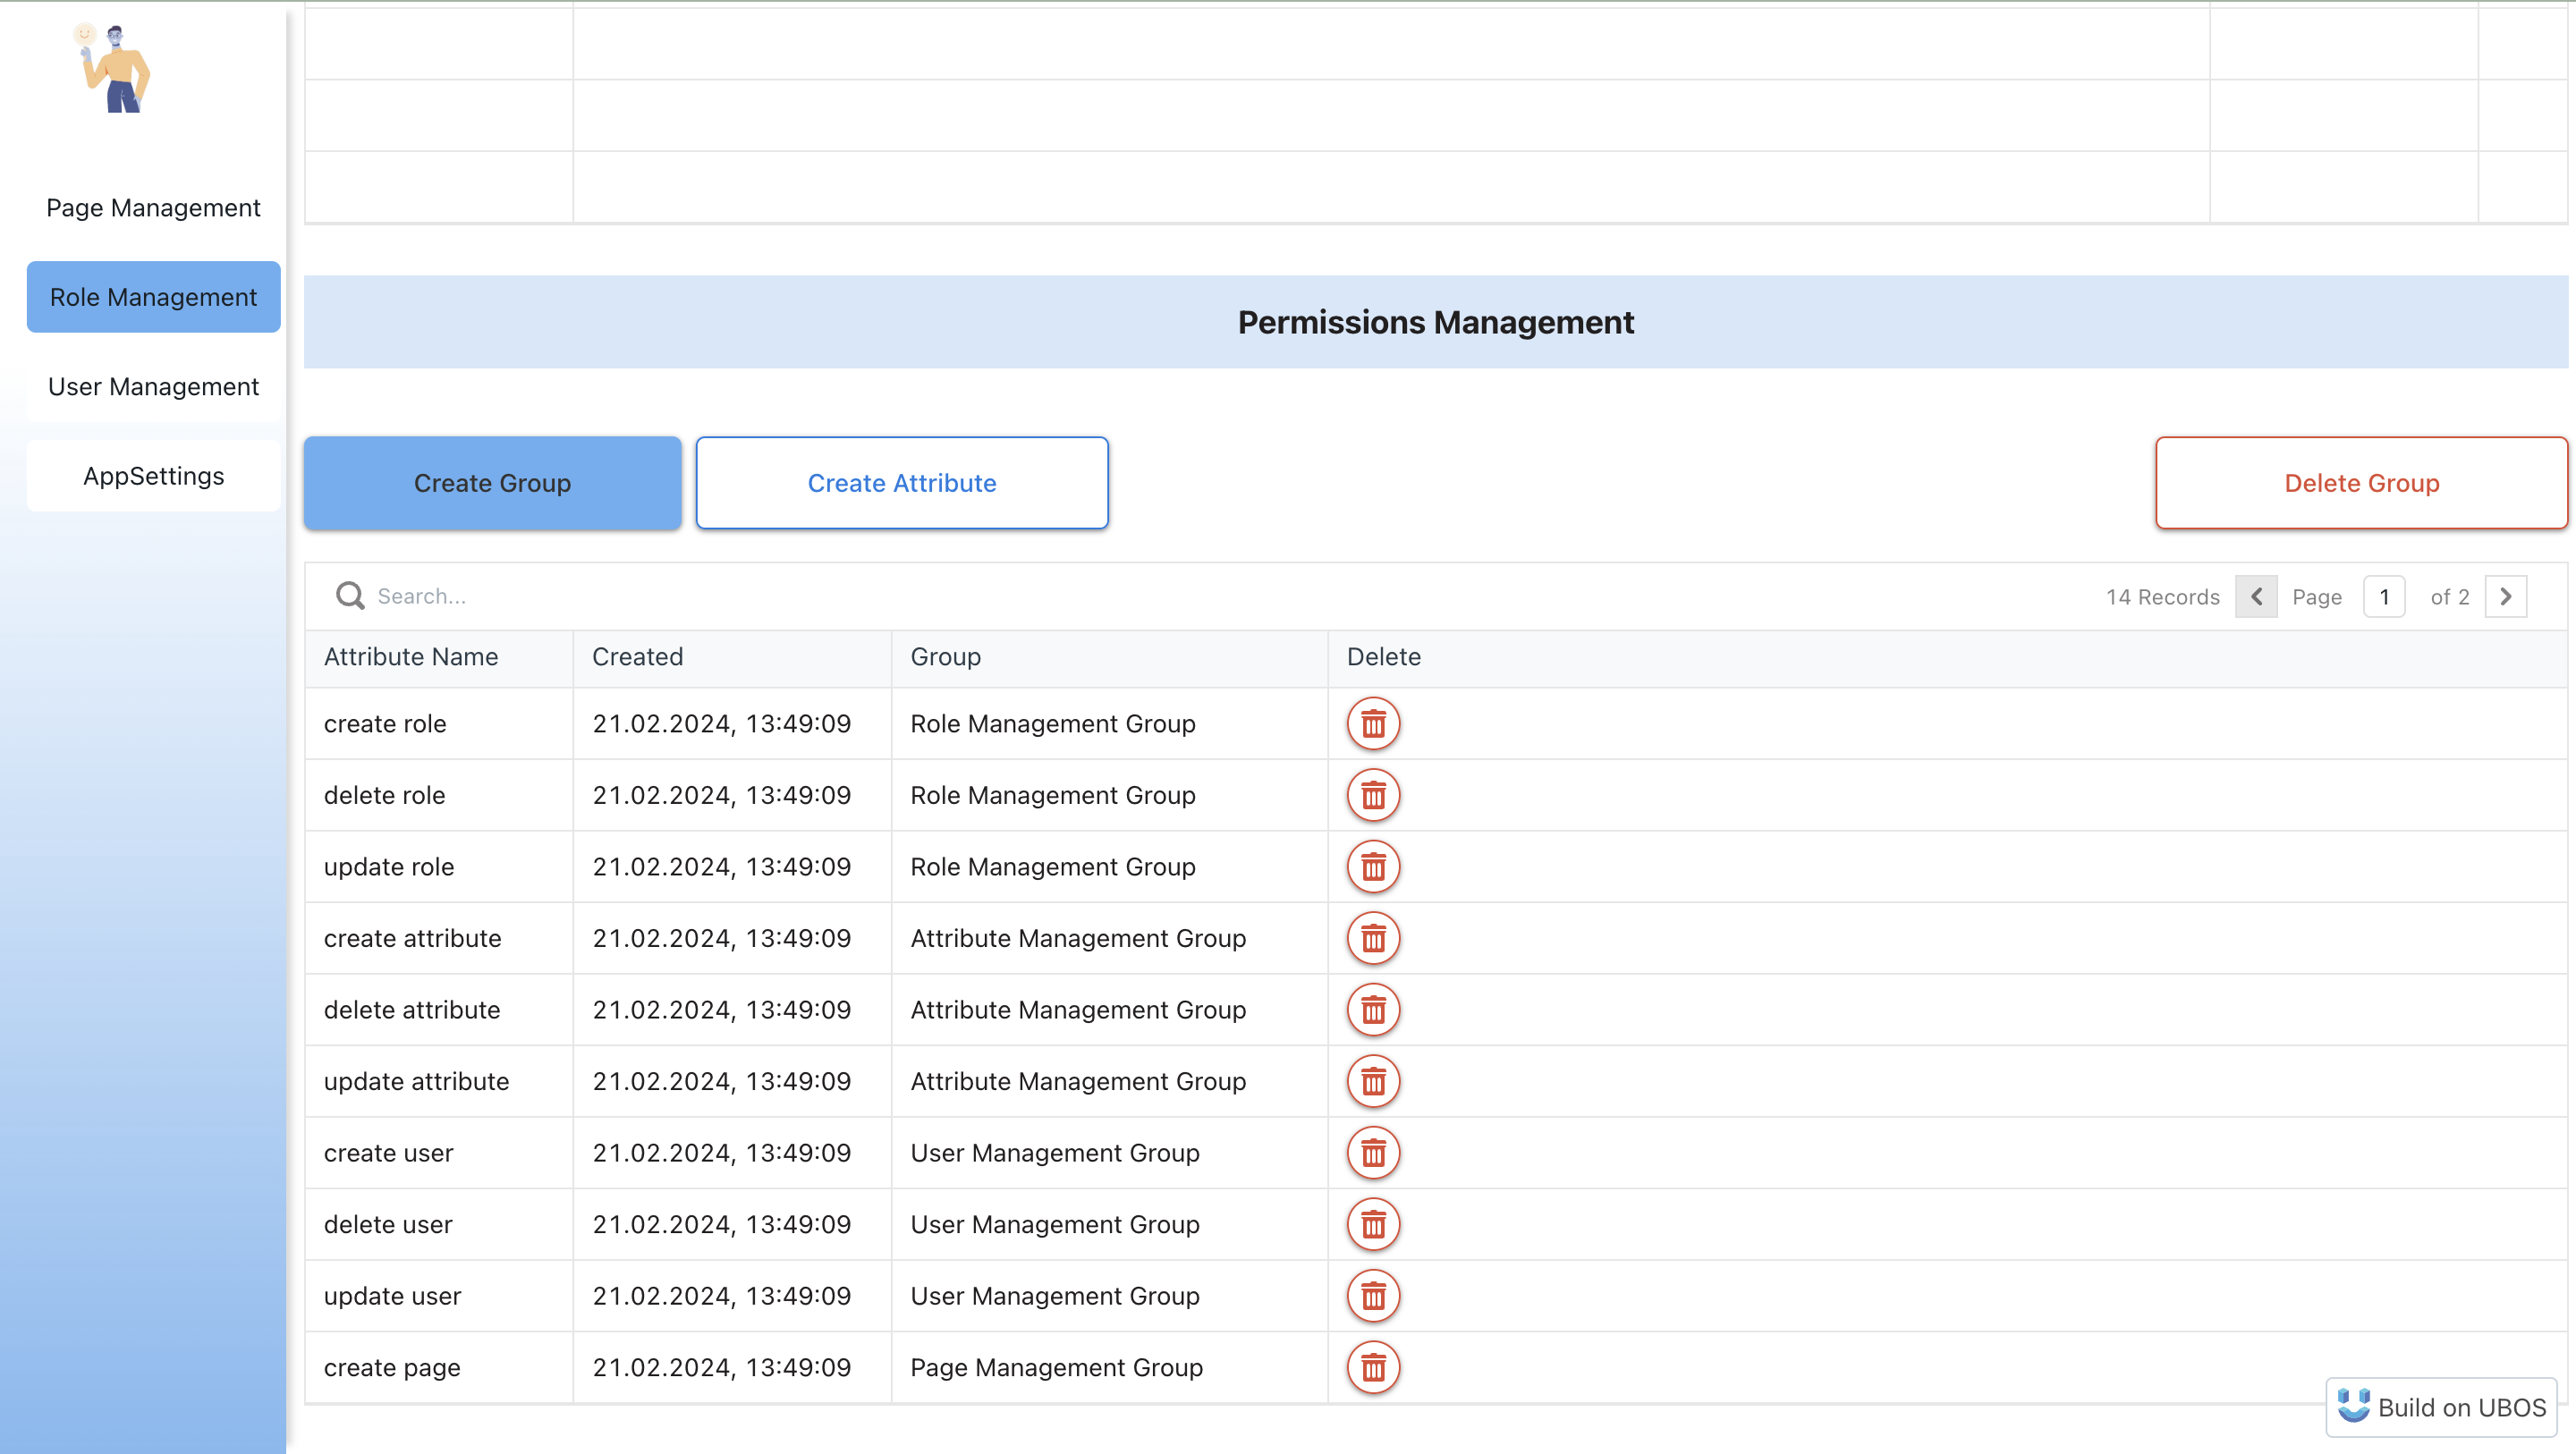
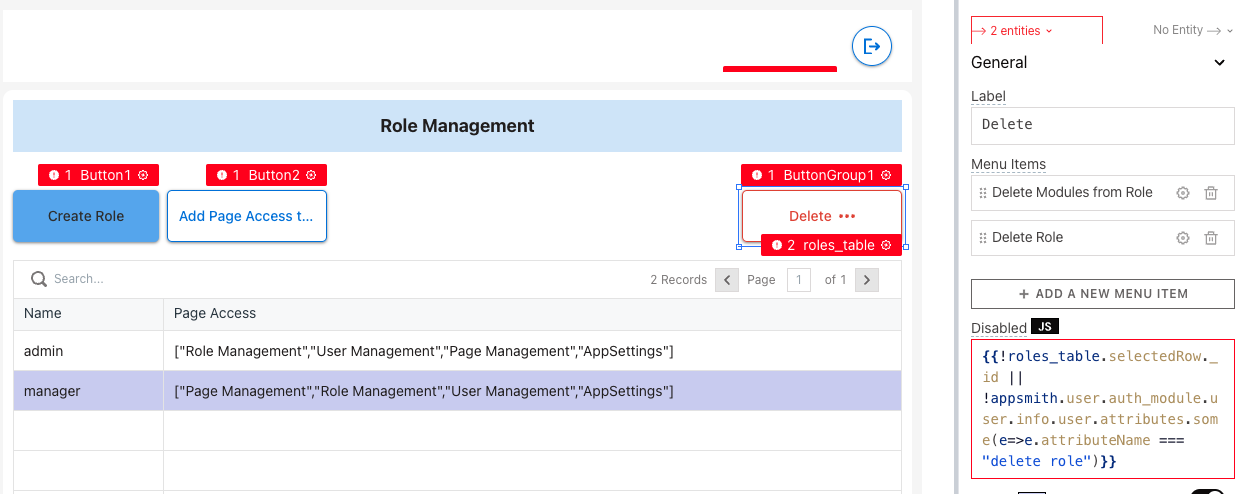
For elements on your pages that can perform actions like create, update, or delete, you can assign specific permissions using attributes. We recommend grouping attributes by the element name and naming the attributes by the action and element name.
To set up permissions:
- First, create an attribute group.
- Then, create the necessary attributes.
- Go to your UI and, for each active element (like a button or input widget) that requires permission, insert code into the disabled field. For example:
!appsmith.user.auth_module.user.info.user.attributes.some(e => e.attributeName === "delete role")
where attributeName is the name of the attribute you're checking for permission.
This process ensures that only users with the appropriate attributes can perform certain actions, enhancing the security and functionality of your application.
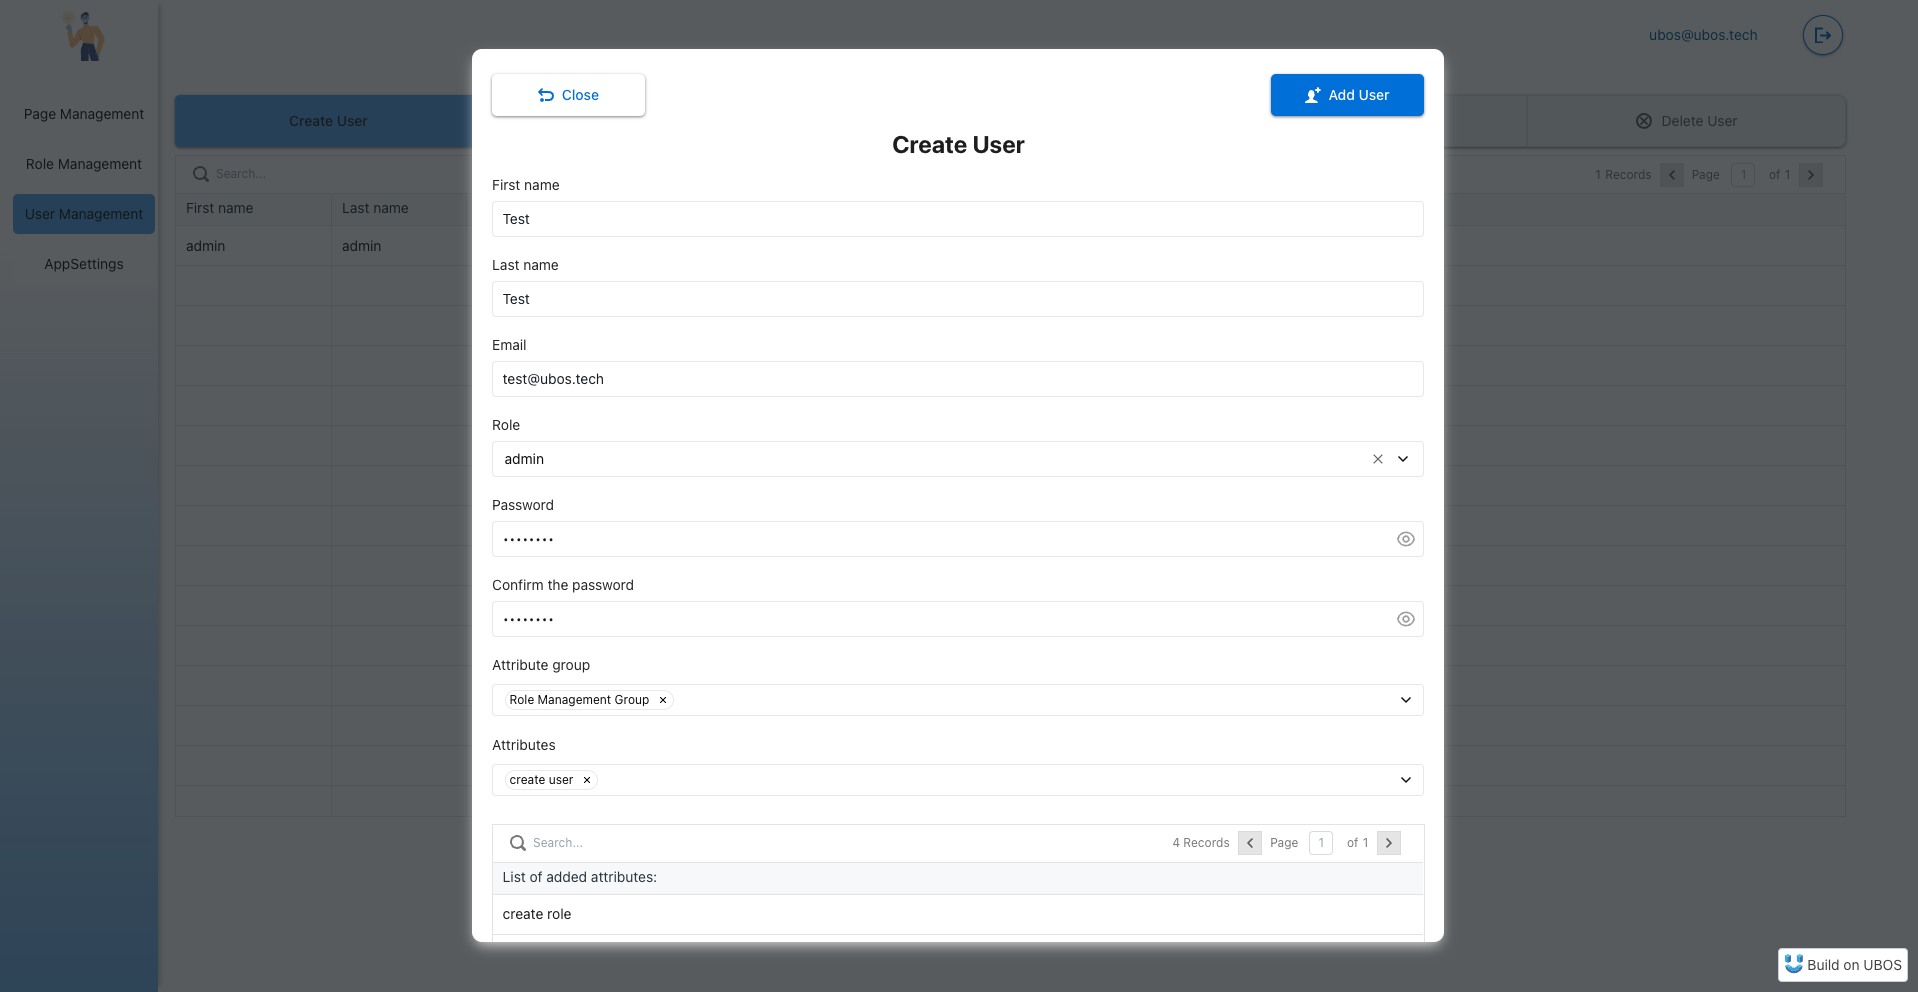
6. Creating Users
To finalize the setup, creating users for the application is done through the User Management page.

Create a new user by clicking the Create User button. You will need to fill out all required fields and assign the necessary rights in the form of attributes. For ease of management, attributes can be added both as groups and individually. Upon creation, an invitation will be sent to the new user's email, prompting them to start using the application.
Once a user logs into the application, they will only be able to access pages and perform actions that are permitted by their role and the attributes assigned to them.
For instance, in the example below, the user has not been granted the rights to create, edit, or delete, rendering these options disabled for them.

This method ensures a secure and efficient way to manage user permissions within the application, aligning with the principles of least privilege and role-based access control.
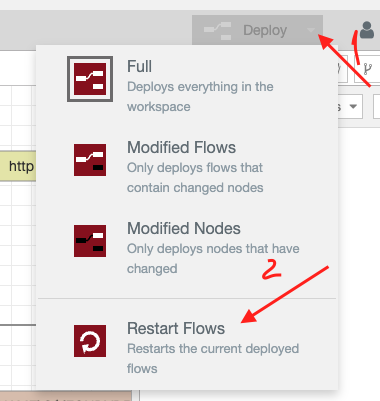
Note:
Before using template, you need to restart Node-Red flows. Please go to your Node-RED environment and restart them.
Summing up, this guide not only provides a step-by-step methodology for setting up a Unified Authorization Template but also emphasizes the importance of a well-structured authorization system in protecting sensitive information and ensuring a seamless user experience. By following these guidelines, developers and administrators can create a secure, efficient, and user-friendly environment that upholds the integrity of the application's access control policies.

Top comments (0)