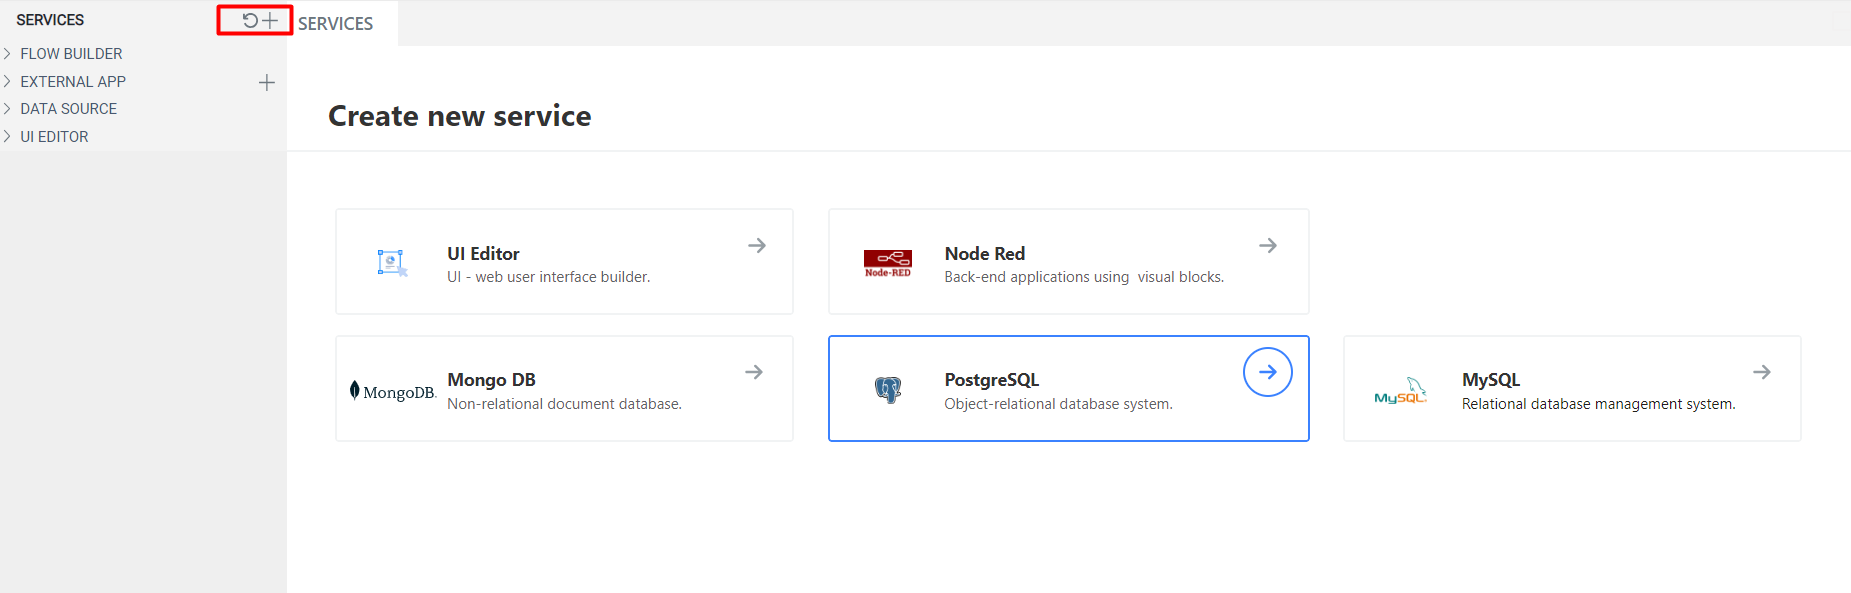
Most programs require data storage. On the UBOS platform, you can use an external database or configure your own. To create a new database, you need to open Services by clicking the "+" button, choose the desired database, and configure it.
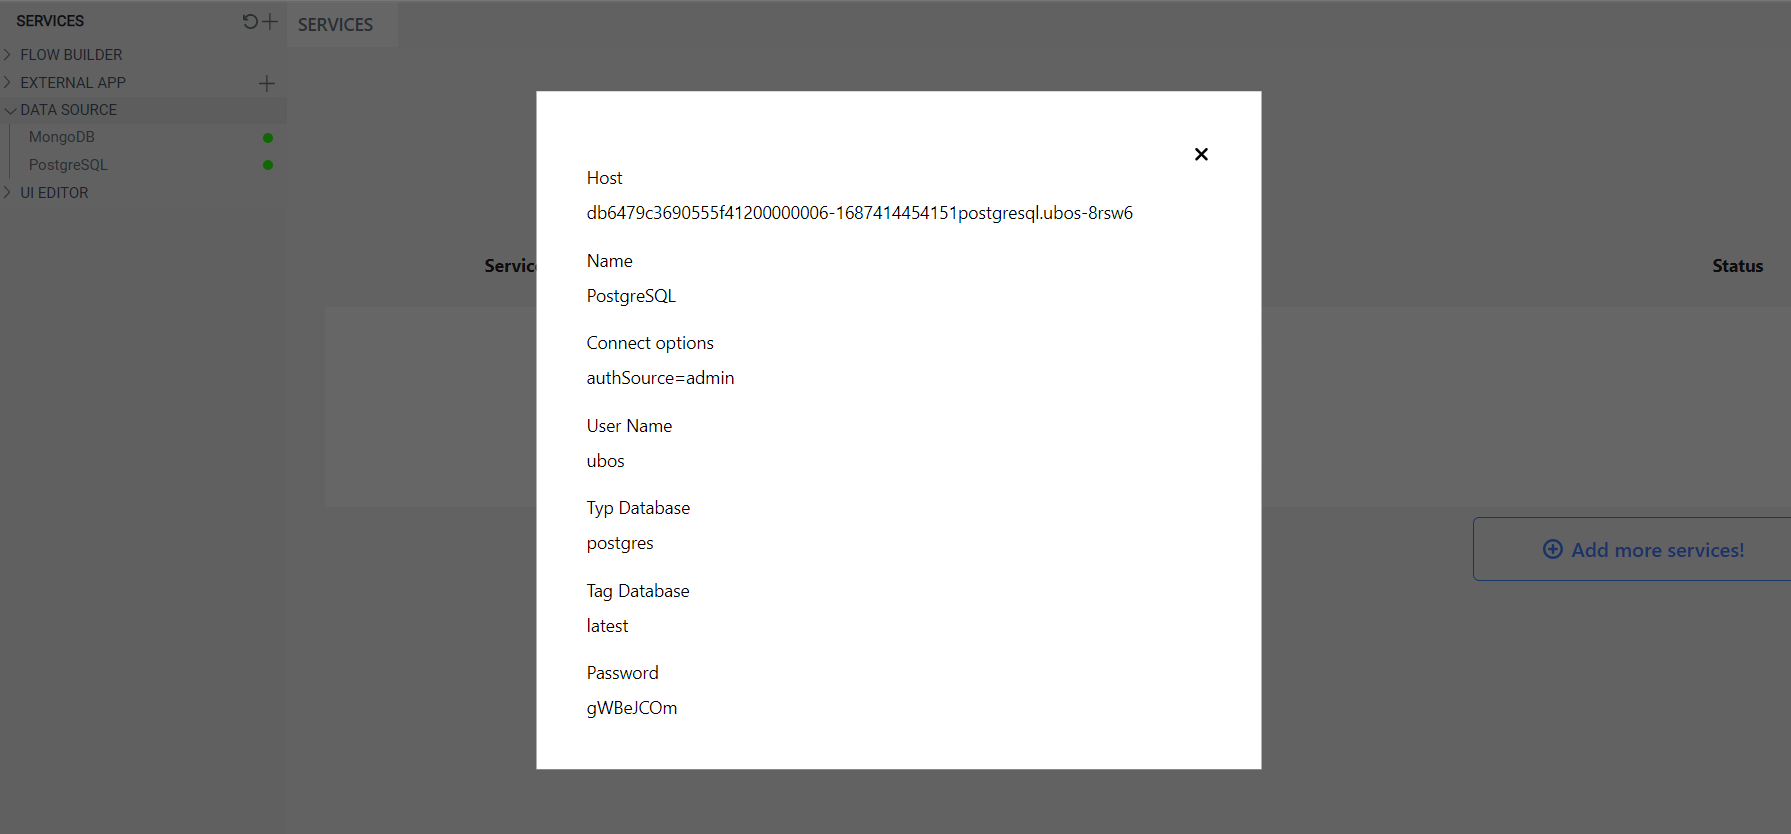
Once a green indicator appears in the left sidebar next to the created database, open the modal window where you can configure the new database.
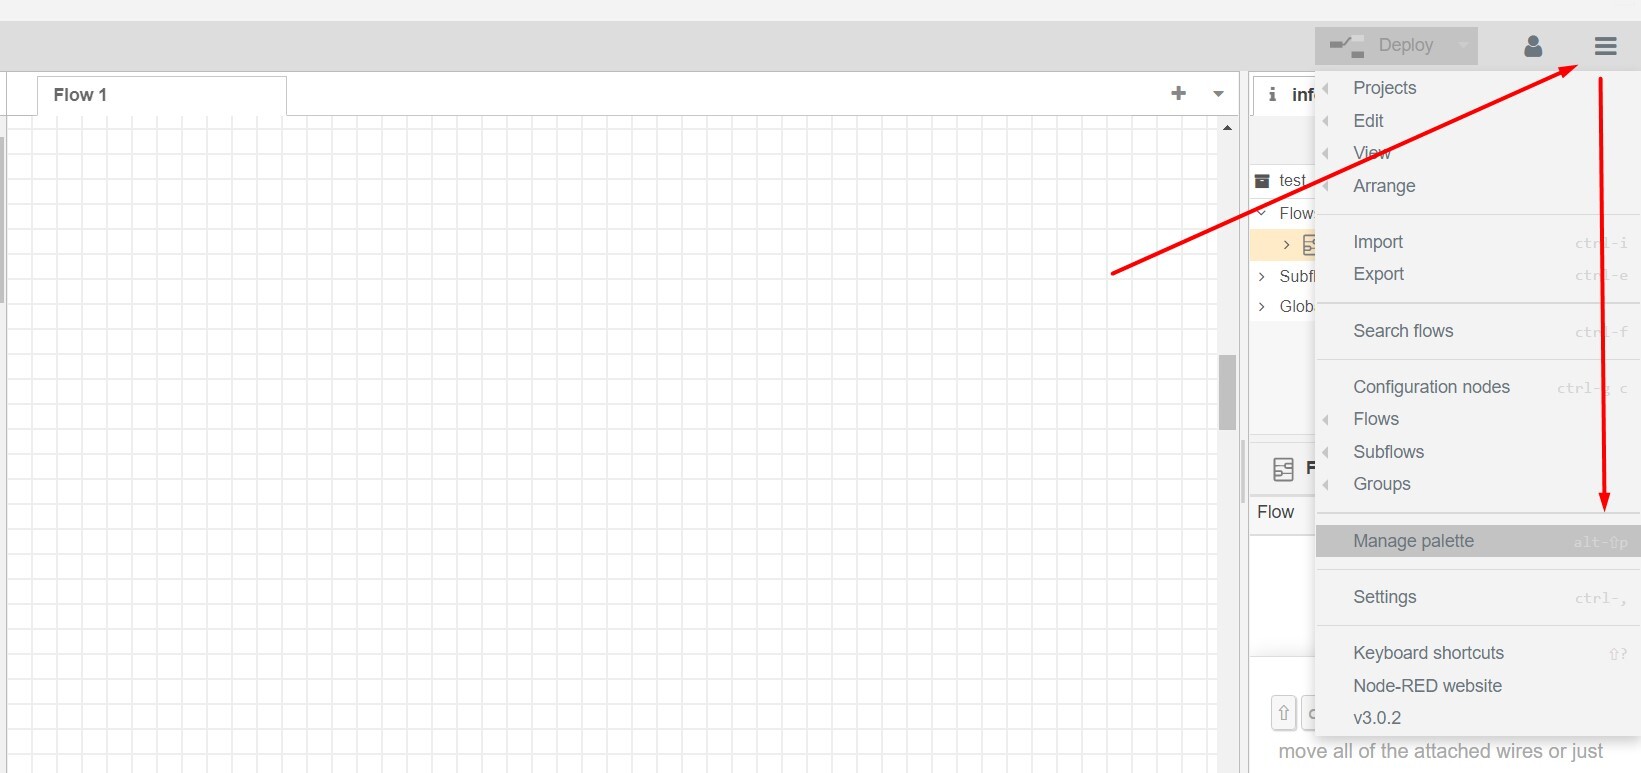
To use the PostgreSQL database in the Node-RED environment, you need to add nodes for working with it. Follow these steps:
- Open the Node-RED interface or editor.
- Click on the menu icon (represented by three horizontal lines) to expand the menu options.
- Select "Manage Palette" from the menu.
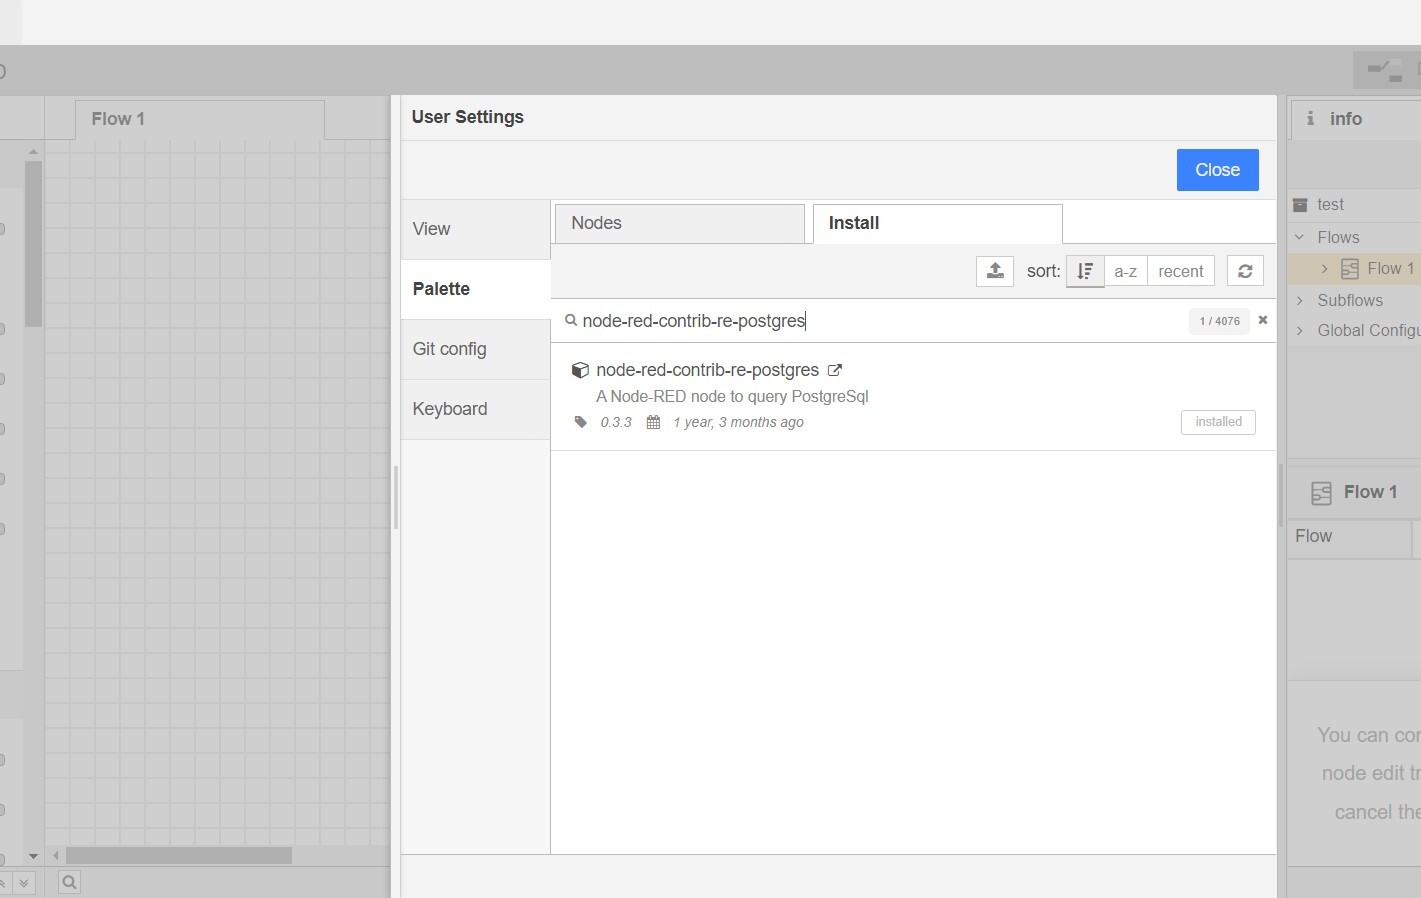
- In the Manage Palette window, click on the "Install" tab.
- Search for "node-red-contrib-re-postgres" in the search bar.
- Once you find the "node-red-contrib-re-postgres" package, click the "Install" button next to it.
- Wait for the installation process to complete.
- After the installation is finished, you can start using the PostgreSQL nodes in your Node-RED flows.
After that, we will have a node with the name postgres.
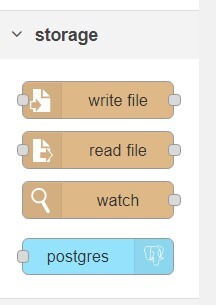
Move the postgres node to the workspace, double-click on the node twice, and edit it.
In the postgres node, you need to enter the information about the database you created.
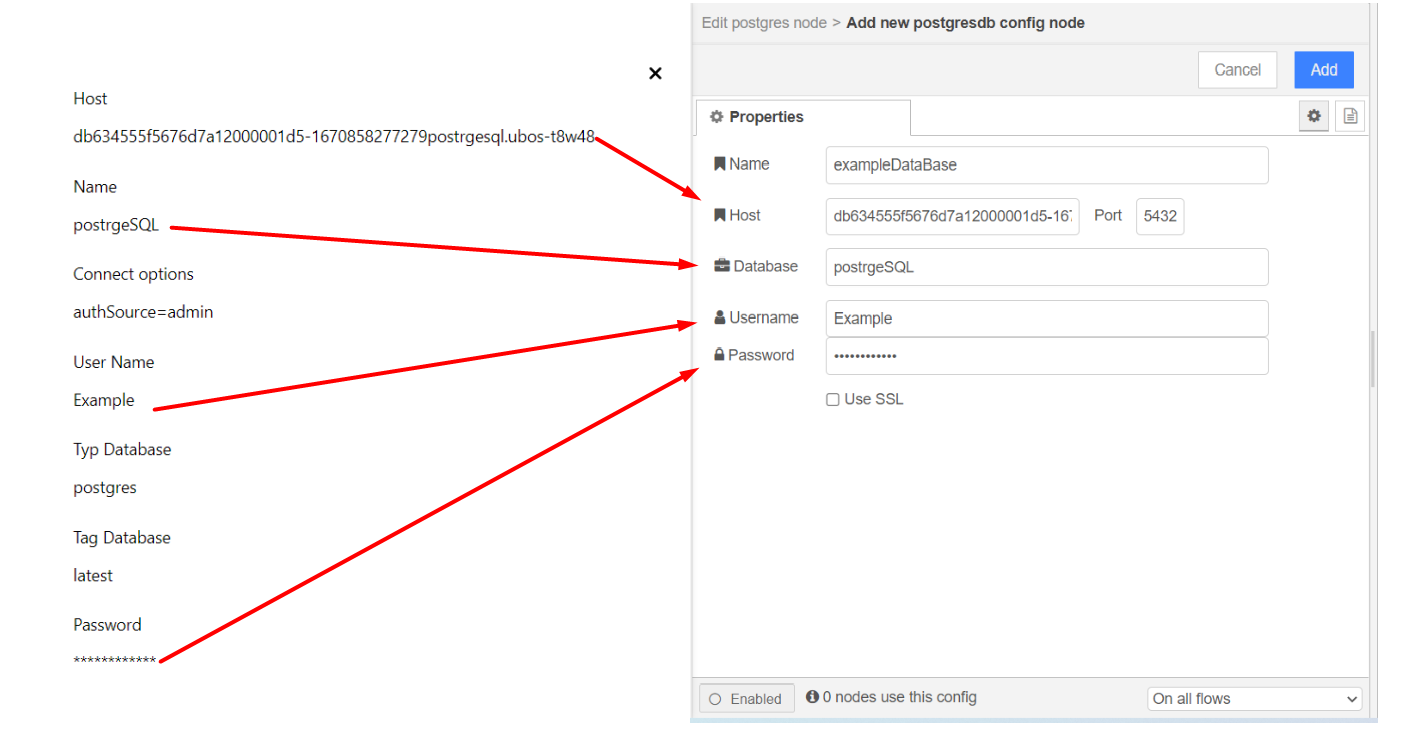
Host: Enter the host address.
Port: Leave it unchanged.
Database: Enter the name of the database.
Username: Enter the username.
Password: Enter the password.
Name: This is the configuration name, you can enter any desired name.
After filling in the information, click the Add button.
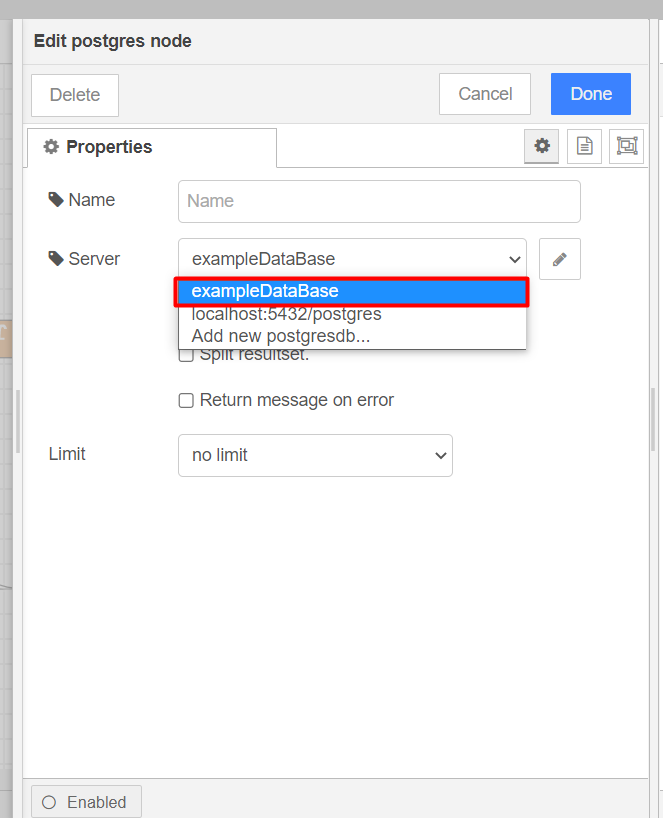
Choose the name of our configuration (as entered in the previous step). Select Receive query output, and you can fill in the Name field, which will be the name displayed for the node on the workspace.
Click "Deploy" to save the node settings.
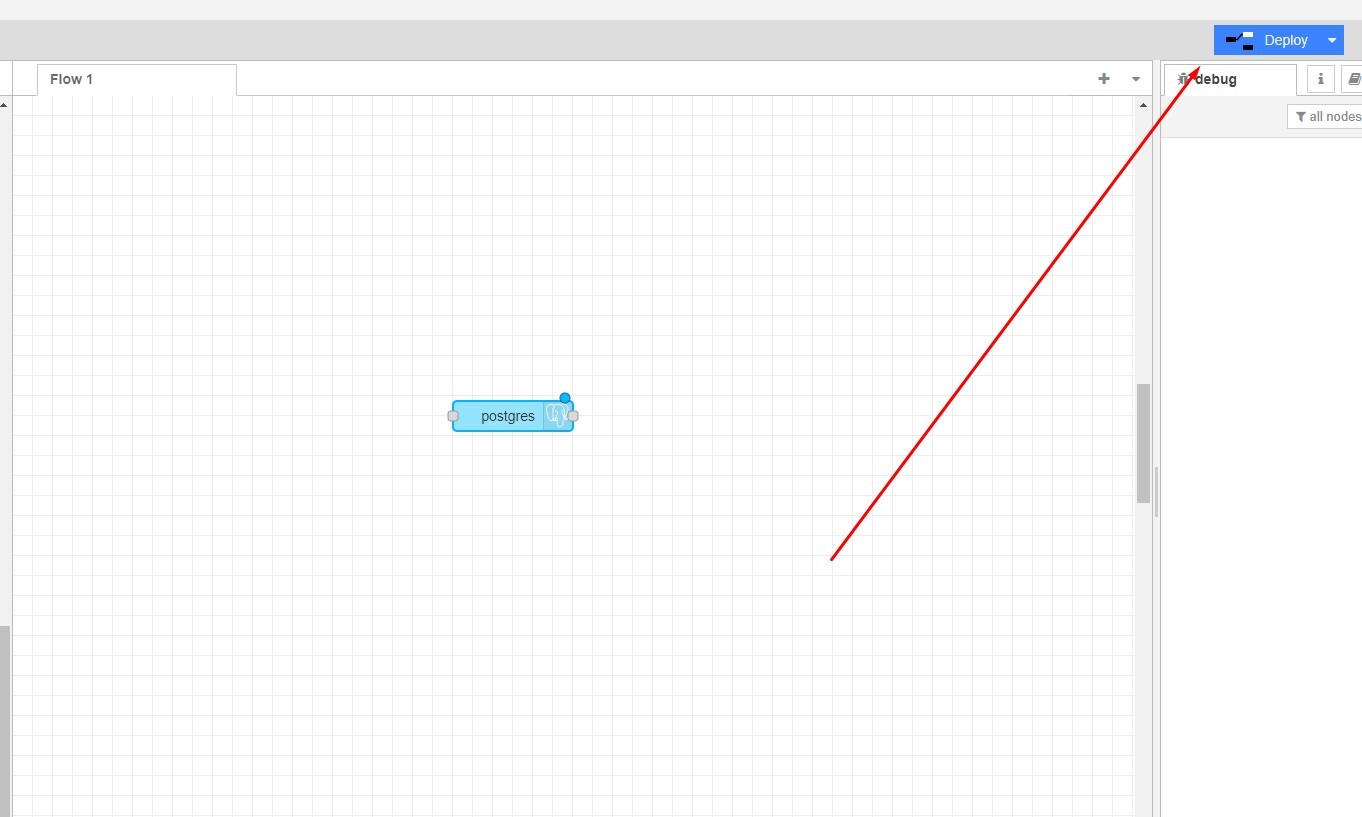
Table Creation.
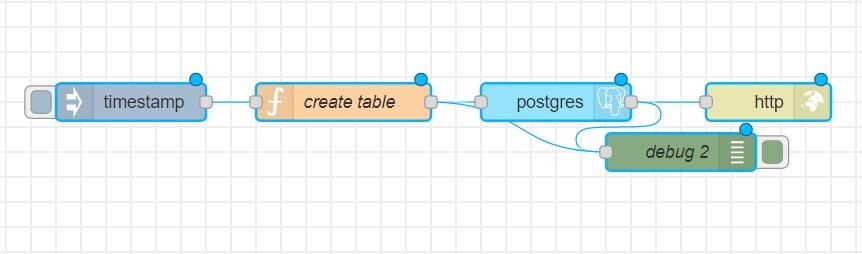
To create a table, you will need 5 nodes:
- іnject
- function
- postgres
- http response
- debug
In the function, specify the table name, fields, and data types.
For example, let's create a table called people with 4 fields: user_id, name, age, and country. Here's the structure:
- user_id: Primary key of type INTEGER.
- name: Name of the person, with type TEXT.
- age: Age of the person, with type INTEGER.
- country: Country of the person, with type TEXT.
You can use the following code to create the table:
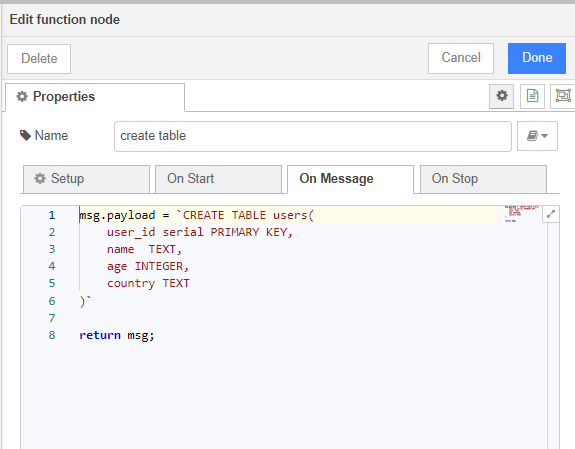
msg.payload = `CREATE TABLE users(
    user_id serial PRIMARY KEY,
    name  TEXT,
    age INTEGER,
    country TEXT
)`

return msg;
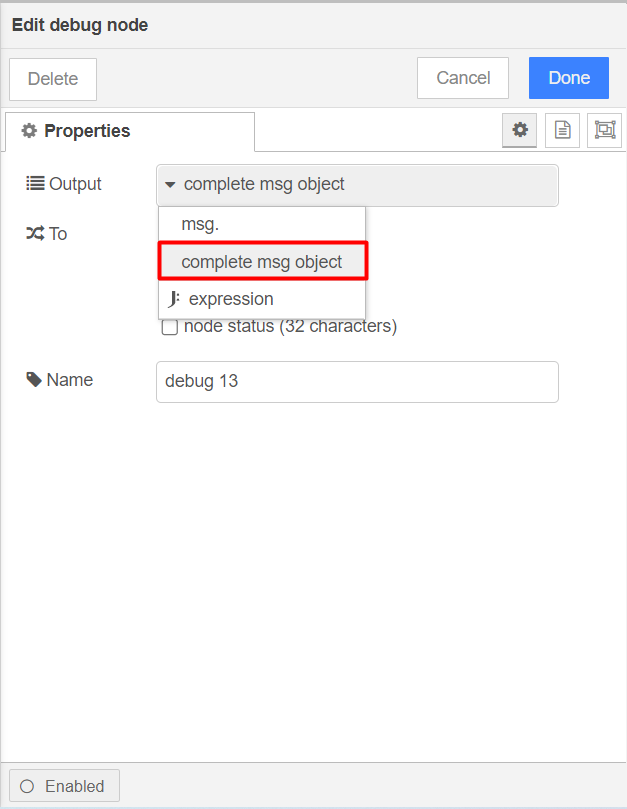
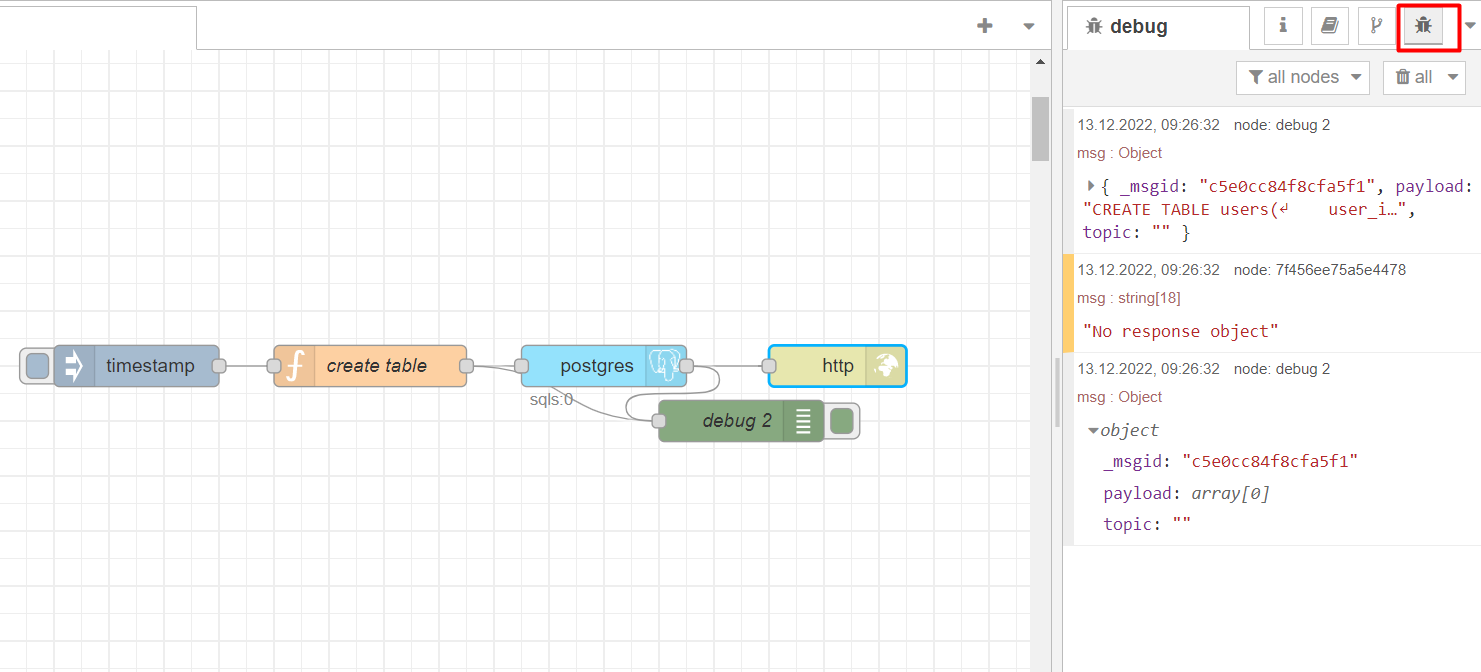
To understand the execution result, in the debug node, select complete msg object.
Click Deploy, and then click on Inject.
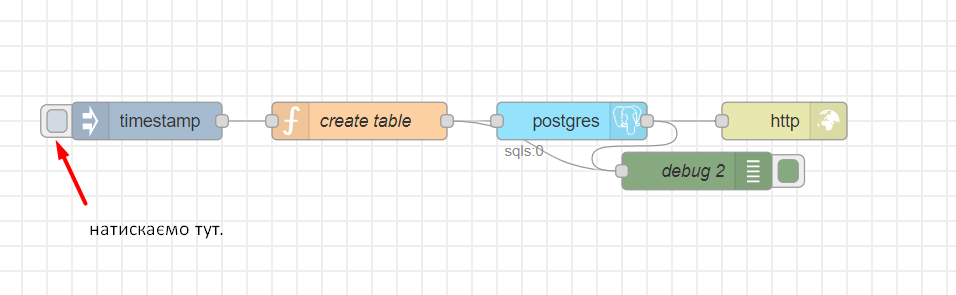
You can view the execution result in the debug output, which will display the relevant information.
POST Request.
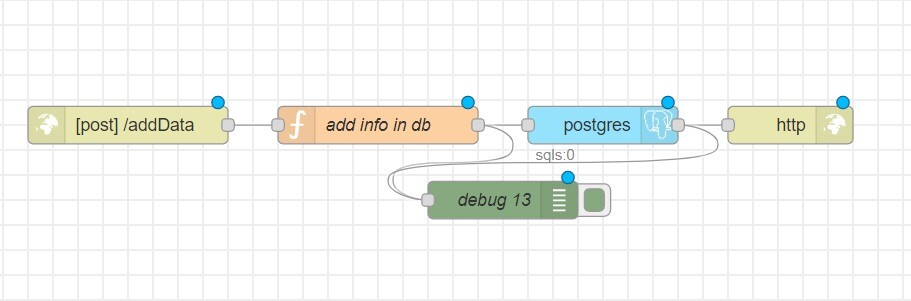
To add data to the table, you need to create an endpoint. Use the following nodes:
- http in
- function
- postgres
- http response
- debug
In the http in node, select the POST method and create a unique address that can be used to access the endpoint from the UI service. You can learn how to do this [here].(https://community.ubos.tech/blue_skies/introduction-and-familiarization-with-the-node-red-environment-2hio#chapter-3).
In the function node, specify the table to which you want to make the record, list the fields, and provide their corresponding values. The sequence of fields and their values is important!
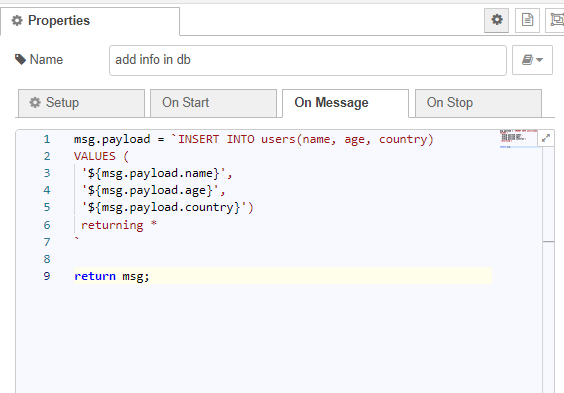
msg.payload = `INSERT INTO users(name, age, country)
VALUES (
 '${msg.payload.name}',
 '${msg.payload.age}',
 '${msg.payload.counrty}')
 returning *
`
return msg;
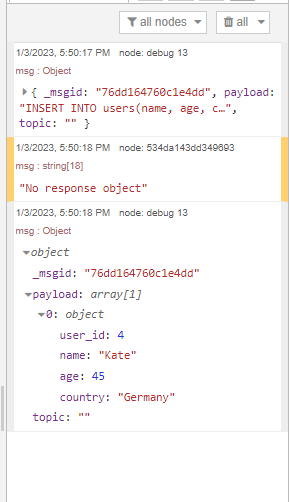
The execution result, which is displayed in the debug output:
GET Request.
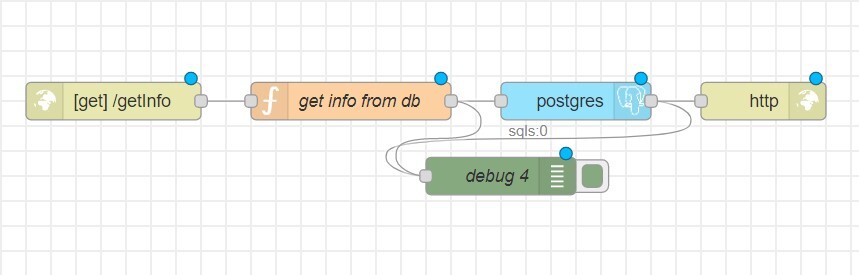
To retrieve data from the created table, you will need 5 nodes:
- http in
- function
- postgres
- http response
- debug
In the http in node, select the GET method.
In the function node, specify the data you want to retrieve. To retrieve all values, use SELECT *. To retrieve specific field values, use SELECT FIELD_NAME1, FIELD_NAME2.
Example 1 To retrieve all data, use the following code:
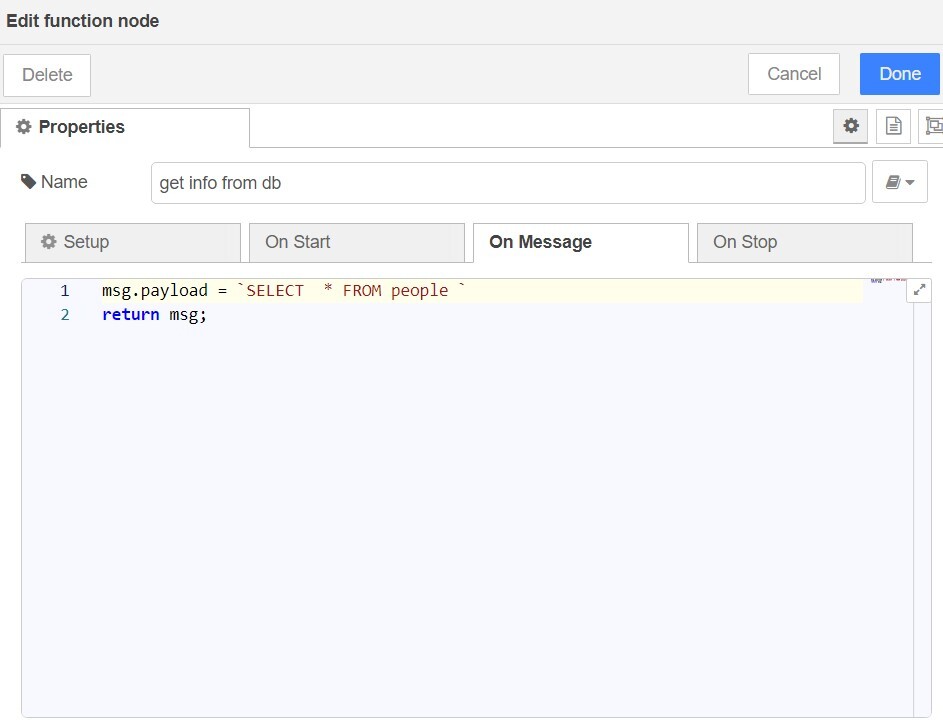
`SELECT * FROM users `
Result:
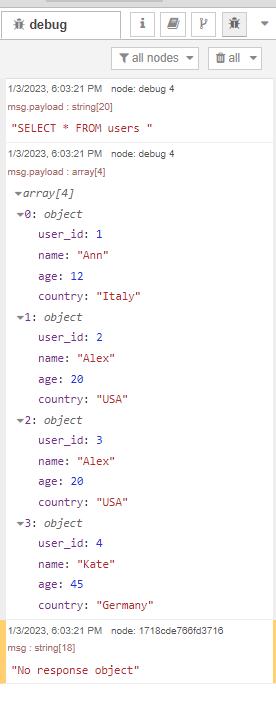
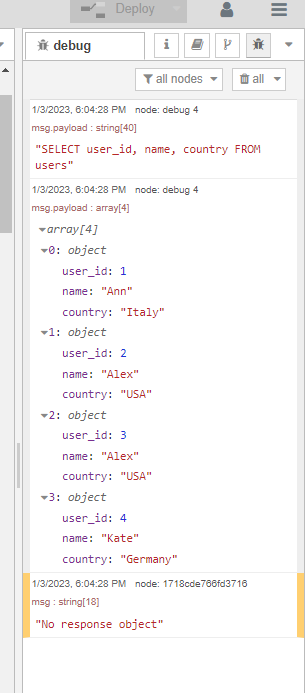
Example 2: To retrieve only the values of user_id, name, and country, use the following code:
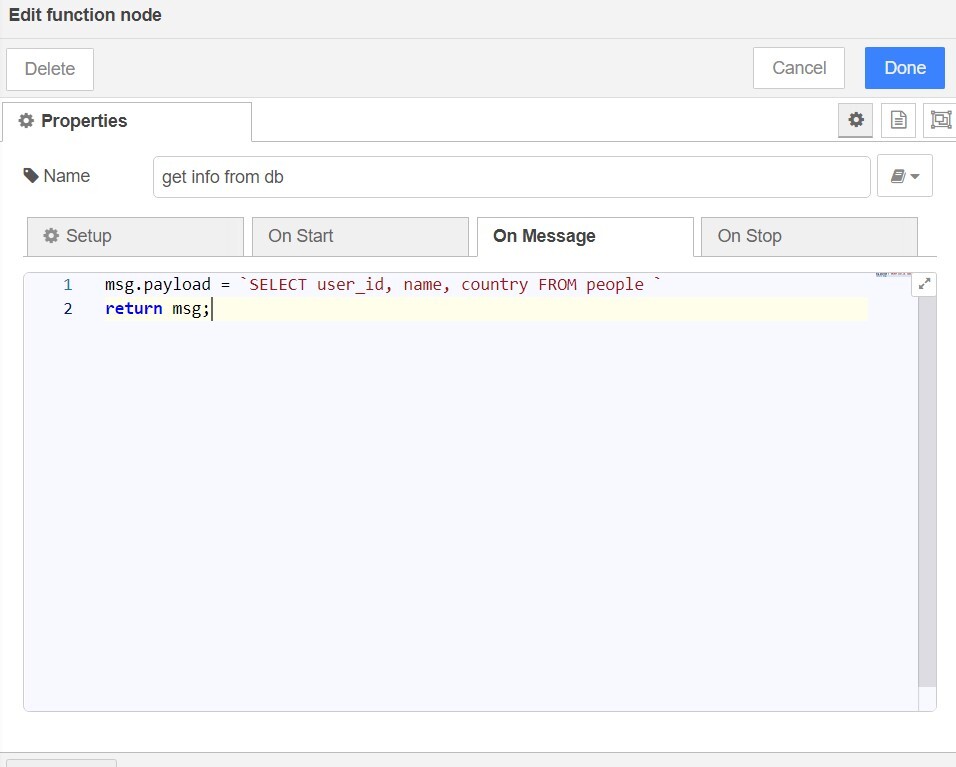
`SELECT user_id, name, country FROM users `
Result:
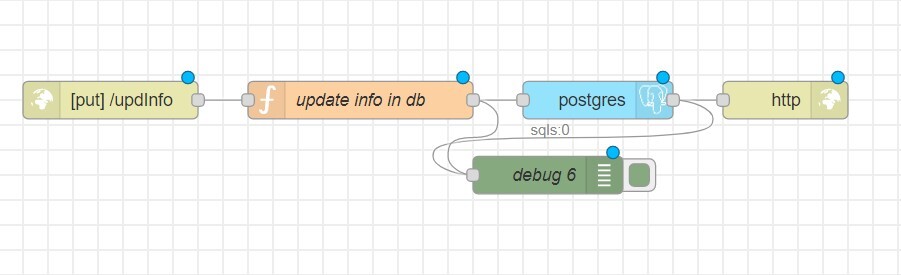
PUT Request.
To modify data in the created table, you will need 5 nodes:
- http in
- function
- postgres
- http response
- debug
In the http in node, select the PUT method.
In the function node, specify the table name, the fields to update, the new values, and the location where the update needs to be performed. For example, in the people table, we update the name, age, and country fields. We identify the object to update based on the user_id.
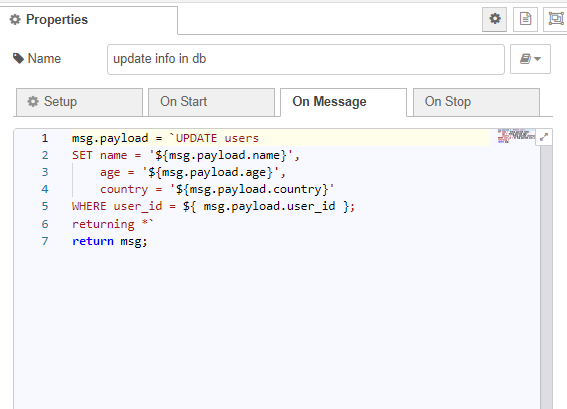
msg.payload = `UPDATE users
SET name = '${msg.payload.name}',
age = '${msg.payload.age}',
country = '${msg.payload.country}'
WHERE user_id = ${msg.payload.user_id};
returning *`
return msg;
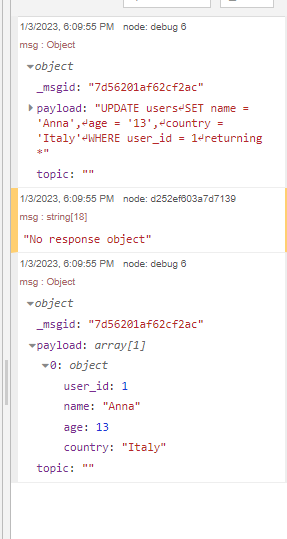
Result:
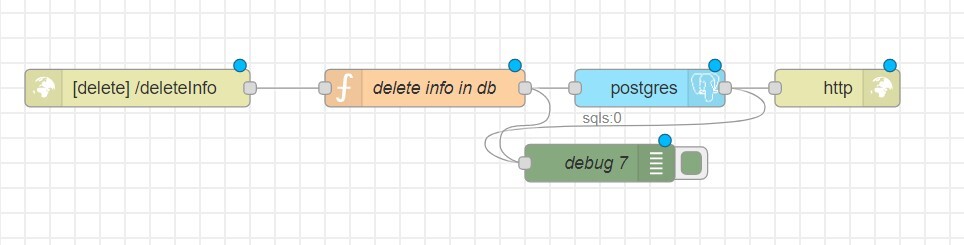
DELETE Request
To delete data from the created table, you will need 5 nodes:
- http in
- function
- postgres
- http response
- debug
In the http in node, select the DELETE method.
In the function node, specify the table name and the parameter by which you want to select the object for deletion. For example, in the people table, we delete the object based on the user_id value.
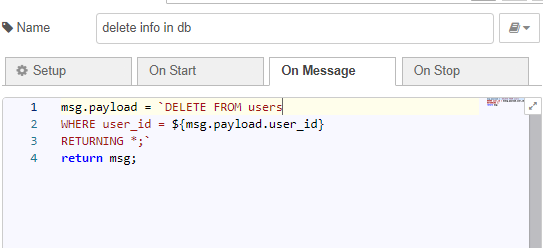
msg.payload = `DELETE FROM users
WHERE user_id = ${msg.payload.user_id}
RETURNING *;`
return msg;
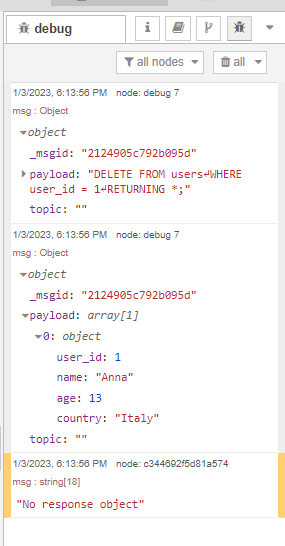
Result:

Top comments (0)