- Creating new Flow service
- Flow Builder Layout
- Creating first HTTP Endpoint
- Connecting API to HTTP Endpoint
- Displaying data on UI
Flow Builder allows you to create powerful workflows that can integrate with a wide range of external systems and implement complex logic for your application. Within a single workspace, you can have multiple instances of Flow Builder that can be combined or created as separate microservices.
Flow Builder is based on the open-source Node-RED system. Node-RED is a visual tool developed by IBM Emerging Technology and the open-source community for API development, Internet of Things (IoT) devices, and various online services. You can create intricate flows using a wide array of nodes and modules (3100+) and expand the functionality of your flow using any of the Node.js packages available in the public repository (225,000+), or create your own custom nodes.
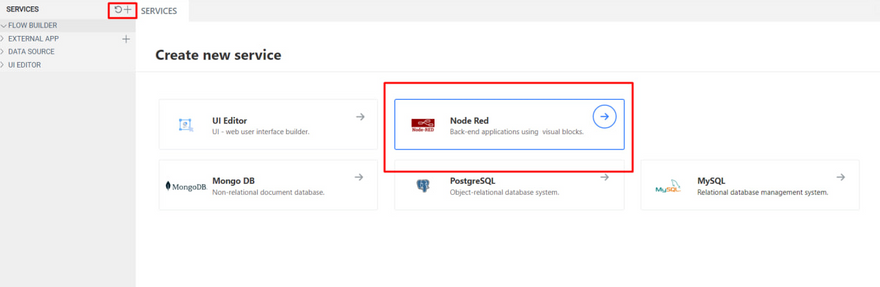
Creating a New Flow Service
On the UBOS platform, to create a new Flow Builder service. , you need to open Services by clicking the "+" button, choose the section "Node Red", and configure it.
Once you have selected "service plan" and filled "name" field, click the Create Service button, and the UBOS platform will start the installation process for your new service. On average, this process may take 1-2 minutess. Until the service becomes available to you, it will be in a pending state, and you can find it in the dropdown list of NodeRed in the service manager.
Once the new service becomes available, to open it, you need to click on the name of the service, and it will open in the Main Workspace.
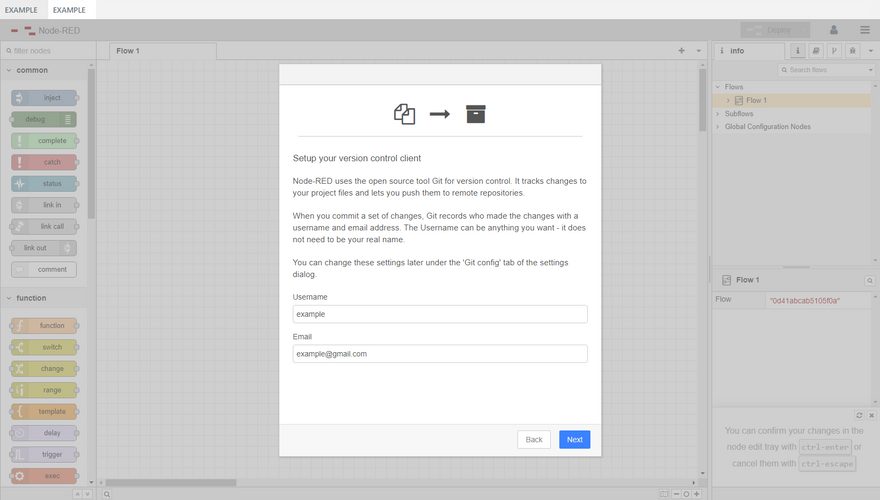
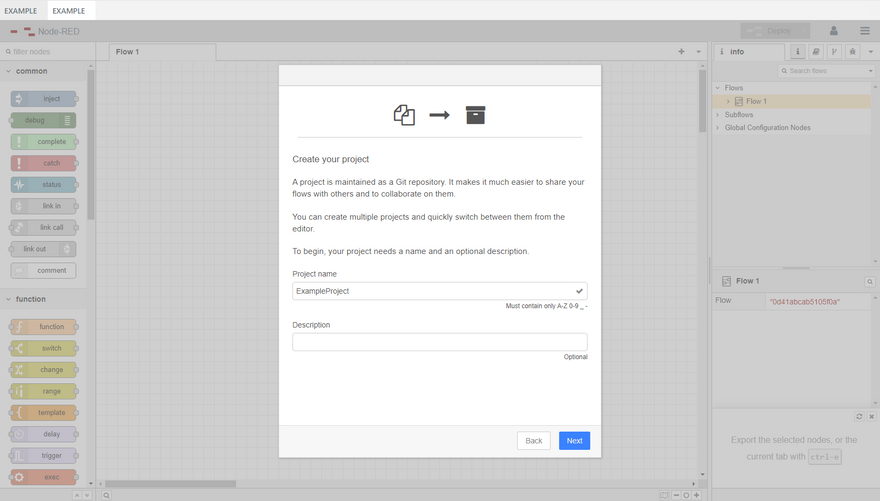
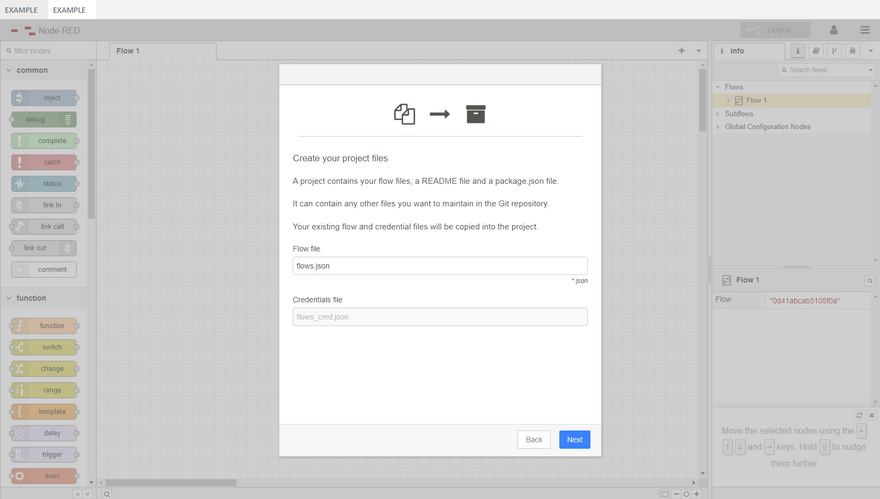
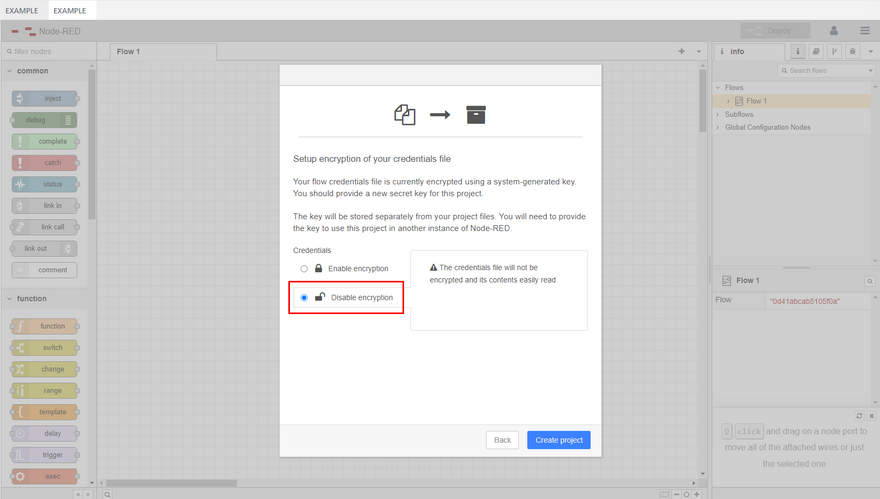
Upon clicking the name of your environment for the first time, Node-RED will provide you with the option to create a new project or copy an existing one.
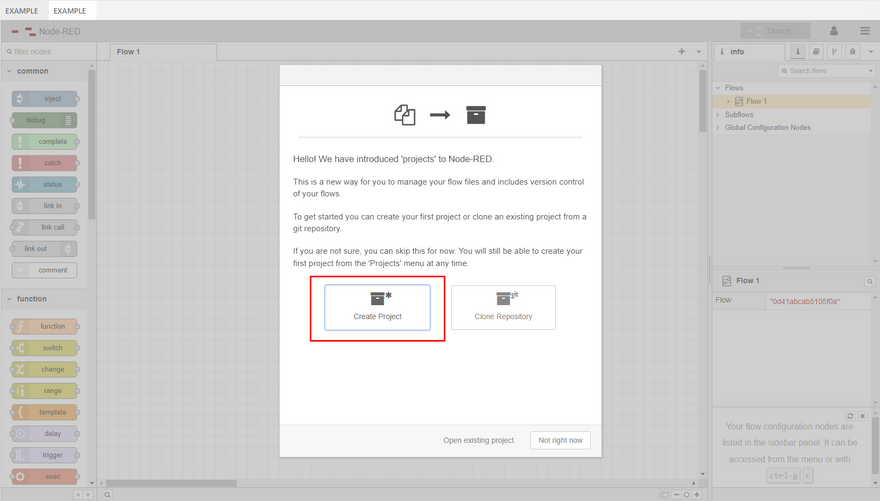
The scenario of copying an existing project is not being discussed at the moment. To create a new project, you need to click on the field labeled "Create Project". After that, you should fill in the following fields: Username, Email, Project name, description (optional), leave the project Flow file field unchanged, and select Credentials: Disable encryption.
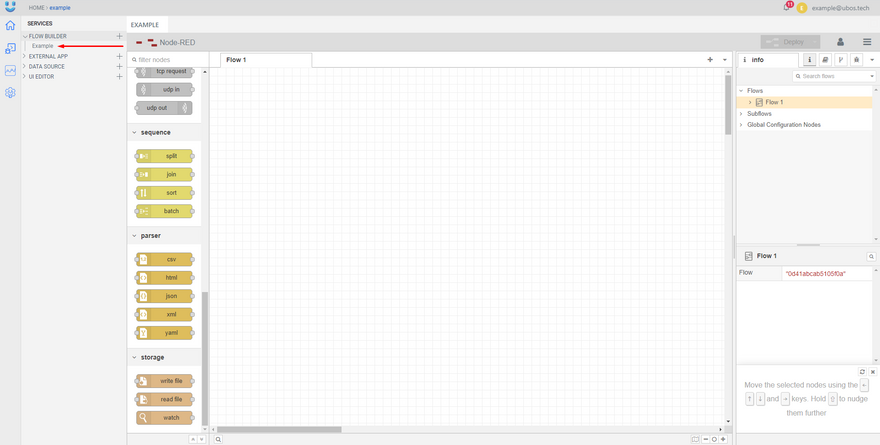
Flow Builder Layout
The basic layout of Flow Builder consists of four main areas:
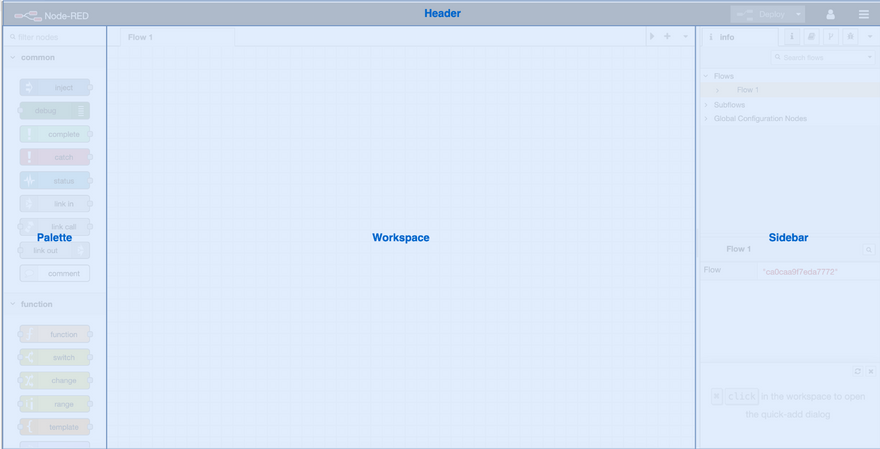
Header - Here you can find various deployment options for your flow and the main Flow Builder menu.
Palette - It contains all the available nodes that can be used.
Workspace - This is the area where you create your flows.
Sidebar - It contains tabs that provide a wide range of useful tools within the editor.
Creating first HTTP Endpoint
Let's create a simple HTTP endpoint that returns the static text "Hello World!". Drag and drop several nodes from the palette onto the workspace.
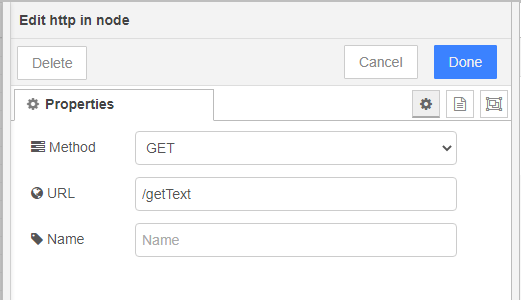
First, you need to find the HTTP In node, drag it onto the workspace, and double-click to open the node's settings.
The HTTP In node will listen for incoming requests. In the settings window, you need to select the method, which will be GET, and specify the endpoint name /hello in the URL field. Then, click the Done button in the settings window.
Next, let's find the function node, drag it into the workspace, and connect it to the "HTTP In" node.
function
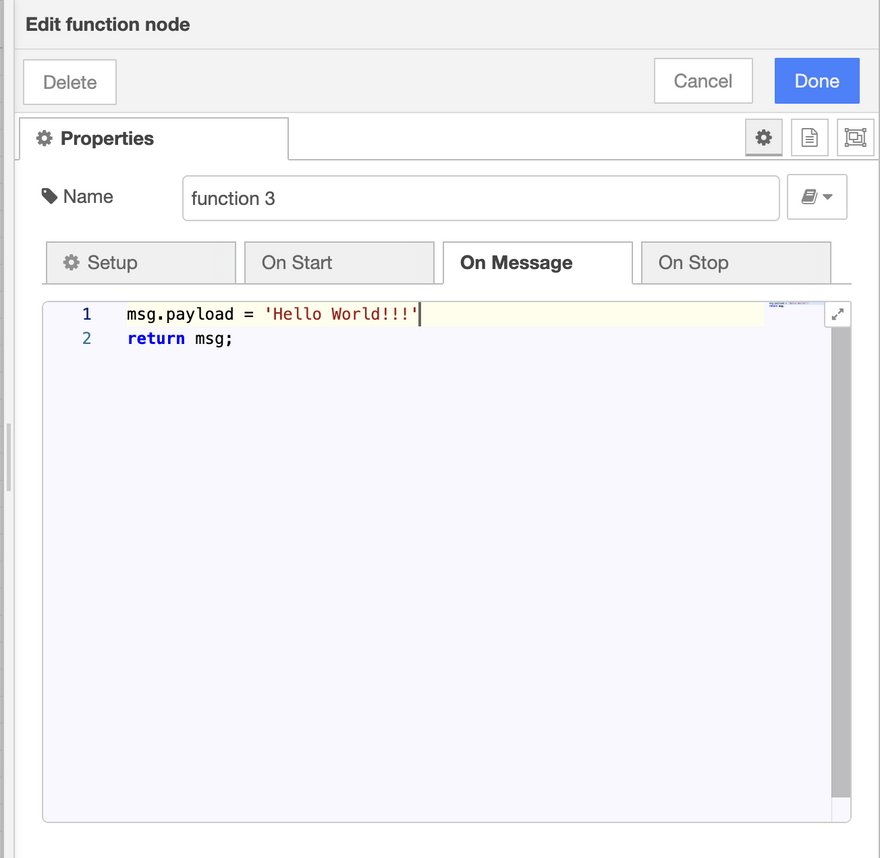
Flow needs to respond to the request with data from the Function node. To achieve this, let's find the HTTP Response node and connect it to the Template node.
Your flow should look like this:

Now you need to deploy your flow to make it accessible. To do this, click the Deploy button in the flow editor's header.

Connecting API to HTTP Endpoint
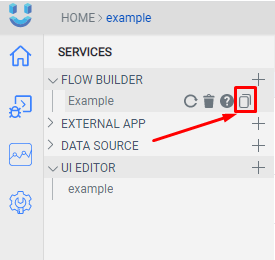
To connect an API to the HTTP endpoint, switch the editor to the UI Editor. In the UI editor, open the list of available APIs for the current page by clicking on the "APIS" row and selecting "API1" from the list to open the API panel.
If you don't see "API1" in the list, you can create a new one by clicking the "+" button in the "APIS" row.
Next, you need to add a link to the endpoint. You should copy the link to Node-RED and add the API name.
Copy the link to Node-RED, and let's add the API name.
To test the API, you need to click the Run button, and you will see the response in the Response field.
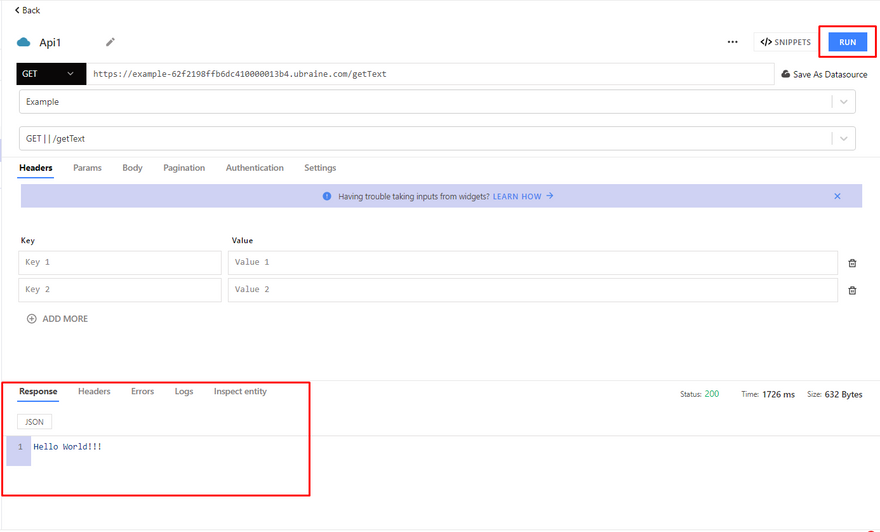
To close the API panel, click the Back button.
Displaying data on the UI
To display data in the user interface, we need to have two widgets. One widget will be a button widget that triggers API1, and the other will be a text widget that displays the response.
You can add a new "Button" widget to the page editor or use existing ones. Next, open the "SettingsWidget" window for the "Button" widget. At the bottom of the window, you will find the "Action" section and a property called onClick. Click on this field, and you will see a list of available actions.
After selecting API1, you will see that the onClick property has changed. So, when you click this button, it will trigger our API1, which will make an HTTP request to our Example.
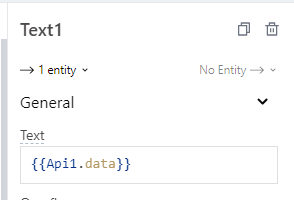
Now let's display the response data from API1 in a text widget. To do this, you need to drag a new text input widget from the widget panel into the page editor and open the widget's settings window.
In the Widget Settings window, locate the default Text property. In this property, you can enter static text or add dynamic data. We want to add dynamism to display the response data from API1. To do this, you need to enter a command inside the Text property.
The command should look like this: {{Api1.data}}
To test the changes, let's deploy the user interface application and check the modifications. Try clicking the button you have configured and observe the data that appears in the input fields intended to display the data.

Top comments (0)