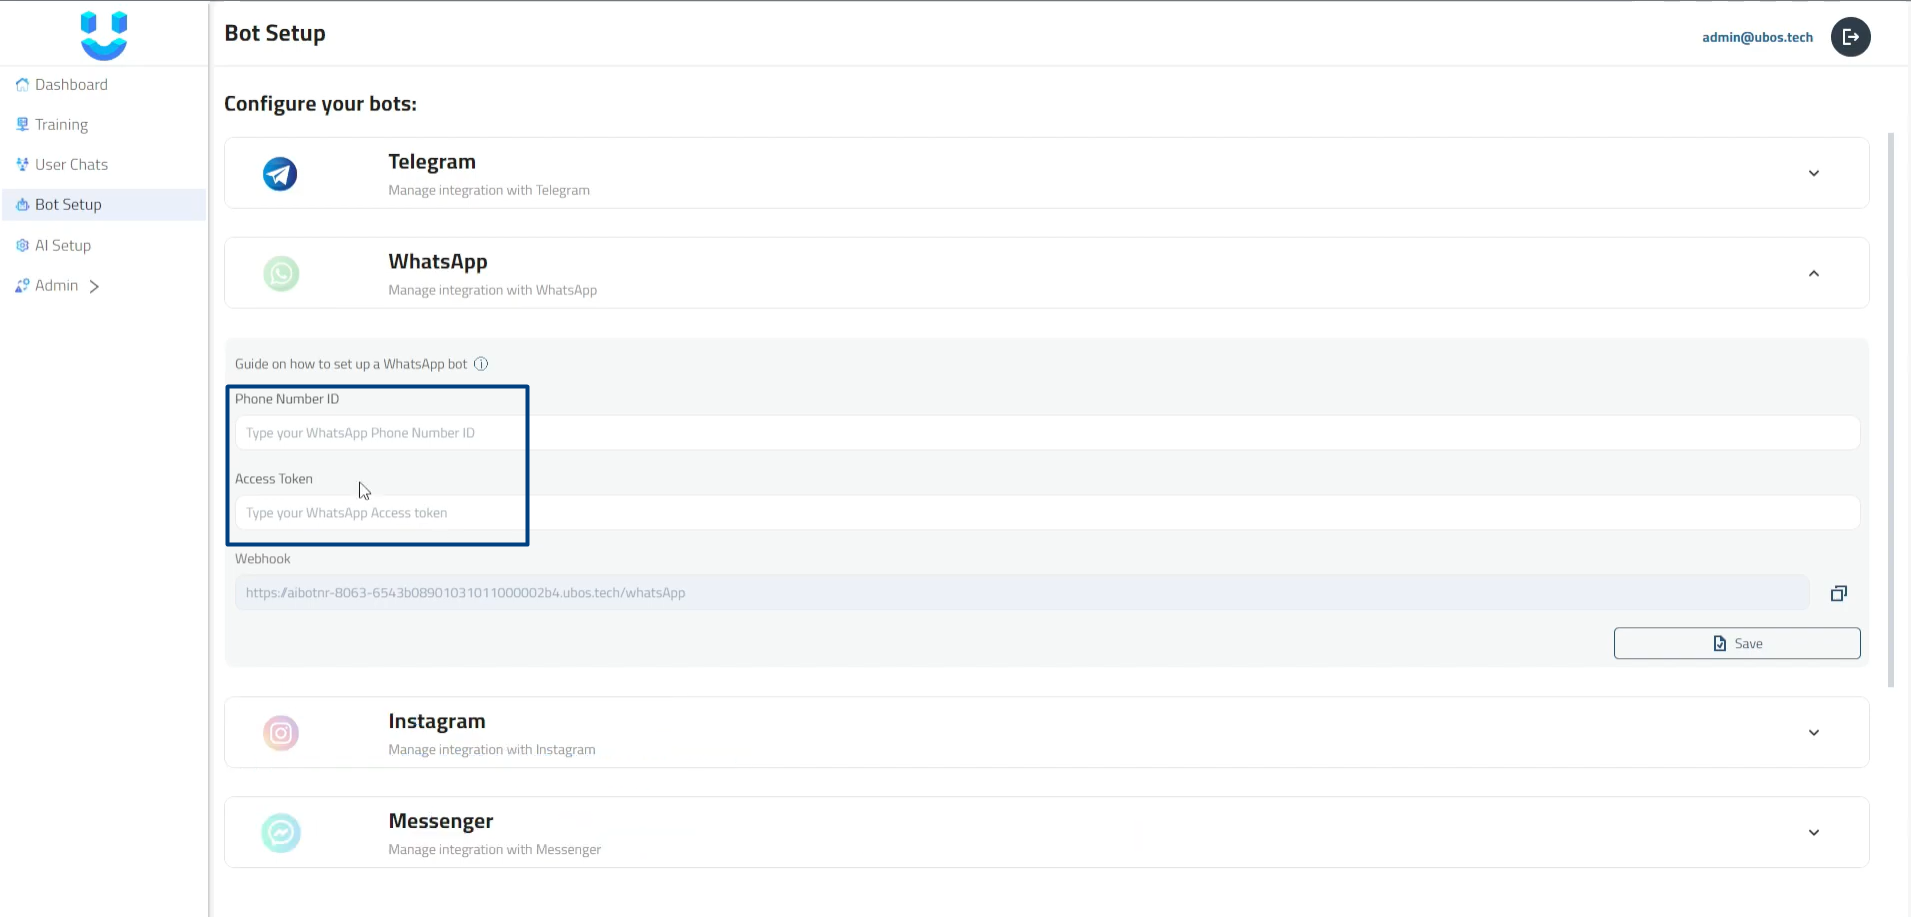
To set up a WhatsApp bot, you need to save the phone number ID and access token on your AI Bot application.
Access WhatsApp Configuration:
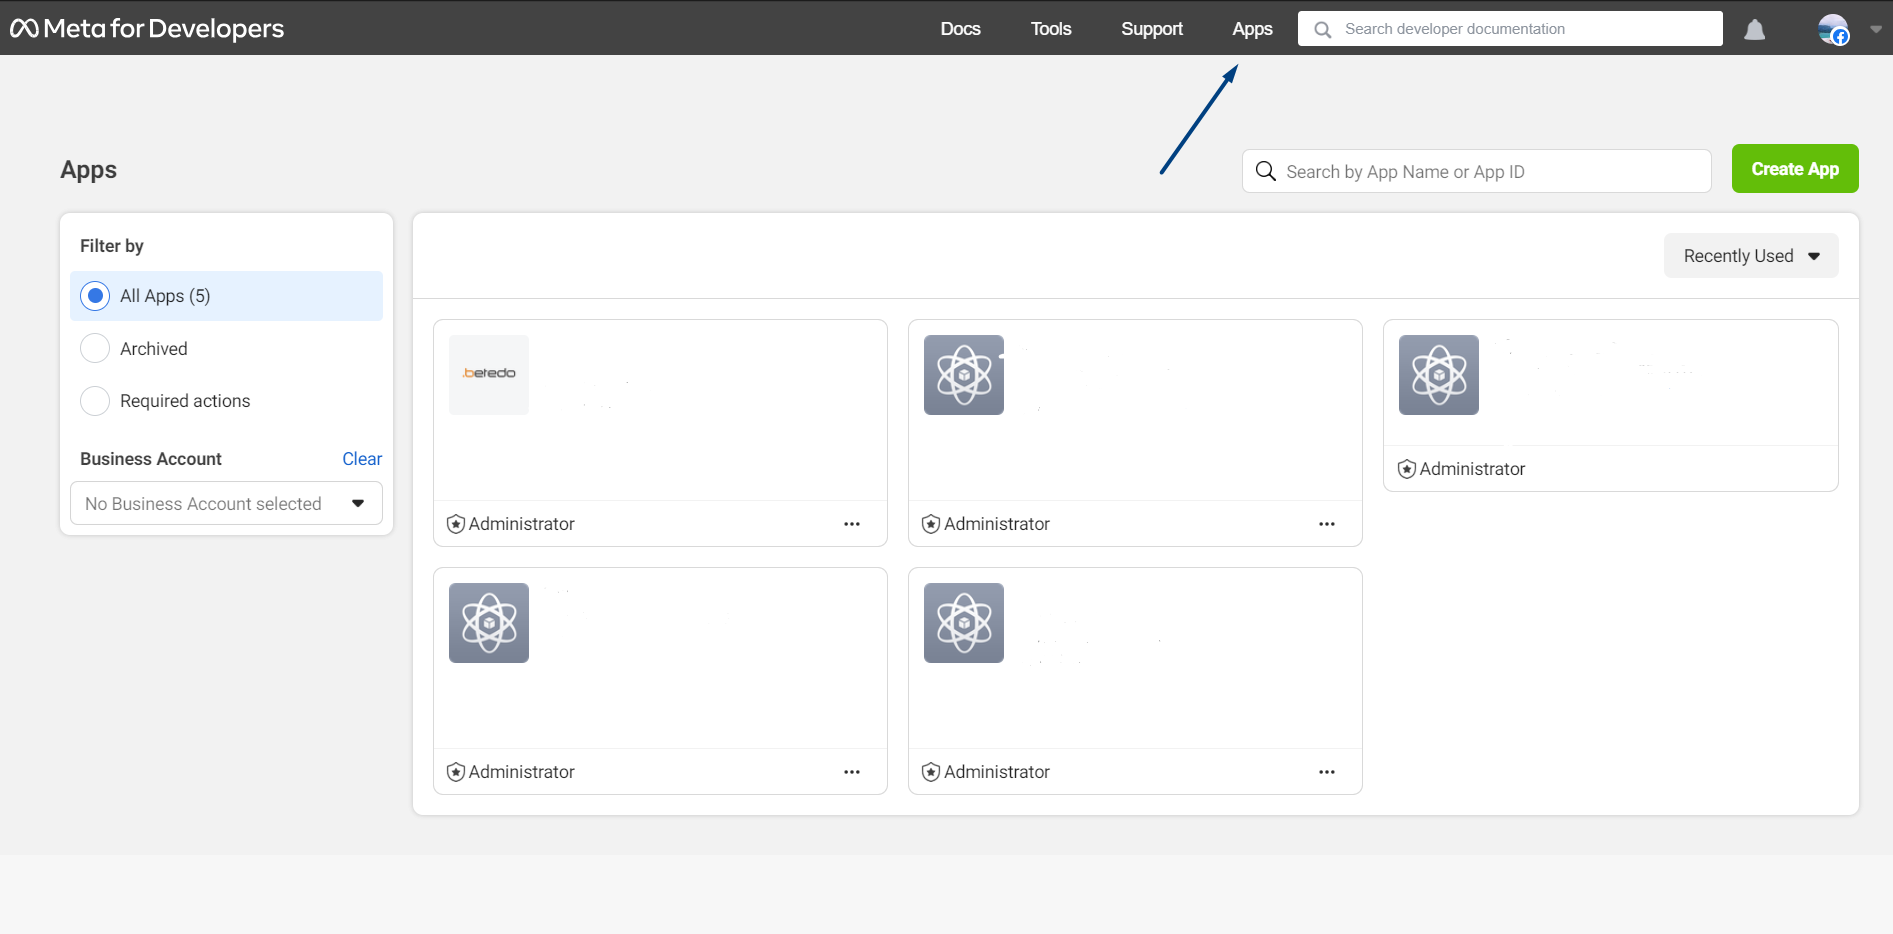
- Visit Facebook Developers.
- Log in to your Facebook account.
- Select Your App:
- In the developer portal, go to "My Apps" and choose the app for which you want to enable WhatsApp.
- In the developer portal, go to "My Apps" and choose the app for which you want to enable WhatsApp.
Navigate to WhatsApp Settings:
- On the left-hand menu, find and click on "WhatsApp."
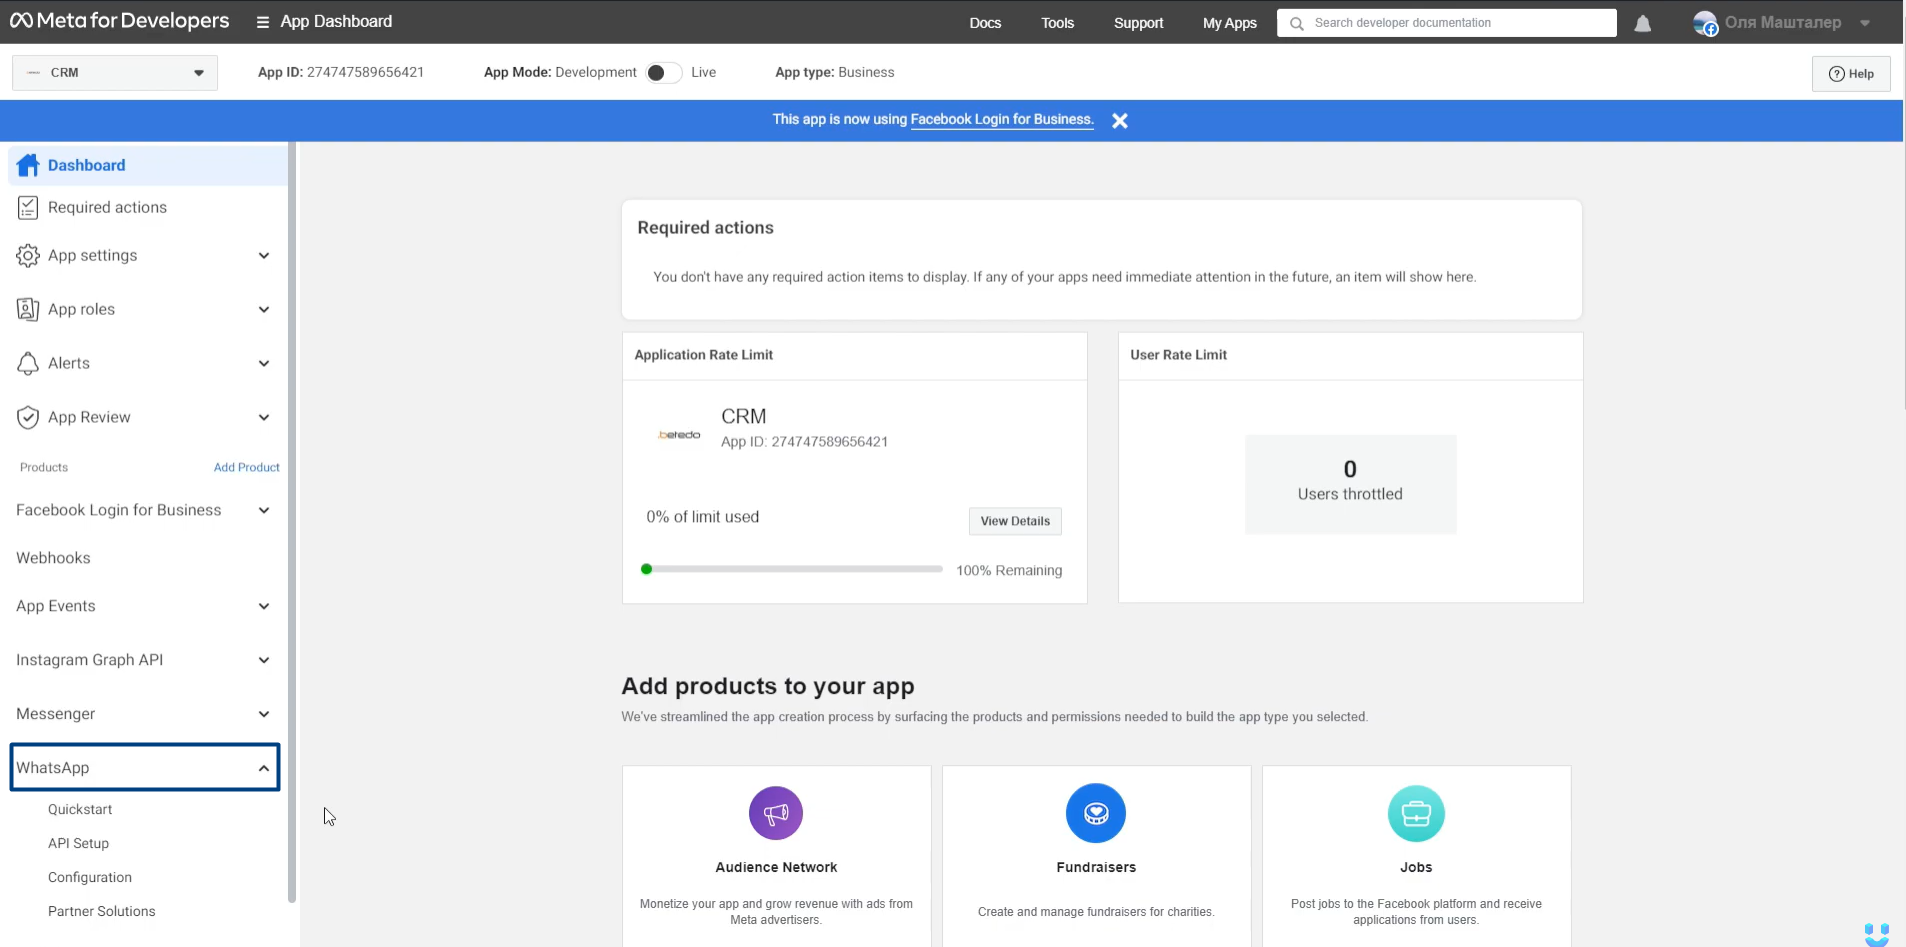
- If WhatsApp is not listed, add it by selecting "Add a Product" and choosing WhatsApp.
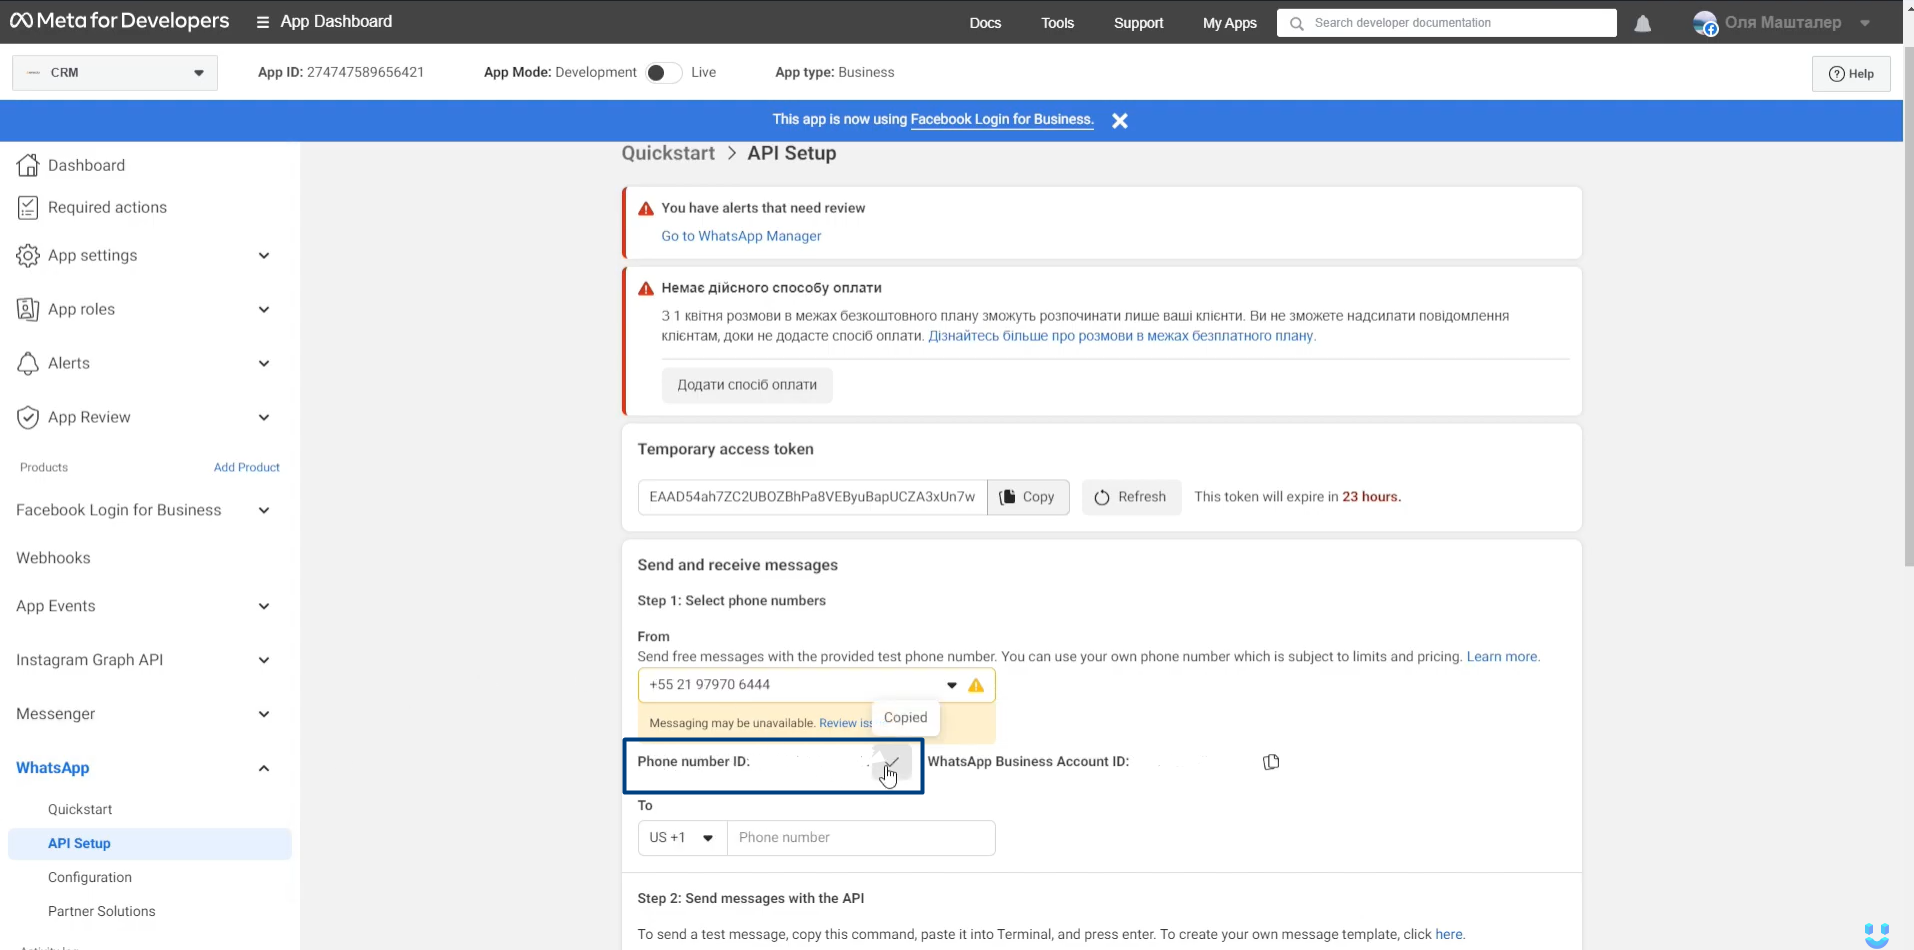
Generate Temporary Access Token:
- Go to the "API Setup" page.
- Obtain a temporary access token; keep in mind that it expires in 24 hours.
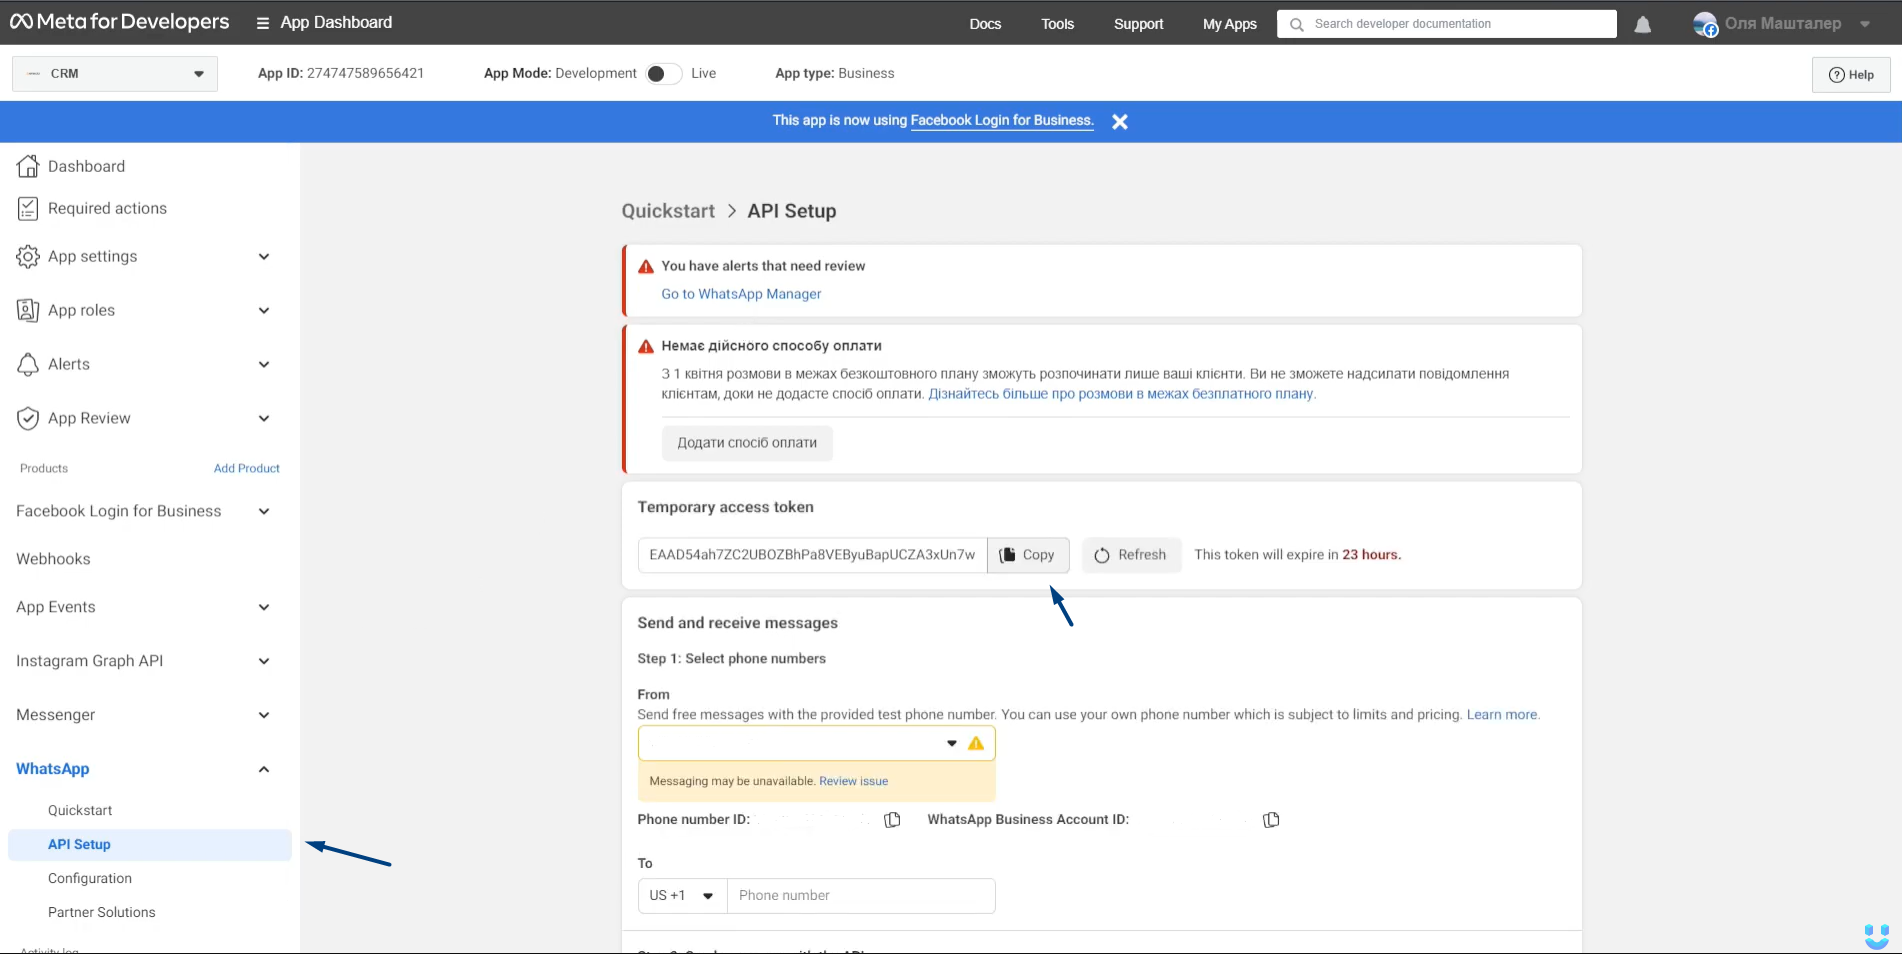
- Considerations for Temporary Token:
- If testing, the temporary token is sufficient.
- For production, create a permanent access token.
Generate Permanent Access Token:
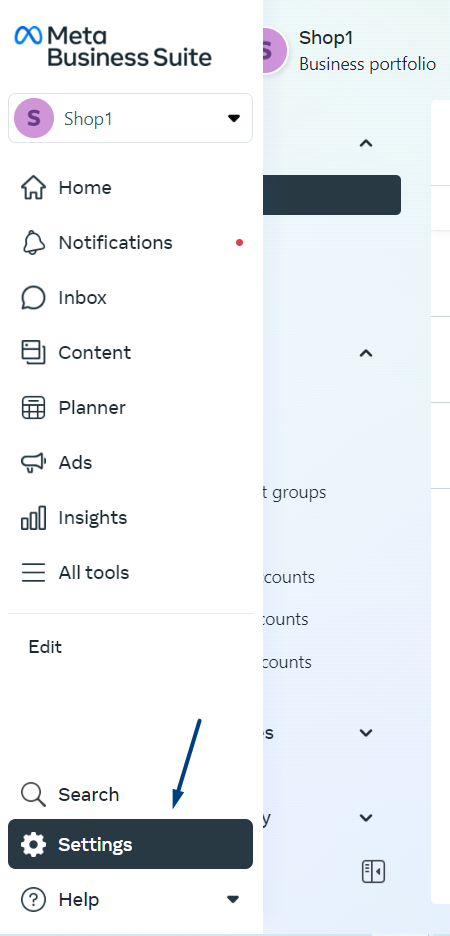
- Sign in to business.facebook.com.
- Navigate to Settings:
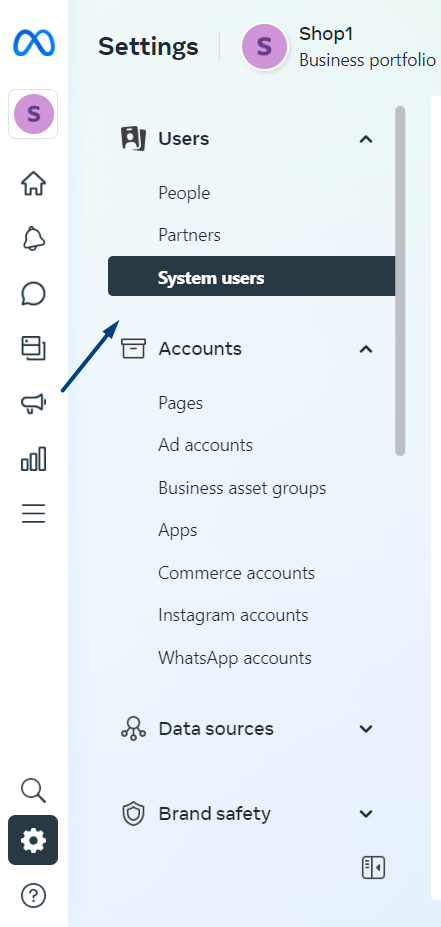
- Navigate to user system settings:
- Press "Generate a New Token":
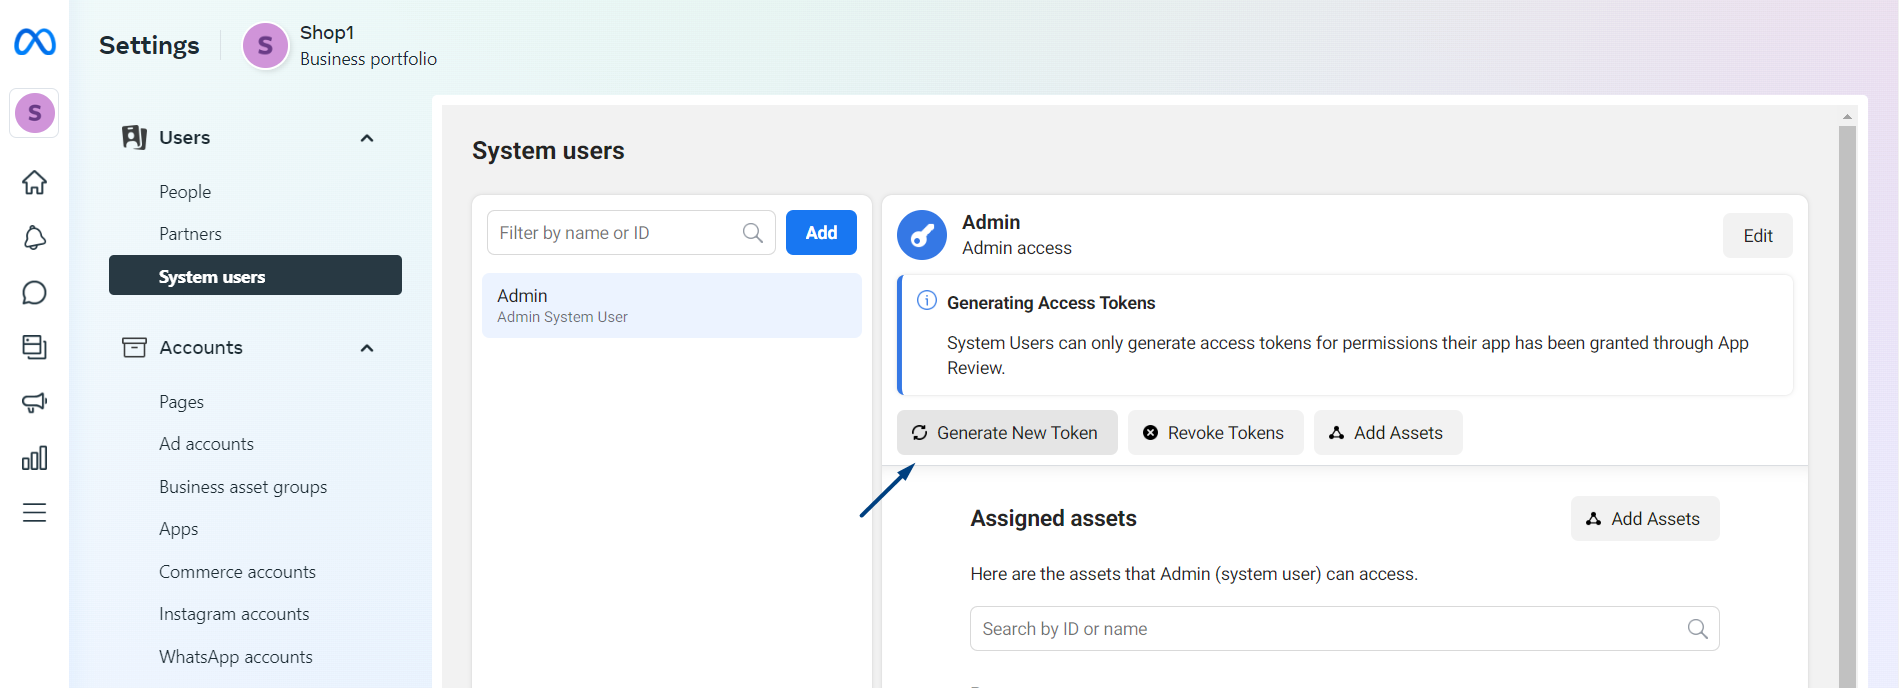
- Choose the app and set the token expiration date:
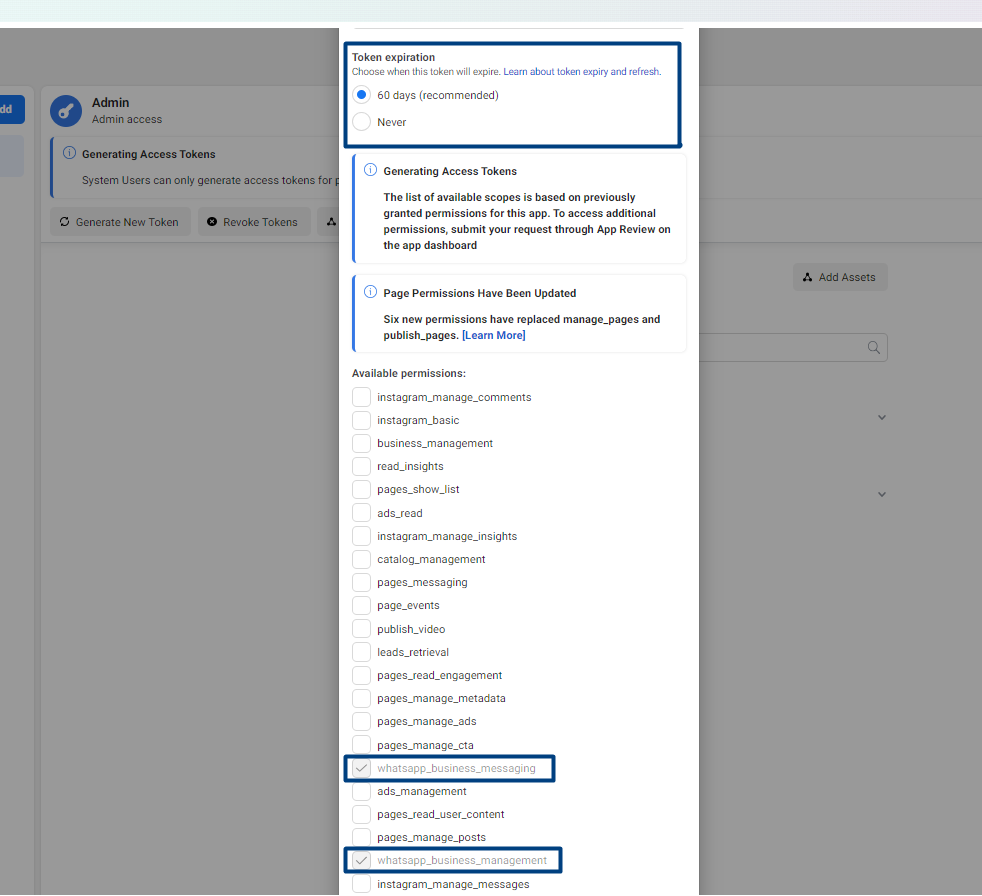
- Under access, choose both "whatsapp_business_messaging" and "whatsapp_business_management."
- Click "Generate."
Save Permanent Token on AI Bot App:
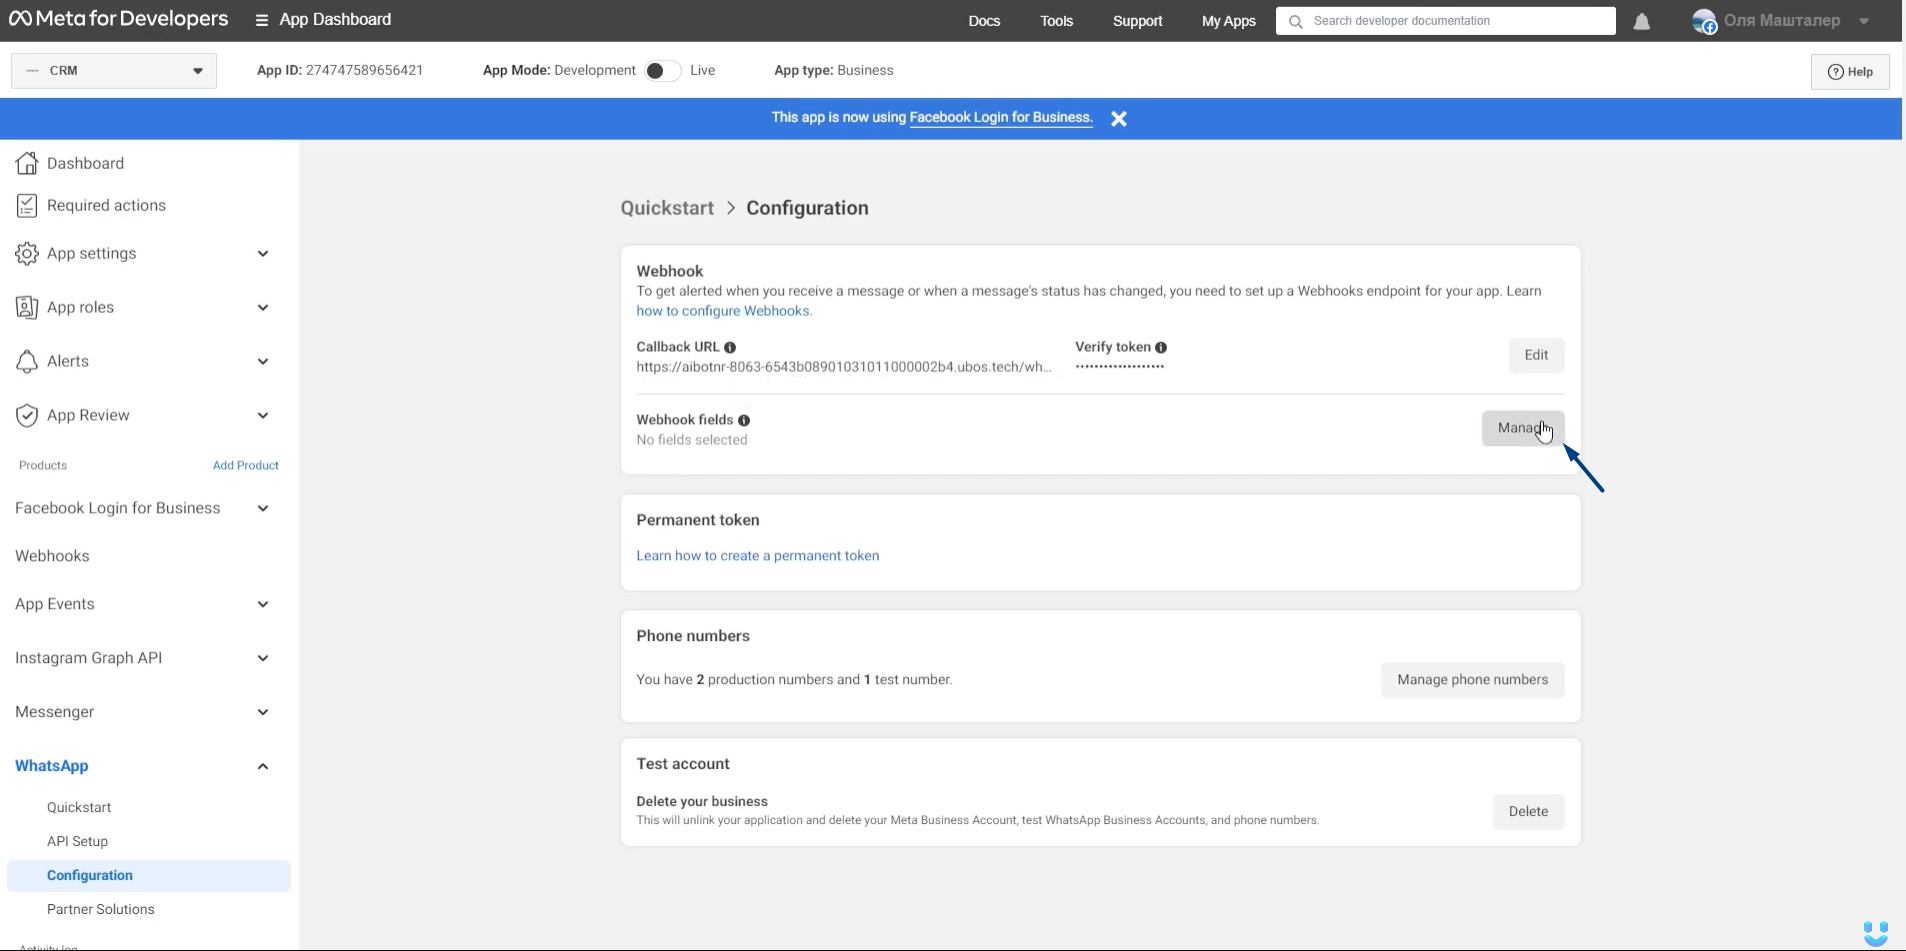
Set Webhook URL:
- Choose Messenger on the left-side menu and go to Instagram setting on developers.facebook.com.
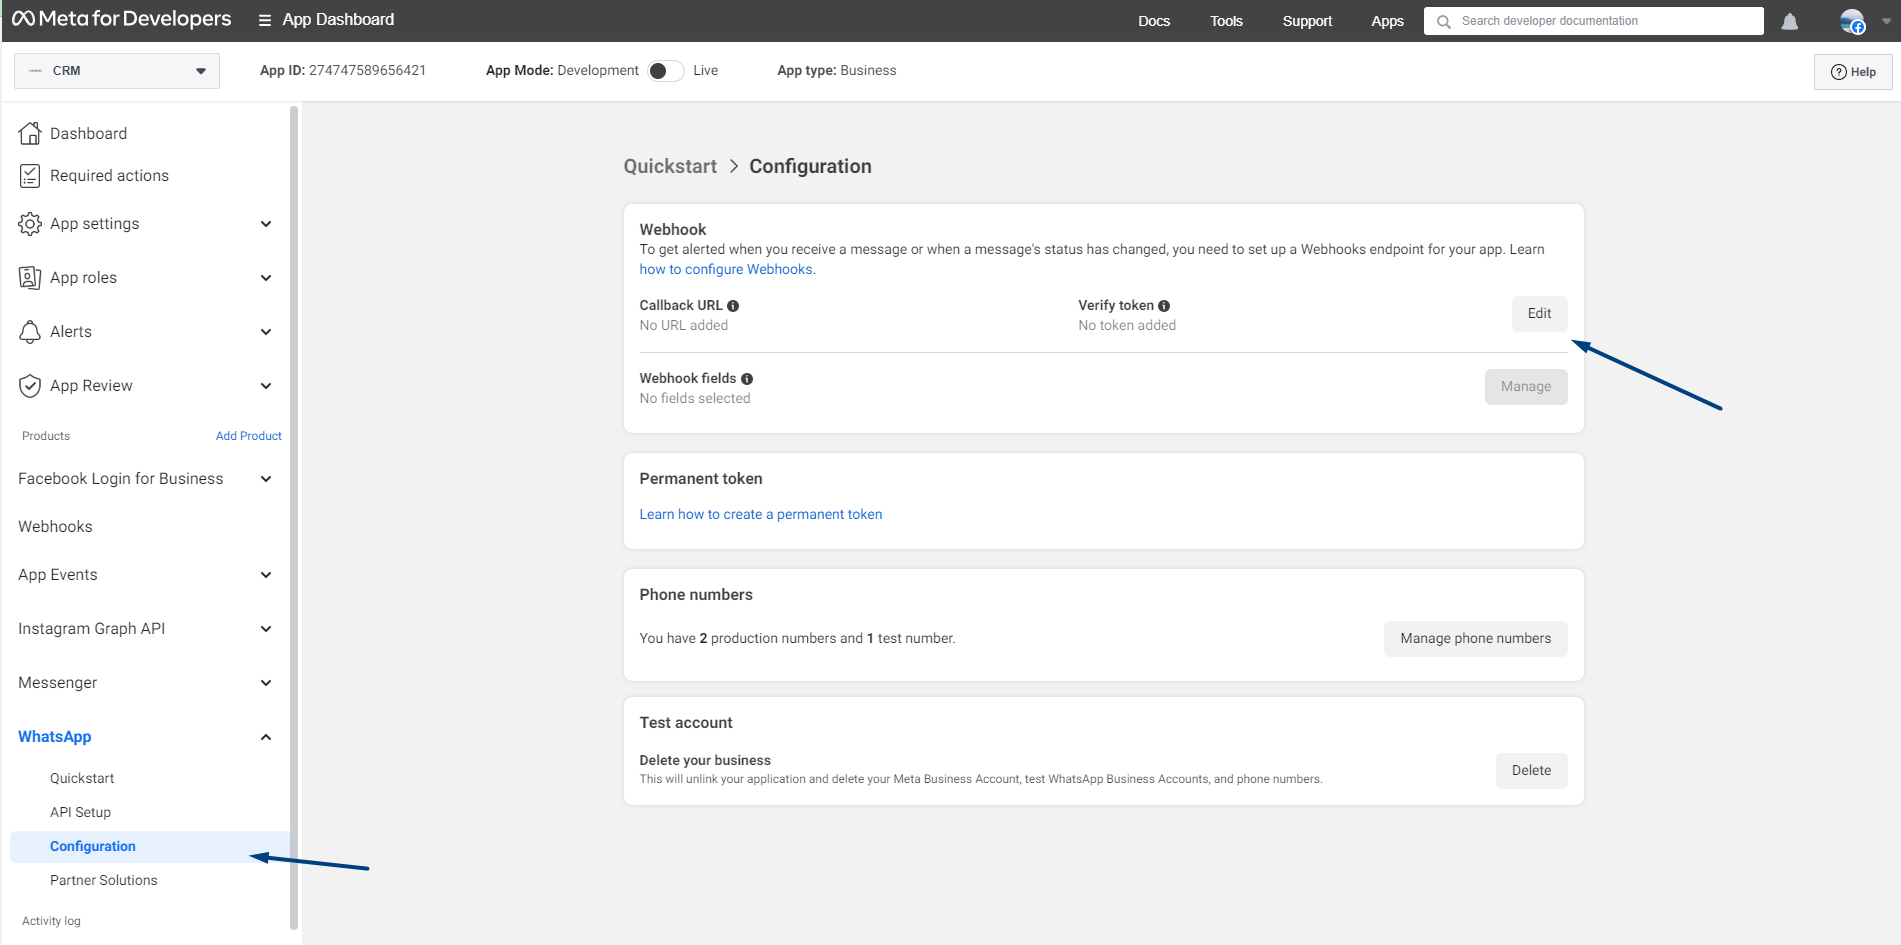
- In the "Webhook" section, paste your URL.
- URL from AI bot app:
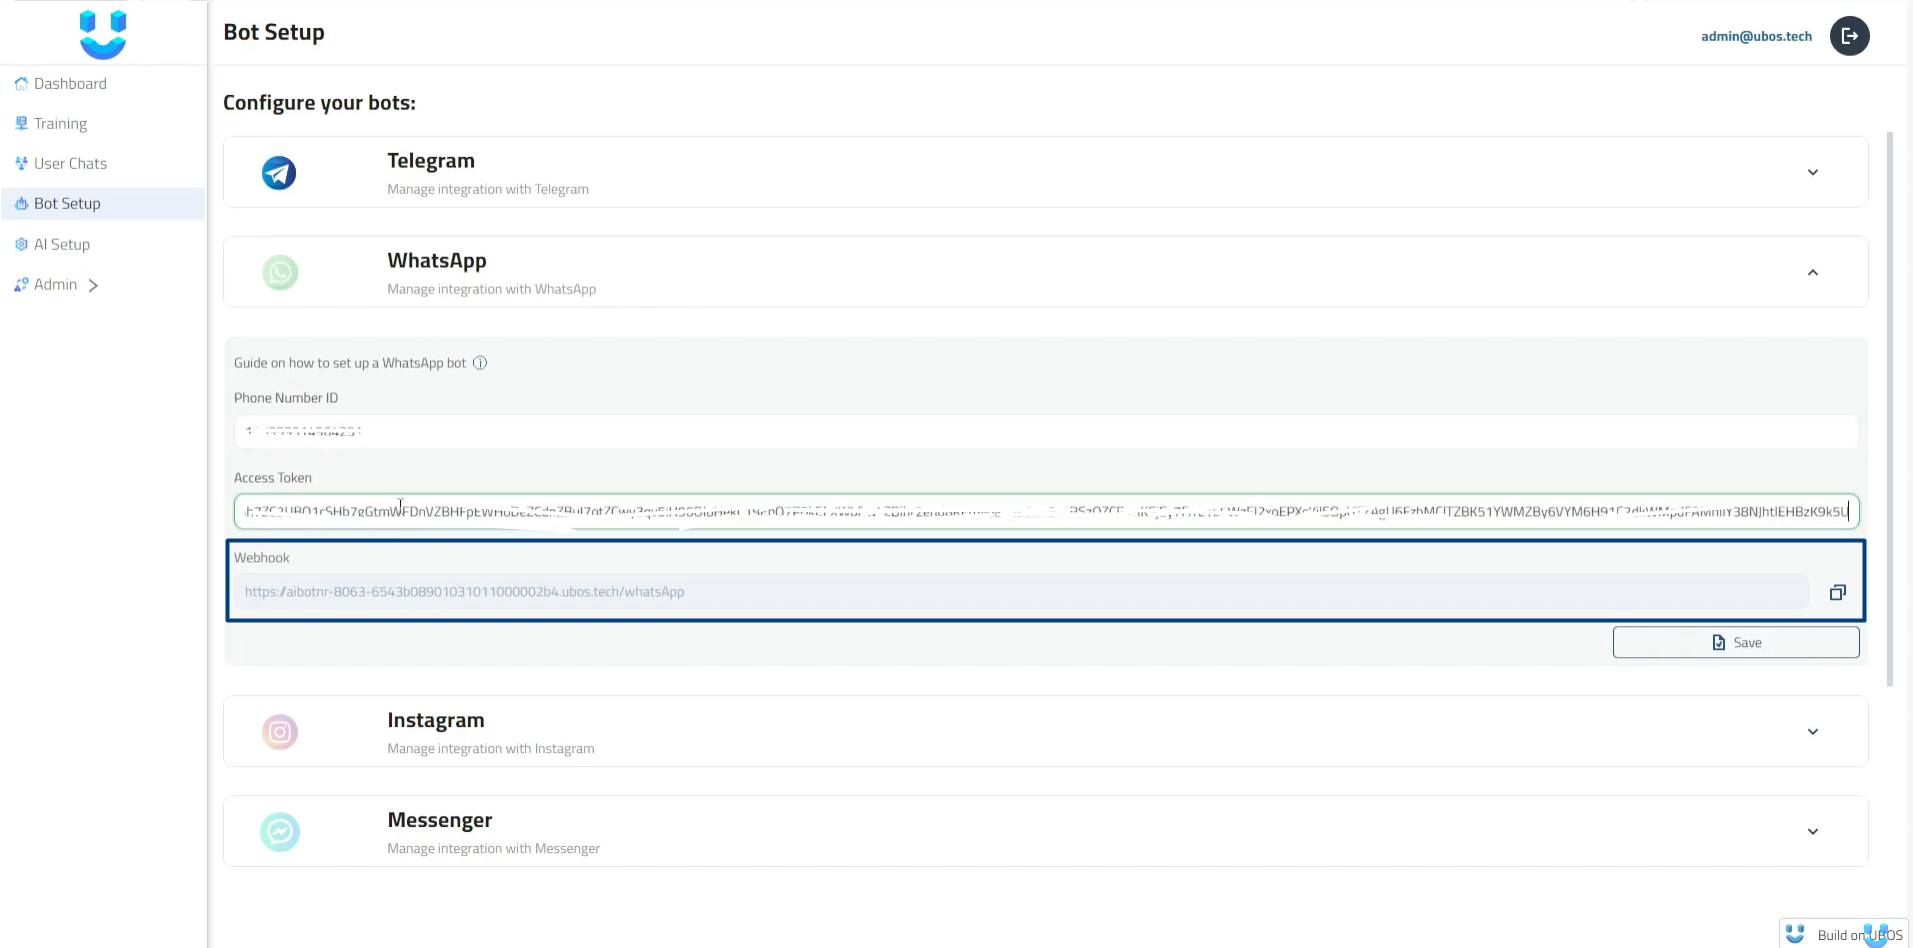
- URL from AI bot app:
- Provide a verification token.
- Click "Verify" and "Save."
Set Up Additional Webhook Functions:
- Under "Webhook," press "Manage," select "Messages," and click "Done."

Top comments (0)